Call Context Tab
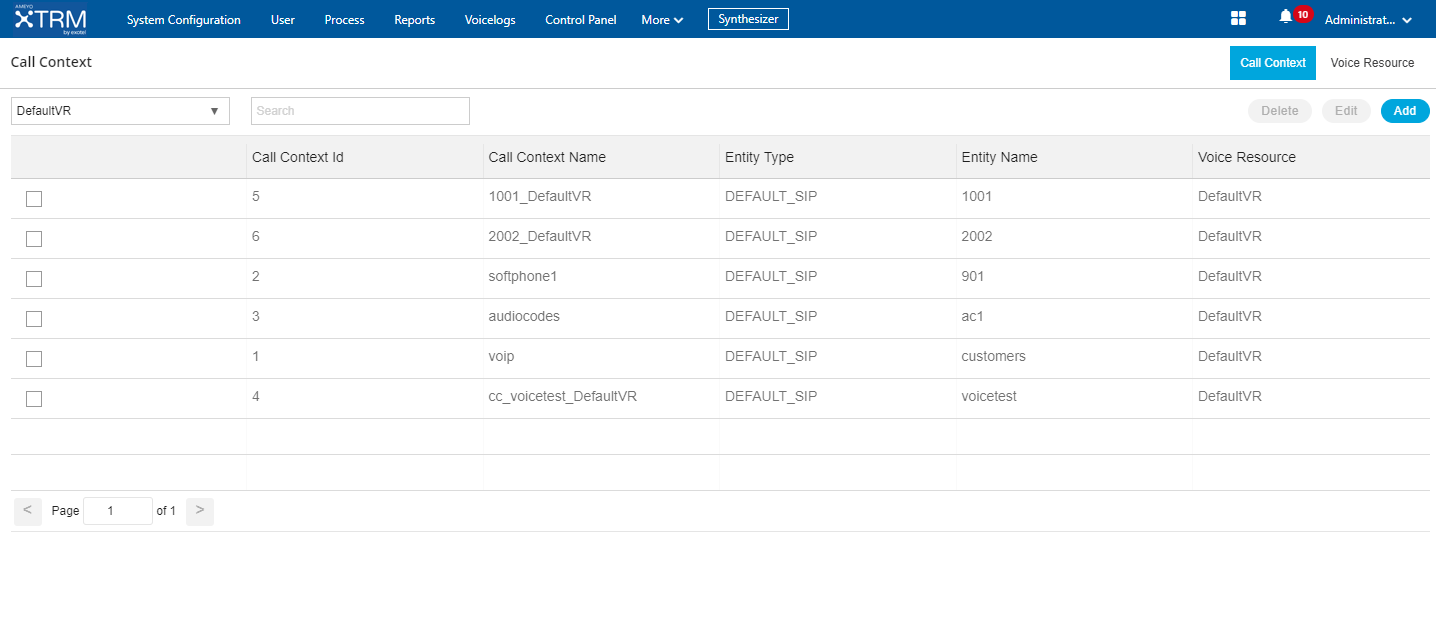
Call context is basically the SIP channel that will be used by the agent to initiate the calls.

Figure: Call Context Tab
Add a Call Context
Perform the following steps to add a Call Context.
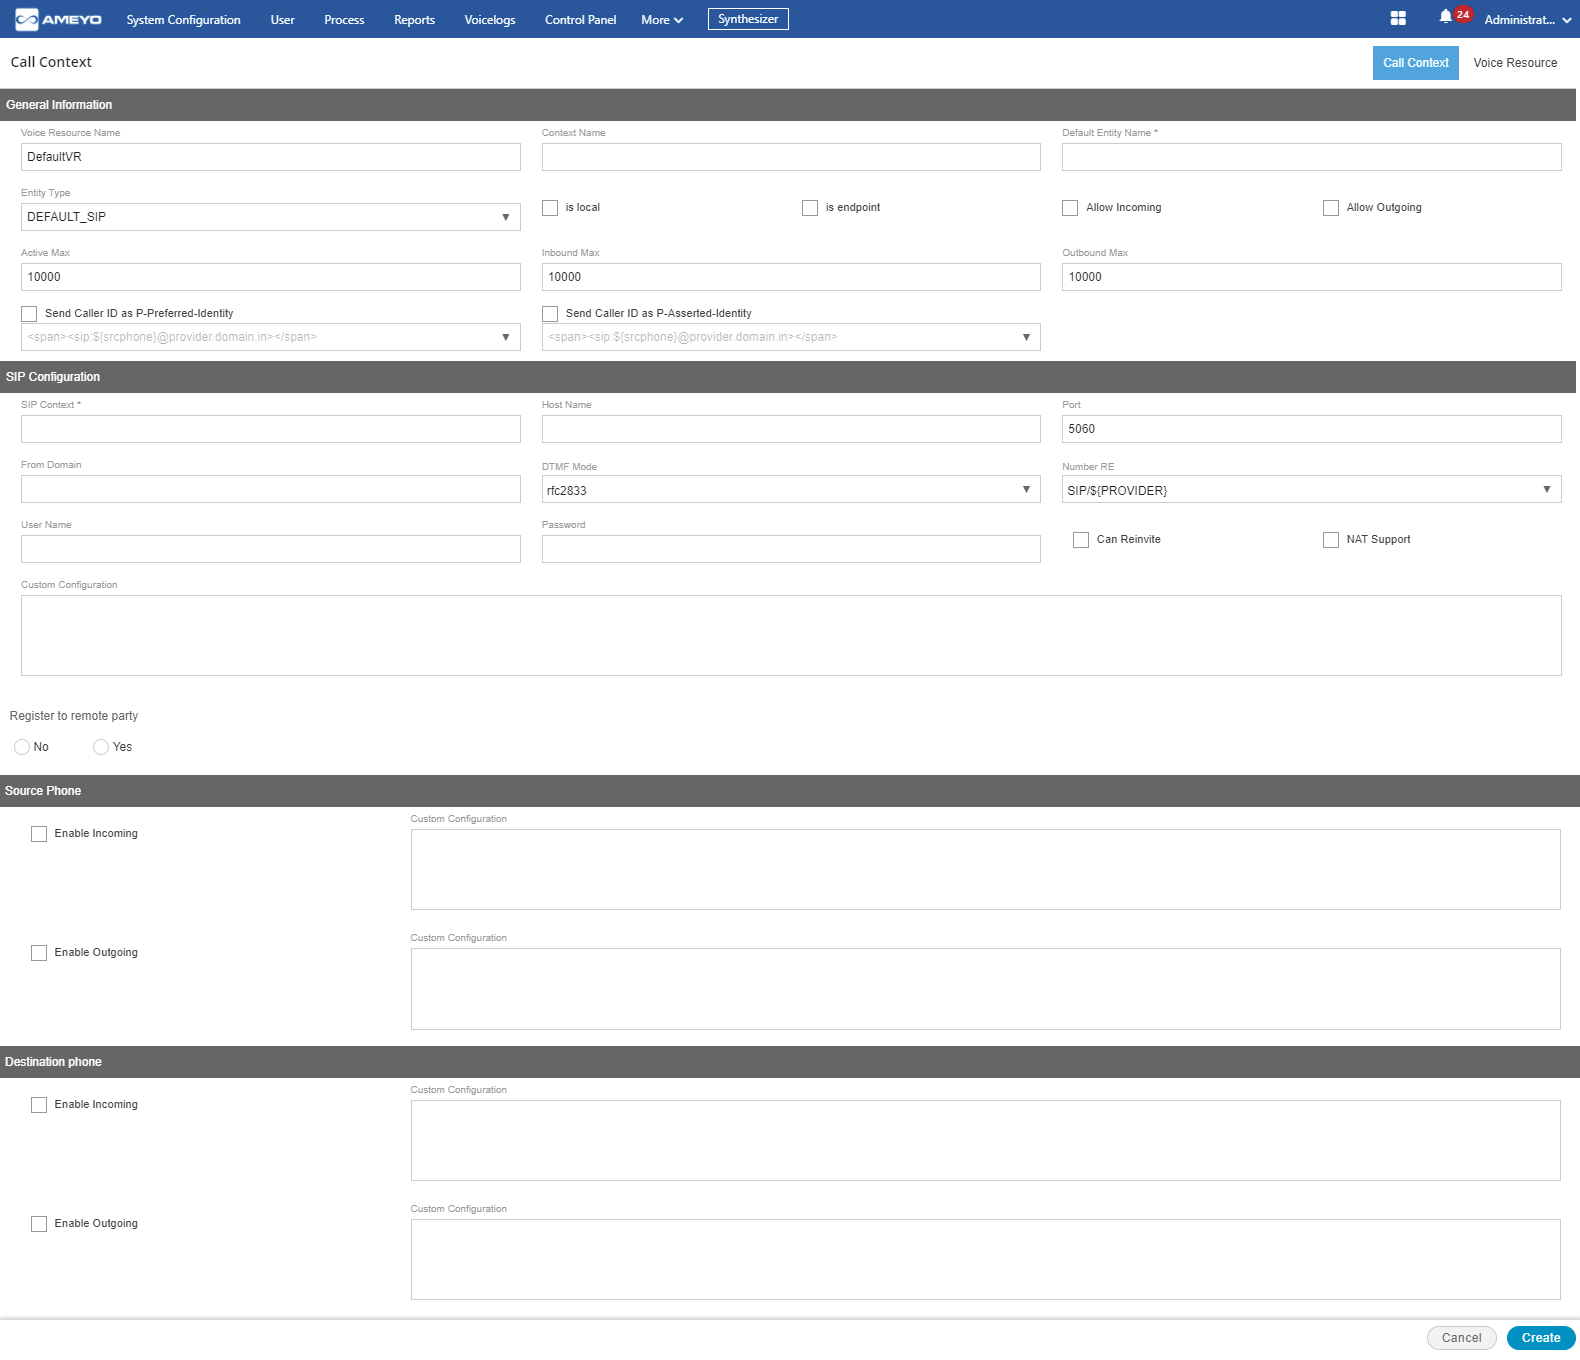
- Click "Add" to add a call context. The following page is displayed.

Figure: Pop-up to add a Call Context
- In "Voice Resource Name" drop-down menu, select a voice resource. If no custom voice resource is added, keep "DefaultVR" selected in this menu.
-
Provide the Context Name of the SIP entity.
- Provide a name for the entity.
- Select any of the following entity type.
- DEFAULT_SIP
- DEFAULT_ZAP_TRUNK
- Is Local: If this is checked then entity will be visible to the Agent.
- Is Endpoint: No other agent can select that entity.
- Allow Incoming: Allow incoming calls using the selected call context. If not set, then the incoming calls on this call context would be automatically rejected.
- Allow Outgoing: Allow outgoing calls using the selected call context. If not set, then the request for outgoing calls on this call context would be rejected.
- Active Max: Maximum allowed active channels. It allows system not to maintain active calls beyond the configured range with this call context.
- Inbound Max: Maximum allowed incoming channels. It allows system not to receive incoming calls beyond the configured range with this call context.
- Outbound Max: Maximum allowed outgoing channels. It allows system not to dial outgoing calls beyond the configured range with this call context.
-
Send Caller ID as P-Preferred-Identity: Enable the checkbox, if you want to send the callerID as the P-Preferred-Identity. After enabling it, select the identity from the available drop-down list.
-
Send Caller ID as P-Asserted-Identity: Enable the checkbox, if you want to send the callerID as the P-Asserted-Identity. After enabling it, select the identity from the available drop-down list.
-
In SIP Configuration section, provide the following details about the SIP.
- SIP Context: The context of a SIP entity.
- Hostname: The hostname or IP address of client host.
- Port: The communication port of SIP entity.
- From Domain: Set the domain name if the client host is behind the NAT or Domain.
- DTMF Mode: DTMF mode supported by the SIP Entity.
- Number RE: Select any of the following number patterns to connect with the receiver.
- SIP/Provider: SIP/${PROVIDER}
- SIP/Number@Provider: SIP/${NUMBER}@${PROVIDER}
- Username: The username of the client. If client SIP entity requires authentication.
- Password: Authentication password to connect with SIP client.
- Can Reinvite: SIP Entity to allow SIP Reinvites. Select the checkbox to enable reinvite.
- NAT Supported: If NAT (Network Address Translation) is supported on the SIP Entity. Select the checkbox to enable reinvte.
- Custom Configuration: This field is used to configure specific parameters allowed only for a particular SIP entity.
-
Register to remote party: Select "Yes" radiobutton, if you want to register this SIP to the Remote Party also.
- Source Phone: You can enable outgoing and incoming for the Source Phone. You can also provide the custom configuration.
- Destination Phone: You can enable outgoing and incoming for the Destination Phone. You can also provide the custom configuration.
- Click "Create" button to create a new Call Context.
Edit the Call Context
Perform the following steps to edit the Call Context
-
Select the Call Context which you want to edit.
-
Click "Edit" button present at the top right corner of the page.
-
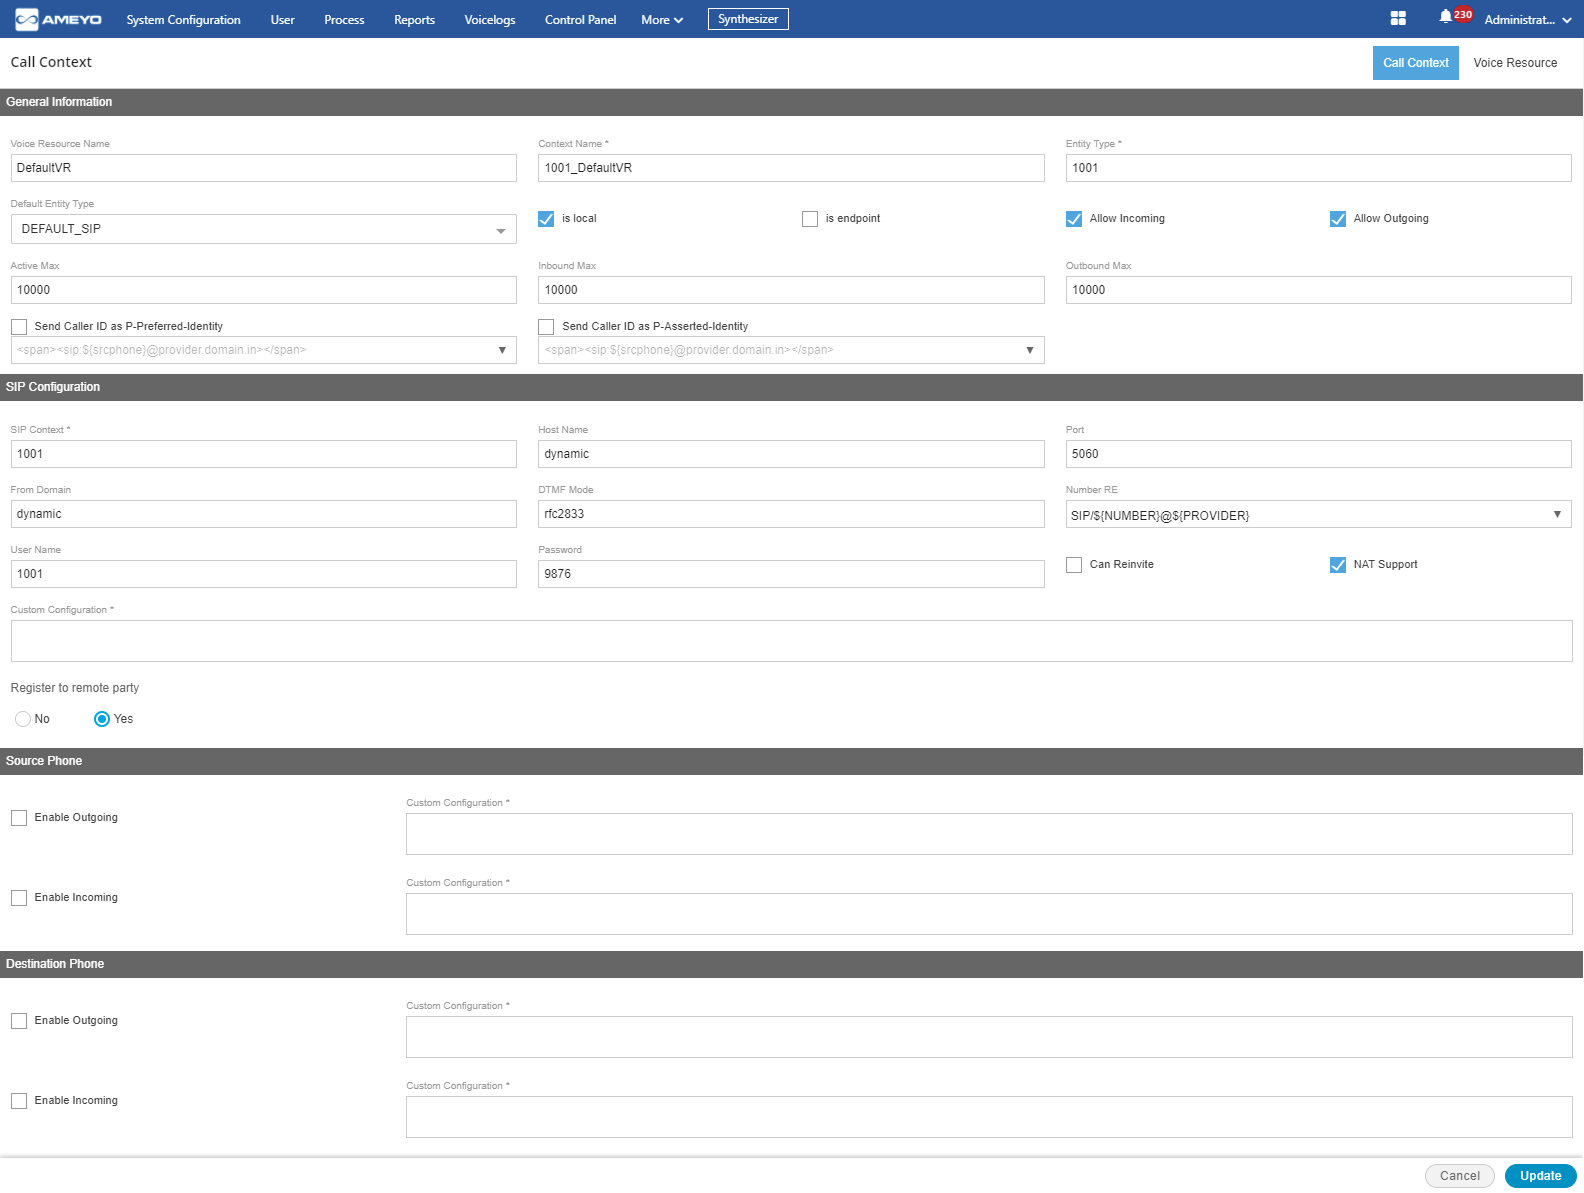
The following page arises on which you can edit the entries of the call context.

Figure: Edit a Call Context
Delete the Call Context
If you want to delete the Call context then, click "Delete" button present at the right top of the page, to delete the call context
However, do not delete a Call Context that is being used in any campaign for calls. The deleted Call Context cannot be restored.