Voice Resource Tab
This tab lets you configure the Voice Resources. These are asterisk call servers where we can configure the SIP/ VOIP minutes and PRI (Zap Trunk).

Figure: Voice Resource Tab
Add a Voice Resource
Perform the following steps to add a new Voice Resource.
-
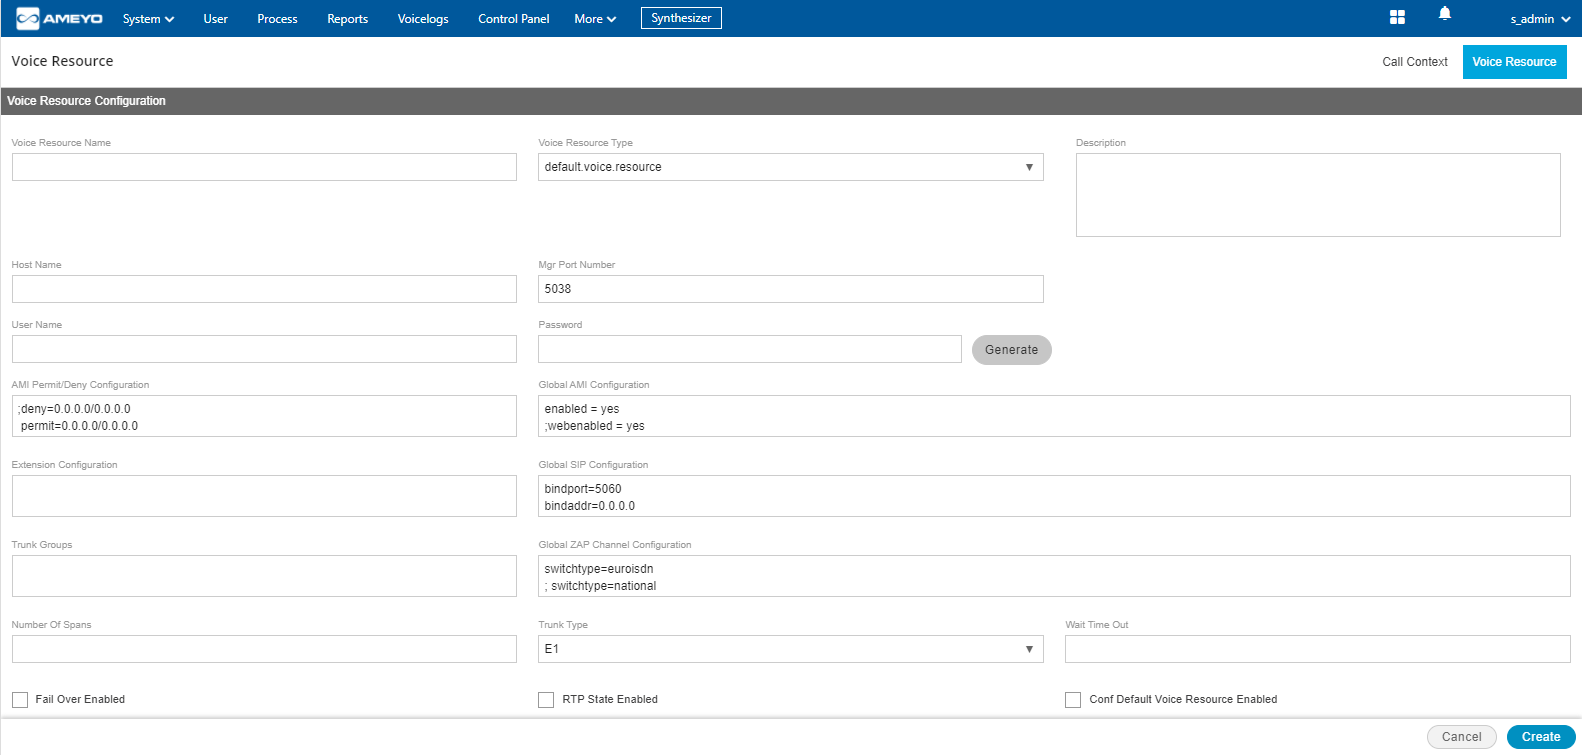
Click "Add" button present at the right top of the page. The following page is displayed.

Figure: Adding a Voice Resource
On the displayed screen provide the following information.
-
Voice Resource Name: Provide the name of the voice resource.
-
Voice Resource Type: Select the type of the voice resource from the drop-down list.
-
Host Name: Provide the IP address or the domain name of your call server location.
-
My Port Number: Provide the PORT number at which your call server is configured to word upon.
-
User Name: Provide the user name of your voice resource through which you want to register your voice resource.
-
Password: Provide the password of your voice resource. Click "Generate" button to generate the provided password to your voice resource.
-
AMI Permit/Deny Configuration: Provide the AMI Permission settings of your voice resource.
-
Global AMI Configuration: Provide the global AMI Configuration of your voice resource. The default configuration is already provided here which you can configure according to your usecase.
-
Extension Configuration: Provide your extension configuration.
-
Global SIP Configuration: Provide the global SIP Configuration of your voice resource. The default configuration is already provided here which you can configure according to your usecase.
-
Trunk Groups: Provide the trunk groups for your voice resource.
-
Global ZAP Channel Configuration: Provide your ZAP channel configuration for the PRI you have used.
-
Number of Spans: Provide the total number of spans.
-
Trunk Type: Select the type of the trunk from the drop-down list.
-
Wait Time Out: Provide the time in seconds for which a call will wait before timed out session.
-
Fall Over Enabled: Check the box if you want to enable the Fall Over Configuration for your voice resource.
-
RTP State Enabled: If you want to enable the RTP state, then enable the check box.
-
Conf Default Voice Resource Enabled: Enable the checkbox to enable default Voice resource configuration.
-
Click "Create" button to create the voice resource.

Figure: Sample Voice Resource
Voice Resource Activation Status
Once the voice resource is created, then the voice resource will be registered at the call server. If it is registered successfully, then the status will turn to "Success"; else it will show the status as "Failure" on the main Voice Resource screen.

Figure: Voice Resource Registration Status
Edit a Voice Resource
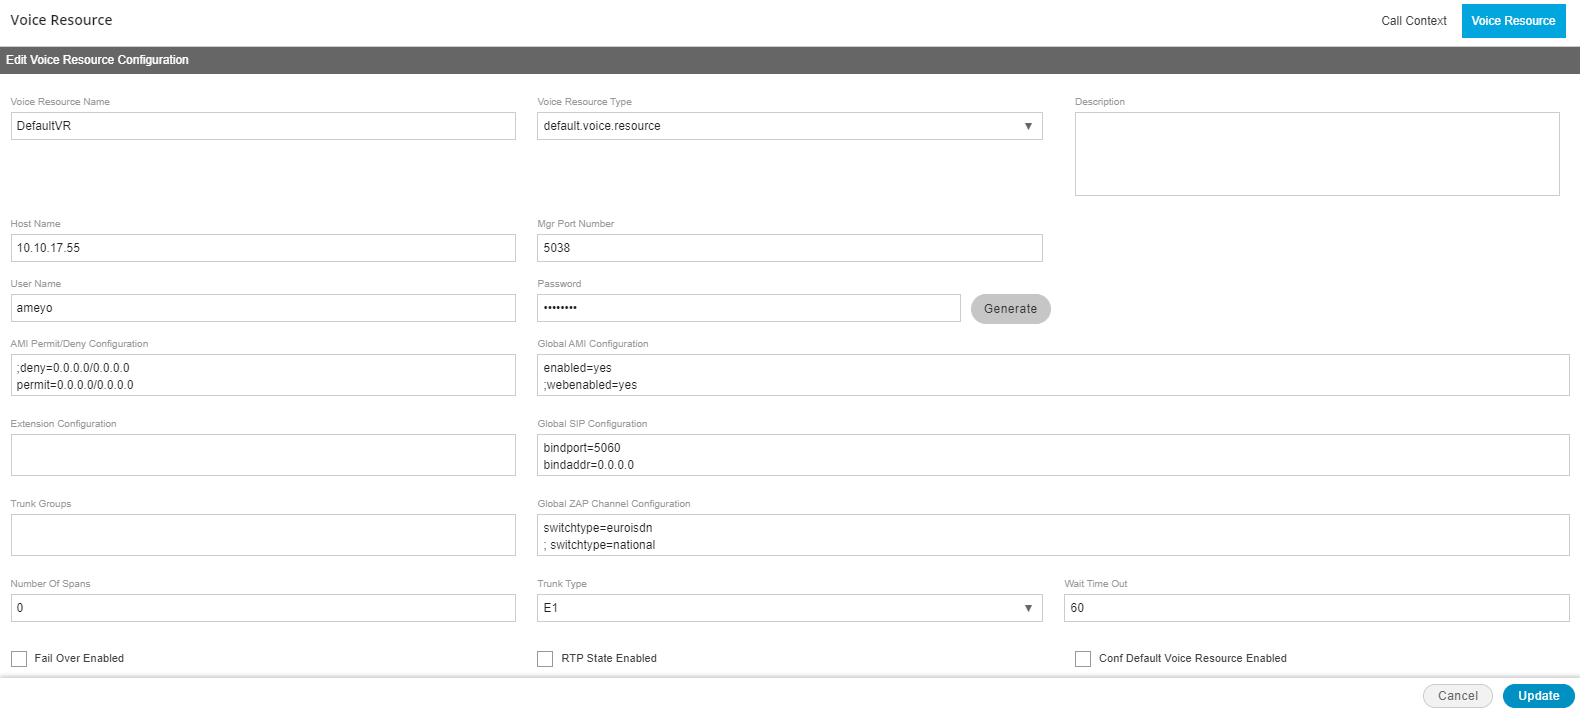
Select a voice resource which you want to edit and click "Edit" button. The same page will display which had been displayed while creating the new voice resource.

Figure: Edit Voice Resource
Delete the Voice Resource
Select a voice resource which you want to delete and click "Delete" button. A confirmation modal is displayed.

Figure: Delete Voice Resource
Click "Yes" to delete the voice resource; else click "No"
Once the voice resource is deleted from the system, then there is no way to get the deleted voice resource back. It will be deleted permanently.