Queue Management in Interaction Campaign
Queues Tab in the Interaction Campaign Settings allows you to create and manage the queues.

Figure: Queues Tab
We support only one Interaction Campaign. It is advised to create multiple queues in IC to address the different functions of the business requirements (like sales, and support). However, the Queue Monitoring is not available in IC.
Create Queue
Perform the following steps to create a queue.
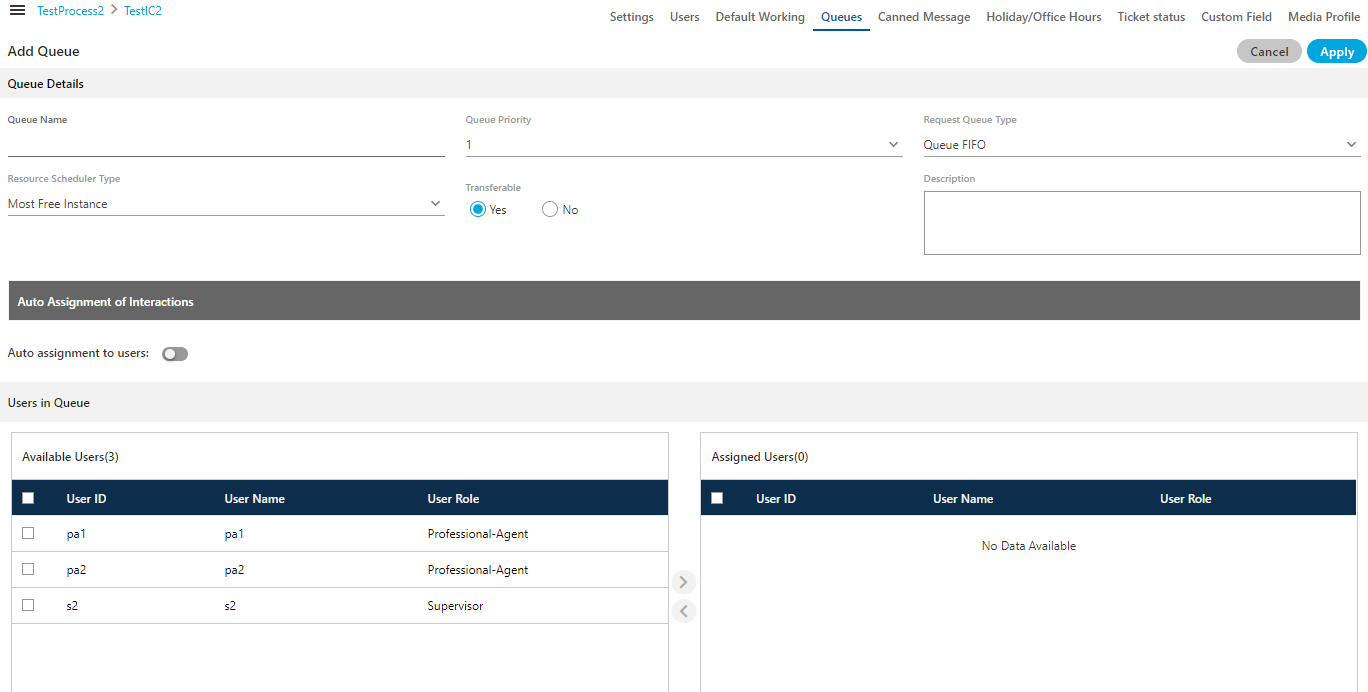
- Click "Add Queue" button on the top right corner to create a queue. It shows the following page.

Figure: Create Queue
- Provide a name for the queue.
- Select a value for the queue priority. This value will be used for "Priority" type queues.
- Request Queue Type: It lets you define which customer will be served first if more than one customers are waiting in the queue.
- Queue FIFO: FIFO stands for First In First Out. If request queue type is FIFO and two customers are waiting in queue for the agent, the customer who is first to reach in the queue would be connected first to the available agent.
- Queue Priority: Nodeflow can be used to decide the priority of any customer. Queue with "1" priority will be selected first. Similarly, Queue with "2" priority will be selected at the second place.
Example:
Question: If customer1 (who reached earlier) is waiting in Queue1 having priority 1 and customer2 (who reached late) is waiting in the Queue2 having priority 2, and if only one agent is serving both queues, then what will happen? Let us go through the following table.Queue Queue Priority Customer Agent Queue1 1 Customer1 Agent1 Queue2 2 Customer2 Agent1 Answer: In such a scenario, Agent1 will be connected first with "Customer1" as its queue - Queue1 - has higher priority.
- Resource Scheduler Type (Licensable): It will let you decide which agent would be connected to the customer when two agents are available to take the interaction.
- Most Free Instance: Select it to assign the tickets to the Agent who is free and is not working on any of the present ticket. This will help to assign the Ticket to the most free Agent at that time.
- Transferable: Select it to transfer the interaction from this new queue to another queue..
- Provide a description for the queue.
- Auto Assignment to users: It means to assign the IC media Tickets to the Agents automatically. To assign the Tickets to the Agents, toggle
 the switch. TO disable this feature and to assign the Tickets to the Agents manually, toggle
  this switch again.
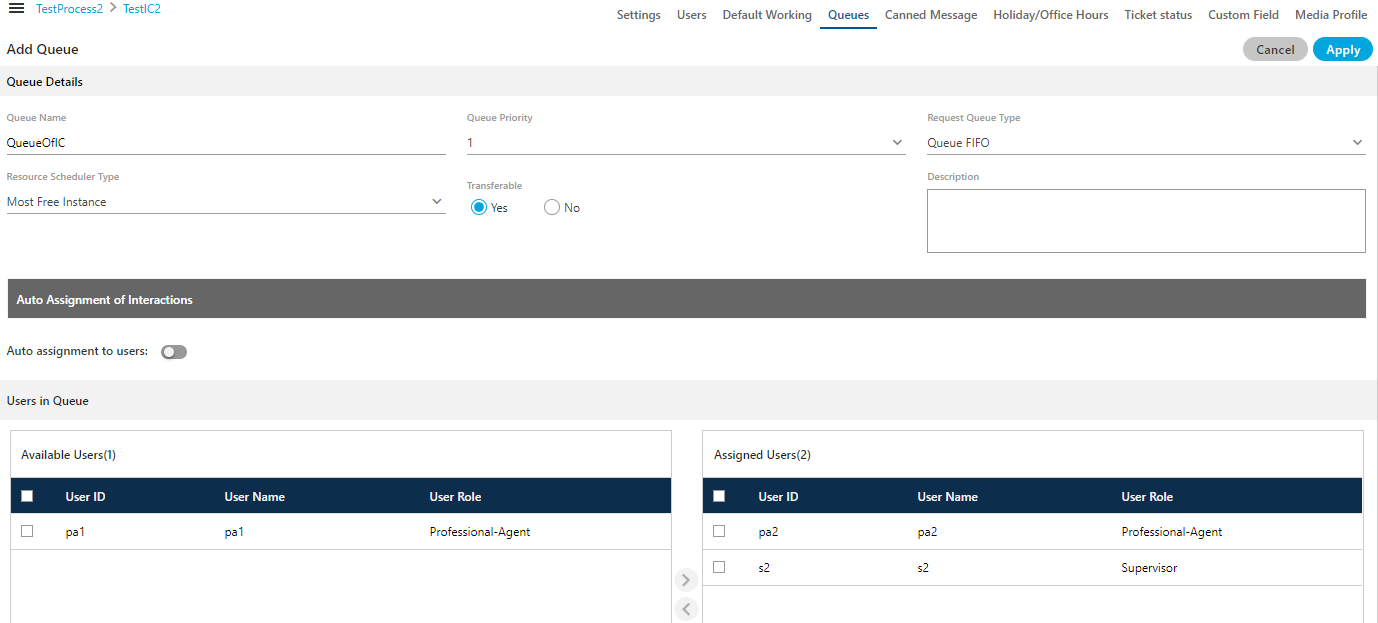
 - Assign Users in Queue: Select the users from the "Available Users" section and click
 icon.
icon.
To unassign a user, select the users in "Assigned Users" and click
 icon.
icon.
Figure: Sample Details to create a Queue
- Click "Apply" to create the queue.
Rather, you can click "Cancel" to discard the changes.
You can create multiple queues using these steps.

Figure: List of Queues
Edit Queue
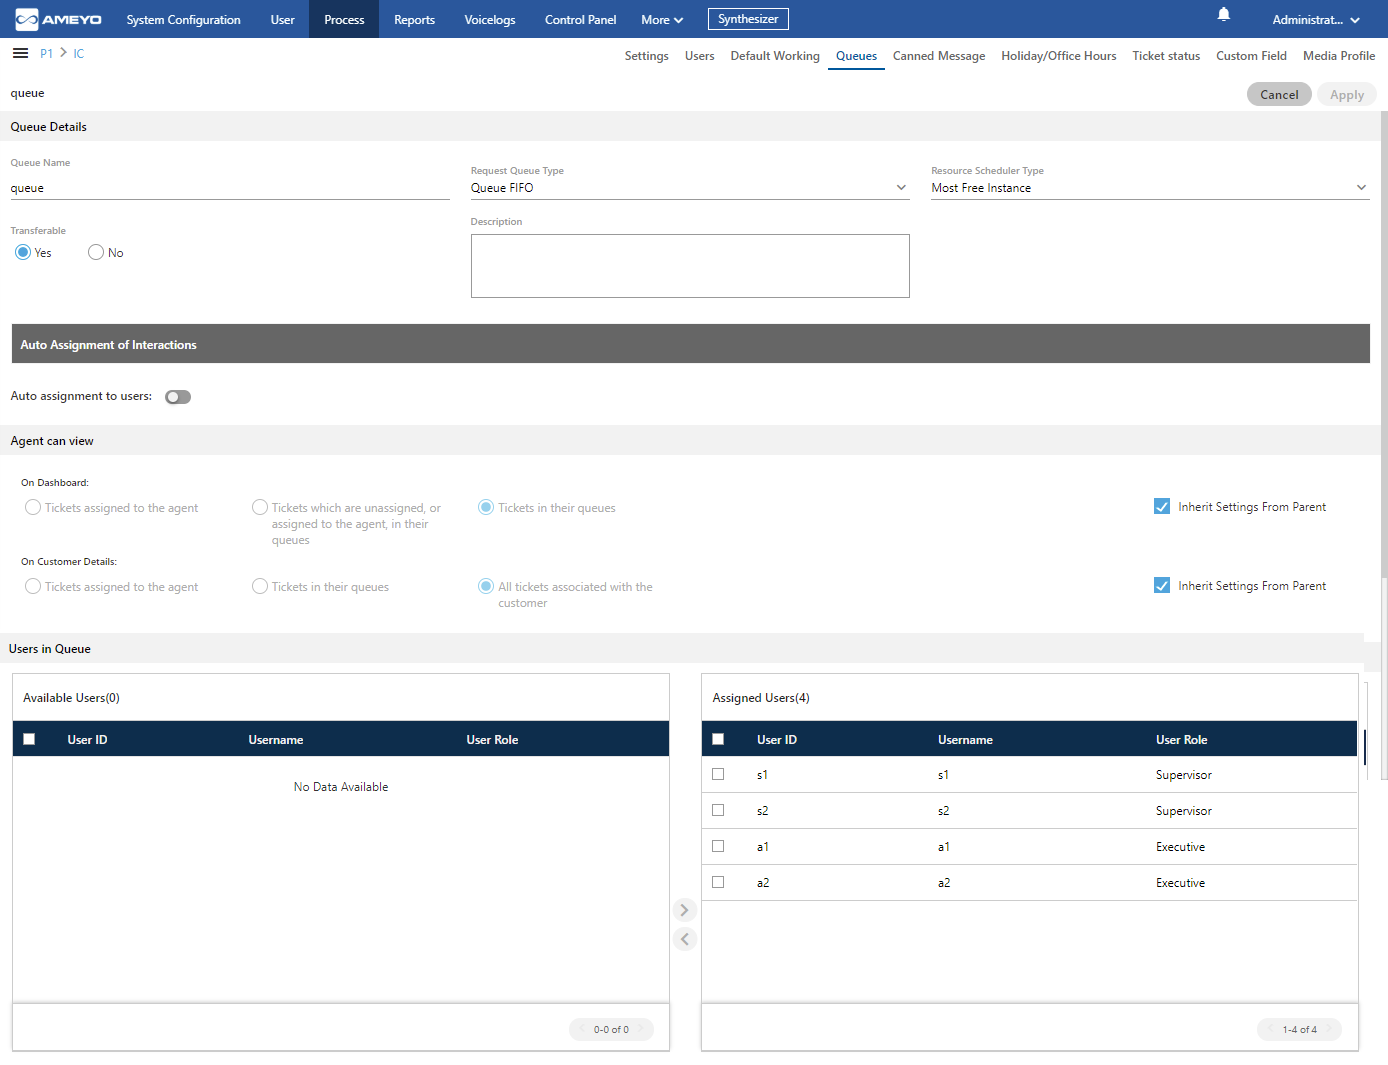
Click "Edit" icon present in the list of the queues. The same page opens which opens at the time of the queue creation. You can change all the information entered at the time of the queue creation.

Figure: Edit the Queue
While editing the queue, the administrator can change the settings of the tickets and assign and unassign the agents from the queue.
Delete Queue
You can delete the queue. Select the queue, which you want to delete and then, click "Delete" icon. A confirmation modal displays.

Figure: Delete Queue
Click "Yes" button to confirm the deletion of the queue, else click "Cancel".