Routing Rules
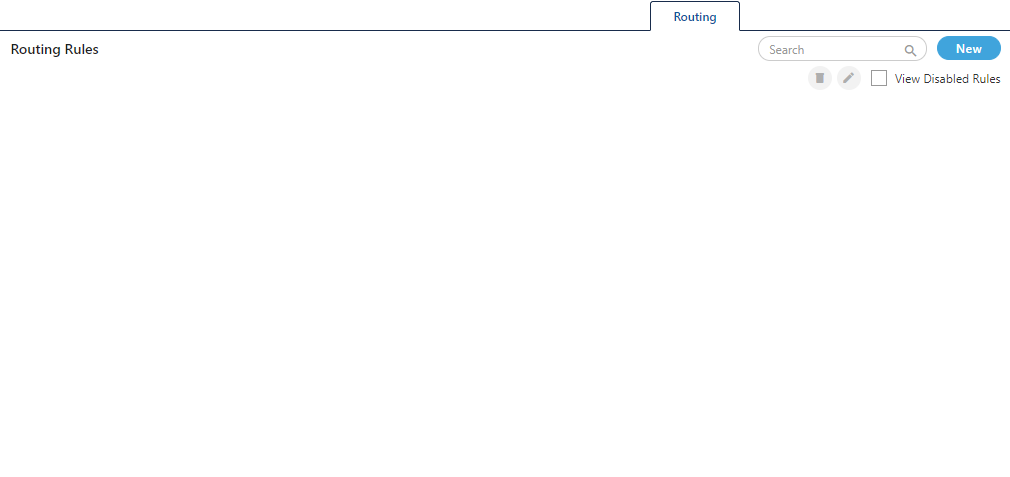
"Routing" Tab in "Rule Engine" allows you create the rules for the media profiles.

Figure: Rules
You cannot create the rules to show the notifications here. Please check "Email Notification Configuration" in Supervisor Console for the same.
You can add, modify, delete, enable, and disable the rules.
Add a Rule
Perform the following steps to add a rule.
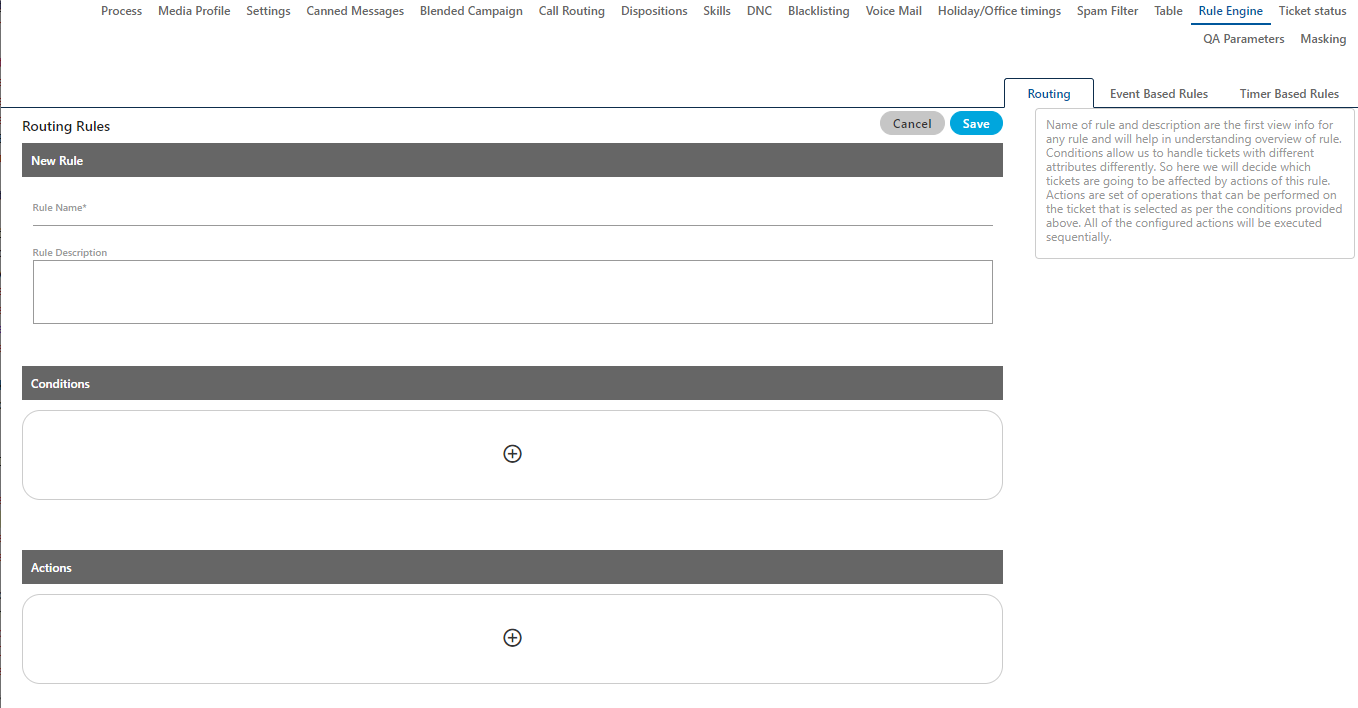
- Click "New Rule" button in the right side. It shows the following page.

Figure: Adding a Rule
- Rule Name: Provide a name for your rule.
- Rule Description: Provide a description for your rule.
- Conditions: Here, you can specify the conditions based upon which the system-rules-add-condition-to actions will be taken. Perform the following steps.
- Click
 icon in the middle of the "Condition" box to add a new condition. It shows the following section.

Figure: Add a Condition
- Click "Condition" drop-down menu to select any of the following conditions.
- Interaction Title: Select it to add a condition based upon the title of interaction. When you select it, the other two fields are changed. The operator drop-down menu has the following options for "Interaction Title" condition.

Figure: Interaction Title Condition
- is
- is not
- contains
- does not contain
- ends with
- starts with
- To: Select it to add a condition based upon "To" field of the interaction that contains the name of recipient. It contains following operators.
- contains
- does not contain

Figure: "To" Condition
Provide a value in the adjoining text field after selecting an operator. - Message: Select it to add a condition based upon the message body. It contains the following operators.
- contains
- does not contain

Figure: Message Condition
Provide a value in the adjoining text field after selecting an operator. - From: Select it to add a condition based upon "From" field that contains the name of sender. It contains the following operators.
- contains
- does not contain

Figure: From Condition
Provide a value in the adjoining text field after selecting an operator. - CC: Select it to add a condition based upon "CC" field that contains the name of recipients who are added in CC. It contains the following operators.
- contains
- does not contain

Figure: "CC" Condition
Provide a value in the adjoining text field after selecting an operator. - Media Profile ID: Select it to add a condition based upon the ID of the media profile. It contains the following operators.
- contains
- does not contain
system-rules-disable-view
Figure: Media Profile ID Condition
Select a media profile ID after selecting an operator.
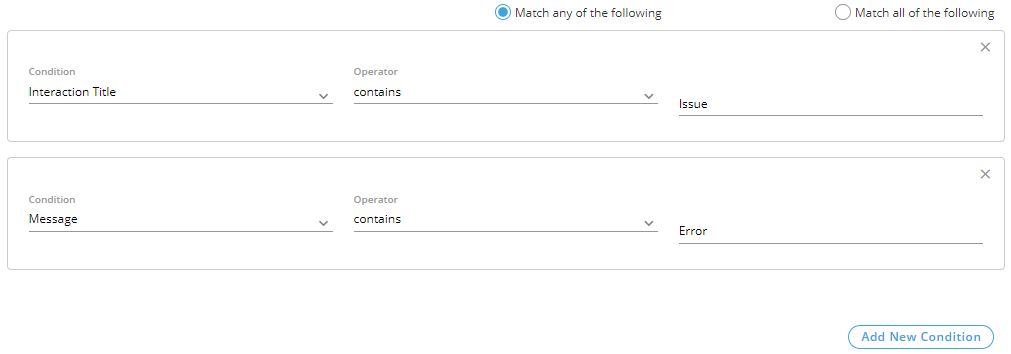
- You can add multiple conditions using the steps discussed above.

Figure: Multiple Conditions
When multiple conditions are added, the following new options are displayed on the top of the "Conditions" Tab.- Match any of the following: Select this option to match any of the conditions. The ticket will be routed as per the rule if one or more conditions are being matched.
- Match all of the following: Select this option to match all conditions collectively. The ticket will be routed only as per the rule only when all conditions are being matched, else the routing rule will not be applied.
You can click the "X" icon on the top right corner of a condition to remove it.
- Click
- Actions: You can select actions in this section, which will be performed only upon those messages which meet the pre-selected conditions. Perform the following steps.
- Click
 icon to add an action. It shows a section.
 - You click the drop-down menu to select any of the following actions.
- Routing Action: Select it to perform a routing action. It lets you to assign the ticket matching the conditions to a user in any queue.

Figure: Routing Action
Perform the following steps.- Select the campaign in which you want to apply the action. Its queues get enumerated in "Queue" drop-down menu.
- Select the queue to which you want to transfer the message that has met the conditions.
- Now in "Assign to User" drop-down menu, select any of the following options.
- None: Select it to not assign the ticket meeting pre-selected conditions to any agent.
- Available Agents: Select it to assign the ticket meeting pre-selected conditions to any of the available agents.
- Agent Available to take Tickets: Select it to assign the ticket meeting pre-selected conditions to any of those agents who have marked themselves available to take tickets in Interactive Campaign.
- Any Agent: Select it to assign the ticket meeting pre-selected conditions to any agent whether it is available or not available.
- Set Priority: Select it to set the priority to those messages which have met the pre-selected conditions. Select "Set Priority" in the drop-down menu.

Figure: Priority Action
Select any of the following options.- Low: Select it to set the low priority of messages that meet pre-selected conditions.
- Medium: Select it to set the medium priority of messages that meet pre-selected conditions.
- High: Select it to set high priority of messages that meet pre-selected conditions.
- HTTP Action: Select it to apply HTTP Action (also called Webhook) to trigger an external API to process those messages which meet the pre-selected conditions. Please refer to "HTTP Action" Page to know more about the same.
- Click
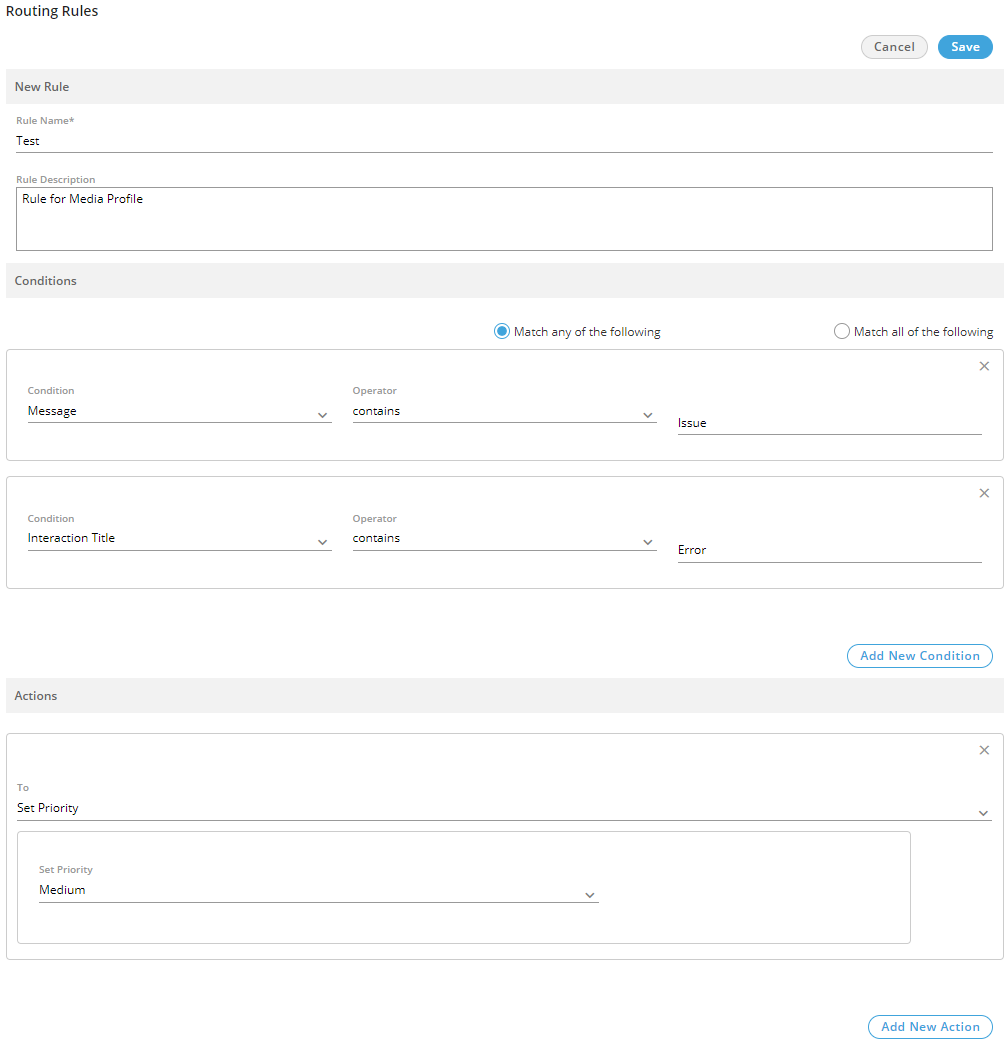
- Following screenshot contains the sample details.

Figure: Adding New Rule
- Click "Save" to create the rule.
You have to select the rule in the campaign to apply it.
You can create multiple rules using these steps.
Following screenshot shows the multiple rules.

Figure: List of Rules
Rule Execution Sequence
The rules will be executed in First In First Out order from top. The very first rule on top will be executed first and other rules will be executed in the sequential order (one-by-one) from the top.
You can use the arrow icons on the right corner of every rule to move it up to increase its priority and move it down to decrease its priority.
Enable or Disable the Rule
You can disable the rules. The disabled rules will be hidden, but you can make them visible. You can also enable the disabled rules.
Disable a Rule
Select a rule and click the toggle  switch to disable rule. It shows the following message.

Figure: Asking to disable the rule
Click "Yes" to disable the selected rule. The disabled rule will not be applied and will be hidden in the list.
View Disabled Rules
Click to check "View Dsiabled Rules" checkbox to show the disabled rules.

Figure: Displaying the Disabled Rule
Enable a Disabled Rule
To enable a disabled rule, click the gray toggle  switch to enable it. The following message is displayed.

Figure: Asking to enable the rule
Click "Yes" to enable the selected rule. The enabled rule will be applied in the campaign, where it has been selected.
Edit a Rule
Perform the following steps to edit a rule.
- Select a rule and click "Edit" button. It shows the following page.

Figure: Edit a Rule
- Make the required changes and click "Save". Rather, you can click "Cancel" to not edit the rule.
Delete a Rule
The Deleted Rule cannot be retrieved back. Also, it will not be applied in the campaign where it has been selected.
- Select a rule and click "Delete" button. It shows the following message.

Figure: Warning before deleting a Rule
- Click "Yes" to delete the rule.