System Settings Tab
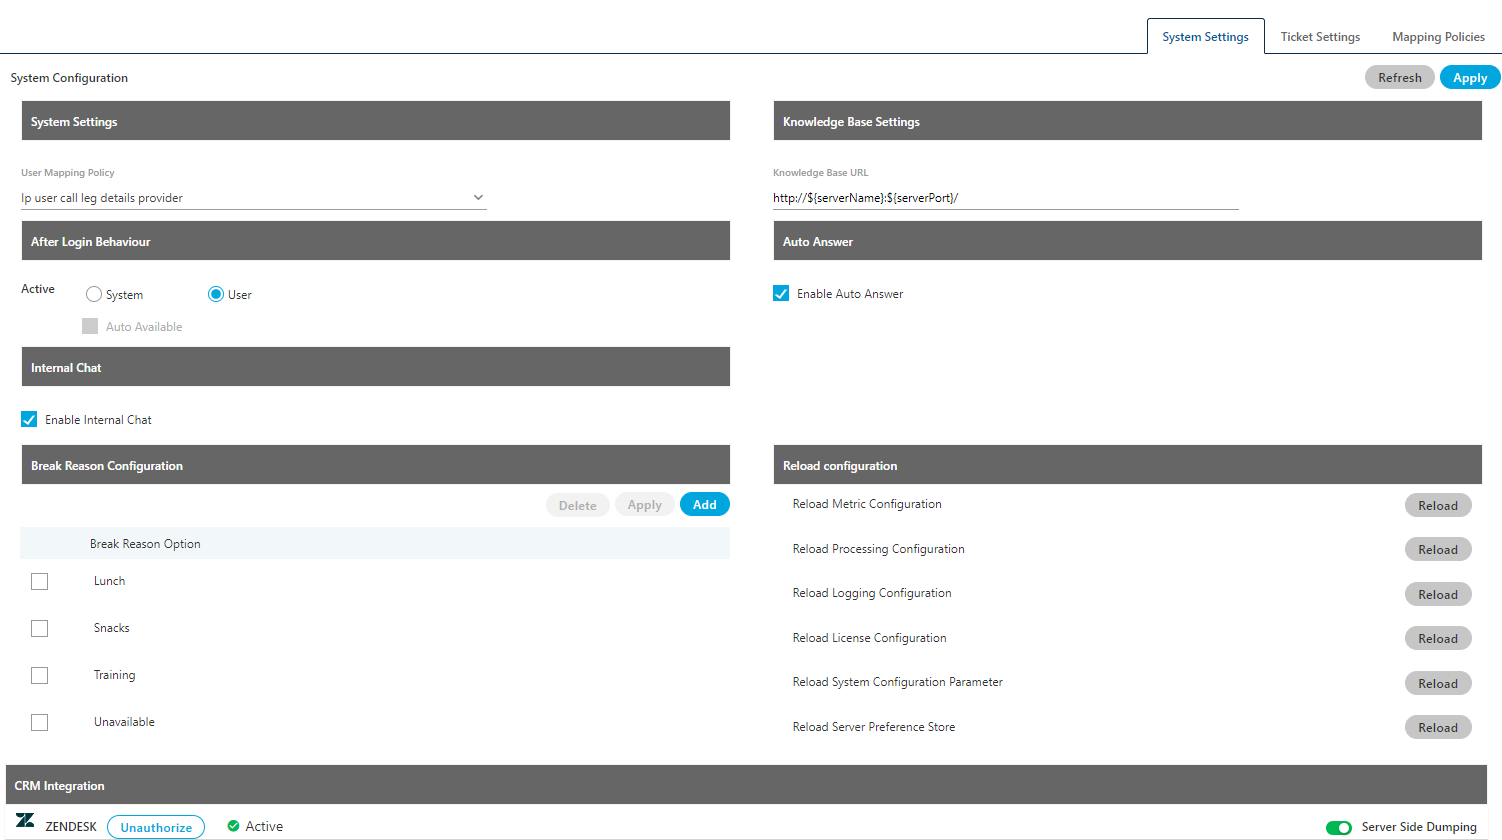
This tab contains the system settings, which are listed hereinbelow.

Figure: Settings Tab → System Settings
- User Mapping Policy: Administrator can map the phone device with the respective user's machine. Agent telephony shall be assigned with static IP, same can not be on DHCP.
Make sure to enable the Call Manager at the backend and configure voice resource and call contexts in it before configuring User Mapping Policies. Know more...
- The Administrator can select the phone mapper type values from the drop down to map the extensions with particular IP. This option can be used to avoid wrong selection of Telephony Channel by the user while logging into the system. The view of "Mapping Policy" tab will be changed for every user mapping policy selected here.
- IP multiple user call leg details provider (Licensable): This mapper can be used to map an IP with multiple call contexts. The applied settings will be applicable for the user who gets the option to select the call context while logging into system. This phone mapper type will be enabled after procuring appropriate license component at the center.
- Userid mapped Call leg Details provider (Licensable): Select it define the default extensions for the selected users. The selected users will not be asked to select the extensions after selecting the campaigns at their logon. After selecting this option, you have to browse "Mapping Policy Tab" to select the default single or multiple extensions for the users.
- User ID based call leg details provider (Licensable): This mapper can be used if WebRTC is being used. This phone mapper type will be enabled after procuring appropriate license component at the center. After selecting this policy, the following option is displayed just below it.

Figure: Option to select Extension if WebRTC is not available
You have to configure WebRTC also to use this mapping policy.
Select this option to let the system select any Extension if WebRTC is not available.
Reference Document: https://sites.google.com/a/ameyo.com/engineering/media-pages/webrtc-knowledge-base/webphone---webrtc-softphone - Manual user call leg details provider (Licensable): This mapper policy can be used when no mapping needs to be done.
- IP user call leg details provider (Licensable): Select it to map one IP with single extension. The Agent need not to select the extension as the IP is already mapped with an extension while logging into the system. The applied settings will be applicable for the user who gets the option to select the call context while logging into system.
It is the default option.
- The Administrator can select the phone mapper type values from the drop down to map the extensions with particular IP. This option can be used to avoid wrong selection of Telephony Channel by the user while logging into the system. The view of "Mapping Policy" tab will be changed for every user mapping policy selected here.
- Knowledge Base Settings: The Administrator can define the knowledge base page URL here. Supervisor, agents, and other users will view this page on the Home screen of their workbenches.
Modify the value of "Knowledge Base URL" field. It's default value is given below.http://${serverName}:${serverPort}/
- After Login Behaviour : Using this feature, the administrator can define the after login behaviour. It contains the following two options. Any one of them can be selected only.
- System: The system should automatically make agent available. To make the agent automatically available, check "Auto Available" box.

Figure: System Auto-Available Option
- User: Select this option to let agent decide whether to make available or not.

Figure: User Available Option
- System: The system should automatically make agent available. To make the agent automatically available, check "Auto Available" box.
- Auto Answer: If "Enable Auto Answer" is checked then call will be auto-answered in all the campaigns of the contact center. Users with auto-call on status will automatically receive the auto-dialed and inbound calls and they do not have to answer each call manually.
Only first call offered to the user needs to be answered manually after that all calls thrown by dialer will be auto answered.

Figure: Auto-Answer and Internal Chat options
- (Licensable) Internal Chat : The Administrator can enable or disable the internal chat. After enabling it, the Supervisor, Agents, and other users can use the internal chat to communicate with each other. A static chat icon will be displayed on the bottom right corner of the interface of every user.
This feature is licensable, hence for further information on the same, contact Support team of Ameyo.
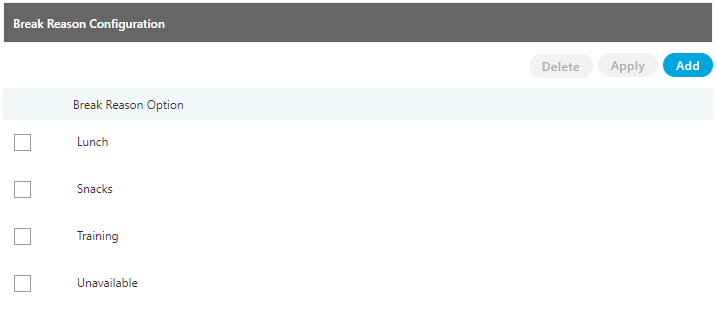
- (Licensable) Break Reasons: Administrator can add the break reasons for the contact center. Created break reasons will be applied at system level and same will be visible to agents on Ameyo Web Access. While going on break, agents can select the respective break reason.
This feature is licensable, hence for further information on the same, contact Support team of Ameyo.

Figure: Break Reason Configuration
Perform following steps to add break reason.- To add a break reason, click on "Add" button.
- Enter the name of break reason.

Figure: Add a Break Reason
Character Limit Information: Character Limit for the Name of the Break Reason is 30 characters. Also, (-) hyphen can be used as the special character. It means that the Break Reason can include maximum to 30 characters including alphabets, numbers, and only (-) hyphen as the special character.
- Click "Apply" button to create the break reason.
- Select a break reason and click "Delete". A warning message is displayed on the screen.

Figure: Asking to delete a Break Reason
- Click "Yes" to delete the selected break reason.
Deleting a break reason will impact all users, queues, and campaigns where this break reason has been applied already. Make sure to modify their settings.
You cannot modify a break reason. Instead of it, delete a break and add a new one.
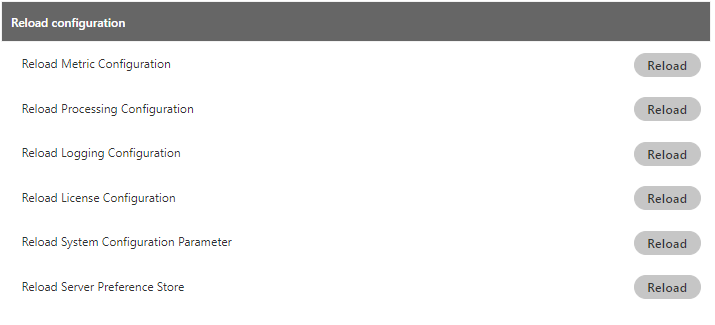
- Reload Configuration: This section contains the following buttons that lets you reload the configuration of different Ameyo components. After clicking a button to reload the selected configuration, you have to logout from Administrator Console and then login again to make it effective.

Figure: Reload Configuration Section
- Reload Metric Configuration: Click this button to reload the metric configurations.
- Reload Processing Configuration: Click this button to reload the processing configurations.
- Reload Logging Configuration: Click this button reload to reload the logging configurations.
- Reload License Configuration: Click this button reload to reload the license configurations.
- Reload System Configuration Parameter: Click this button to reload the system configuration parameter. Reloading the "System Configuration parameter" also reload the "IC Configuration Parameter" with one click. This button also reloads the AutoClose and AutoExpire Timers with one click. There is no need to reload them separately.
Following parameters will be reloaded from here.-
isCustomerEditable
-
shouldRunHeatValueTimer
-
smsNotificationCredentials
-
AutoClose Timer
-
AutoExpire Timer
-
- Reload Server Preference Store: Click this button to reload the server preference store.
After the changes in mapping policies, always reload the server preference store.
If there is a change in licenses then reload both License configuration and server preference store. -
CRM Integration: Here, the Administrator c enable the access to the Third-party Apps including CRMs such as Zoho, Zendesk, Salesforce, Microsoft Dynamics, Freshsales, and Freshdesk Mint. For some Apps like Zendesk CRM and Zoho Desk, the OAuth for Single Sign-On have to be enabled before authorizing the access.

Figure: Authorize Zendesk
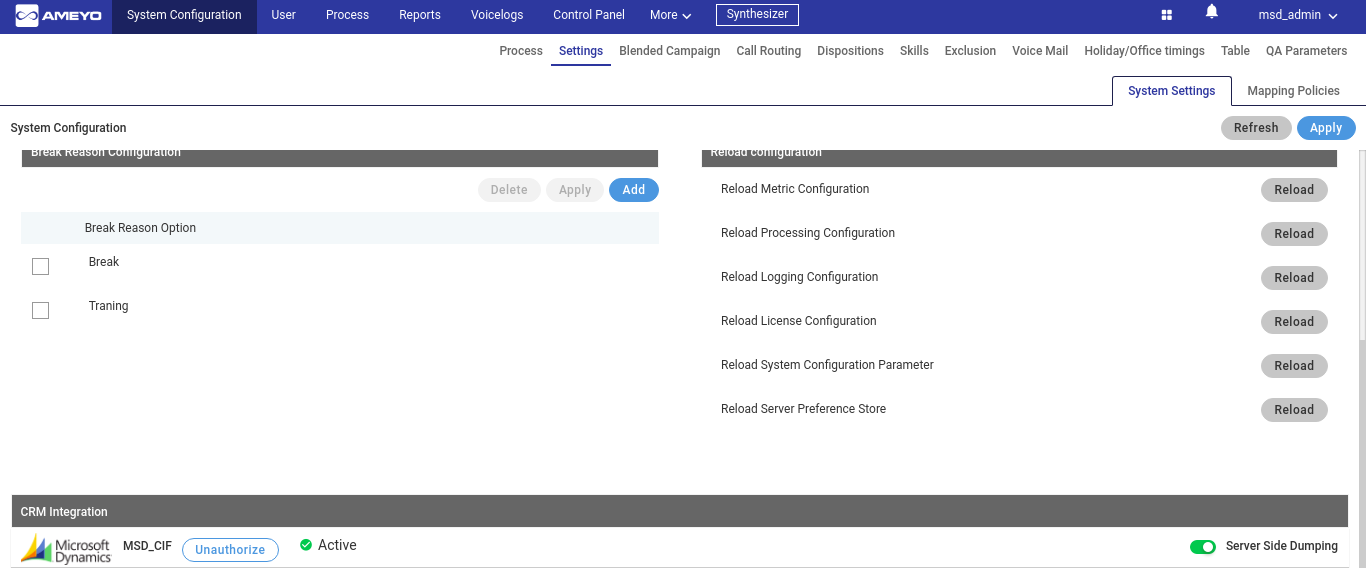
The following screenshot displays the authorization of Ameyo Application Server to Microsoft Dynamics.

Figure: Option of Server-side Dumping for Microsoft Dynamics
After authorizing a linked Third-party App, the Administrator can click "Server-side Dumping" toggle switch to enable the server-side dumping of the data like Call Duration, etc. Know more...
The Administrator can click "Unauthorize" button to unauthorize the configured third-party app.