Table Filters
Here, you can create, edit, and delete filters for the table definitions.
Table Filters are used to filter the customers in Outbound, Parallel Predictive and Voice Blast Campaigns. Administrator has to assign the required Table Filters in "Customers" Tab in the Settings of these campaigns. Know more...

Figure: Table Filters
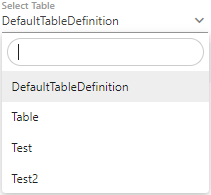
Click "Select Table Definition" drop-down menu to select the table definition, in which you want to create, edit, and delete the table filters.

Figure: Select Table Definition
You can use search box in the top row to search for the particular table definition.
Create Table Filter
Administrator needs to follow below steps for creating new filters.
- Select the table definition.
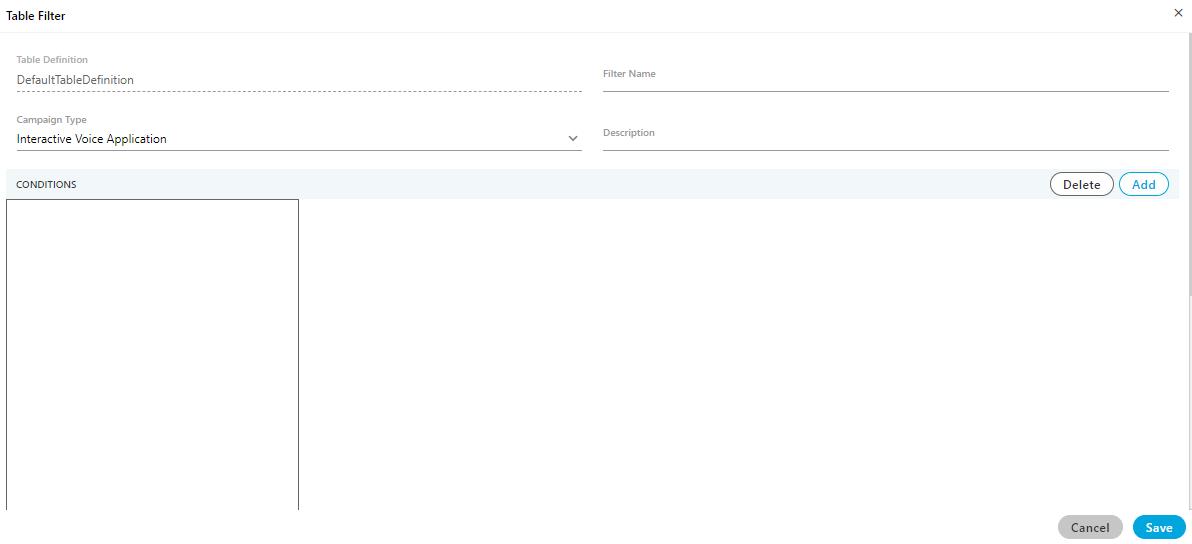
- Click "Create New Filter" to create a new table filter.

Figure: Create a Table Filter
- Administrator needs to fill the following details in order to create new mapping.
- Filter Name: Provide a name of the filter.
- Campaign Type: Select the campaign type from the drop-down menu. It contains the following options.
- Outbound Voice Campaign
- Parallel Predictive Voice Campaign
- Voice Blast Campaign
- Description: Enter the description regarding the filter.
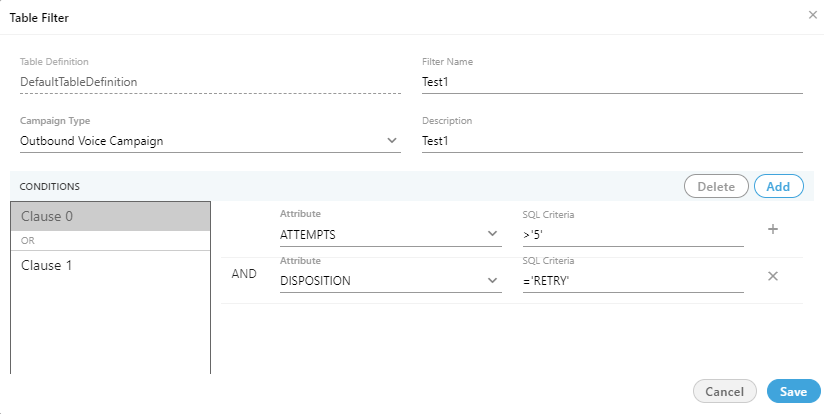
- Click "Add" to add a clause. Each clause has a condition to filter the table. It adds a row on the right. Perform the following steps to add a condition in a newly added clause.
- In a row, you can select "Left Operand" in the drop-down menu. It contains the following options.
- ATTEMPTS
- customerid
- DISPOSITION
- IS_CALLBACK_SCHEDULED
- IS_EXCLUDED_DISPOSED
- LAST_CALL_TYPE
- LAST_CHURN_1
- LAST_CHURN_2
- LAST_DIALED_NUMBER
- LAST_DIALED_NUMBER_1
- LAST_DIALED_NUMBER_2
- LAST_DIALED_NUMBER_3
- LAST_DIALED_NUMBER_4
- LAST_DIALED_TIME
- LAST_USER_ID
- LEAD_ID
- name
- NUMBER_STATUS
- phone1
- phone2
- phone3
- phone4
- phone5
- timezone
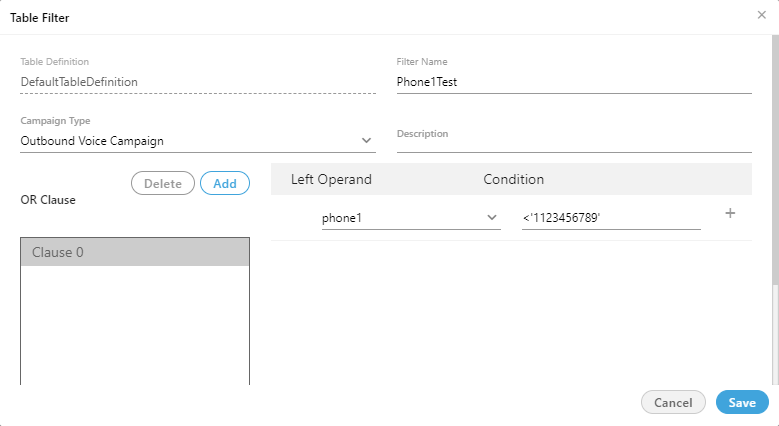
- After selecting "Left Operand", you have to provide a value for that operand in the cell under "Condition" column. The value should contain a operator such as =, < or >. The following table shows some examples of some operands.
Operand Value ATTEMPTS ='1' <'1' >'1' CustomerID ='1234' <'1234' >'1234' Phone1 ='2111155555' <'2111155555' >'2111155555' Table: Sample Values of Operands
If you do not add operator or single quotes, you may get error while adding or modifying the table filter.
- You can click "+" icon on the right side of a row to add a new condition.
- To delete a condition, you can click "x" icon on the right side of a row.
- In a row, you can select "Left Operand" in the drop-down menu. It contains the following options.
- You can click "Add" again to add a new clause. After adding the clause, you can add the condition rows in it.
You can click the clause names in the box located on bottom left side to navigate between the clauses.
- To delete a clause, select it in the box and click "Delete".Following screenshot contains the sample values to create a table filter.

Figure: Creating Table Filter
- Click "Save" button to create the table filter.
Alternatively, you can click "Cancel" button to not create the table filter.
You can create the multiple table filters.
Enable or Disable a Filter
Perform the following steps.
- Select a table filter in the list.

Figure: Select a Table Filter
- Check the box titled "Enable" to enable the table filter.
- Alternatively, you can keep "Enable" box unchecked to keep the table filter disabled.
Modify a Table Filter
Perform the following steps.
- Select a table filter in the list.

Figure: Select a Table Filter
- Click "Edit" button on top right corner to edit the table filter. It shows the following pop-up.

Figure: Modify a Table Filter
- You can change the following items here.
- Filter Name
- Campaign Type
- Description
- Left Operand
- Value
- Clause
- Click "Save" to save the modified table filter.
Delete a Table Filter
A deleted table filter cannot be restored. If the table filter is being used in any campaign to filter the leads, then the filtration will not work after deleting the table filter.
Perform the following steps.
- Select a table filter in the list.

Figure: Select a Table Filter
- Click "Delete" button on top right corner to edit the table filter. It shows the following warning message.

Figure: Warning before deleting a Table Filter
- Click "Yes" to delete the table filter.