Take Backup of Application Specific Databases
It allows the Administrator to backup any application-specific database. Here, the databases related to the selected application appear only. For example, the databases related to Ameyo AppServer and Ameyo Archiving and Reporting Tool are displayed here.
Perform the following steps.
-
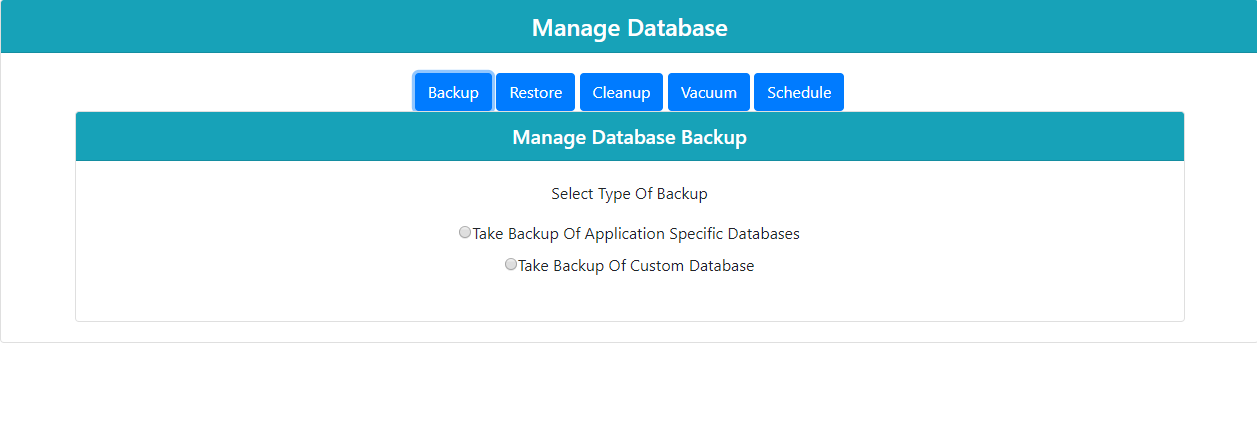
Click "Backup" tab in "Manage Database." It shows the following wizard.

Figure: Backup Tab
-
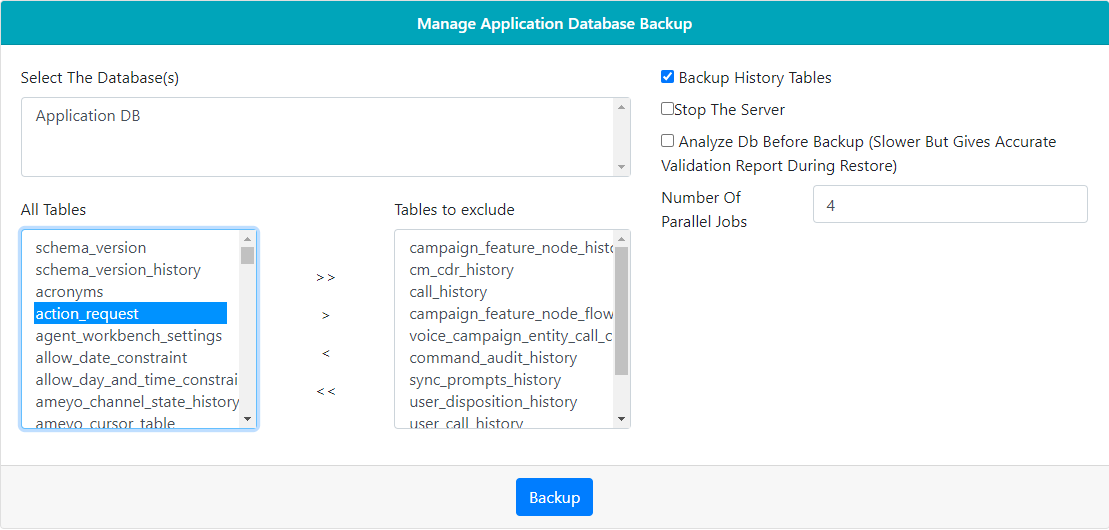
Click "Take Backup of Application Specific Databases" option. It shows the following screen.

Figure: Application Specific Backup
-
Select the application name for which you have to take the backup.
-
The administrator has the option to select the specific database table names for which the backup needs to be taken. The user can exclude the tables which are not much useful for the backup. Select the tables from "All tables" list and click > to exclude that table. The user can select the table from the excluded list of tables and click < to select that table to be included in the backup process.
To exclude all listed tables, then click >> option; else click << to include all tables from the excluded list.
-
(Optional) Backup History Table: Check "Backup History Tables" to enable the option for taking the backup of the History tables also. The History tables store the history of all contents such as Call History, User Login History, and others.
However, in some cases, these tables are not that important for the users, and thus, the user can also skip this step. -
(Optional) Analyze Database Backup: Check the box titled "Analyze DB before Backup (Slower but gives accurate validation report during restore)" to analyze database while taking the backup. At the time of backup, it runs the database error check resolver to check for the errors during the backup process.
There are possibilities of having the errors at the time of backup, which can be there due to any reason. For example, during the backup process, one of two related tables get backup with the old data, but the second table stores the updated data. This is because the server is still working on updating the data of both related tables and may take more time to complete, but the backup process has been started already. -
(Optional, but Recommended) Stop Server: Check "Stop the Server" box to stop the Server while performing the Cleanup task. It is an optional step but recommended. Enabling this function stops the server until the "Cleanup" process is completed so that any discrepancy can be avoided.
-
Number of Parallel Jobs: Provide the number of jobs which can be executed simultaneously. Parallel jobs means that the total number of jobs that can be executed at any instant of time.
-
Click "Backup" button on the bottom to backup the selected database. It can take a few minutes to complete the backup process depends upon the size of the database.

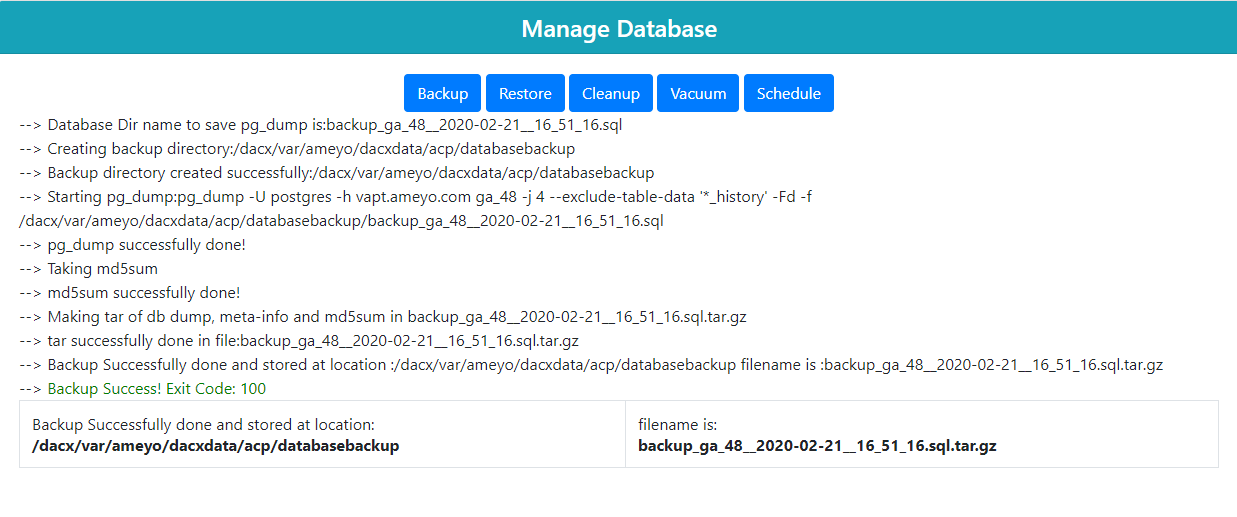
Figure: Backup Process
Once done, it shows the status of the backup whether it is done or not. Also it contains the path at which the backup file is kept on the server with its file name.
-
Click "Download" to download the backup file. Download" option is based upon "Save As" functionality of the Web browser.
It is recommended to keep "Ask where to save each file before downloading" or similar option checked in your Web Browser so that you can specify the name and path to save the files.
-
Case 1: If "Ask where to save each file before downloading" option is not checked, the voicelog will be saved as ".wave" file with the default name at the default download location of the Web browser.
-
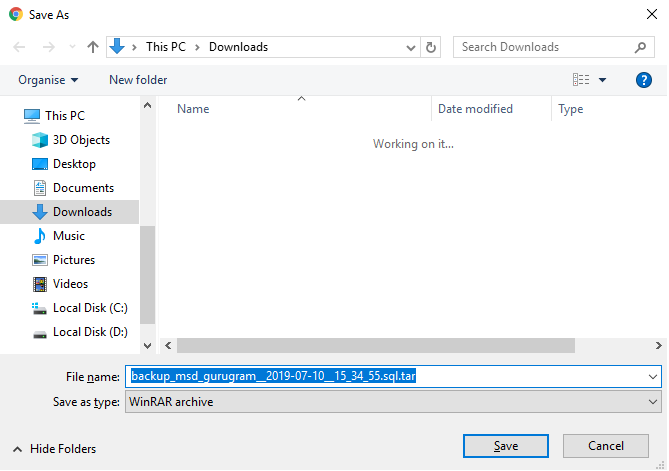
Case 2: If "Ask where to save each file before downloading" or other similar option is checked, then you have to perform the following steps to download the voicelog file.

Figure: Dialog Box to download the file
-
Select the location where you want to save the file.
-
The default name of the file is the name of the database (of which backup is taken) followed by the present time stamp(YYYY-MM-DD-hr-mm-ss).
-
You can change filename in "File Name" textbox.
-
Click "Save" button.
-
-