Take Backup of Custom Database
This option helps the Administrator to take the backup of any specific database. Perform the following steps.
-
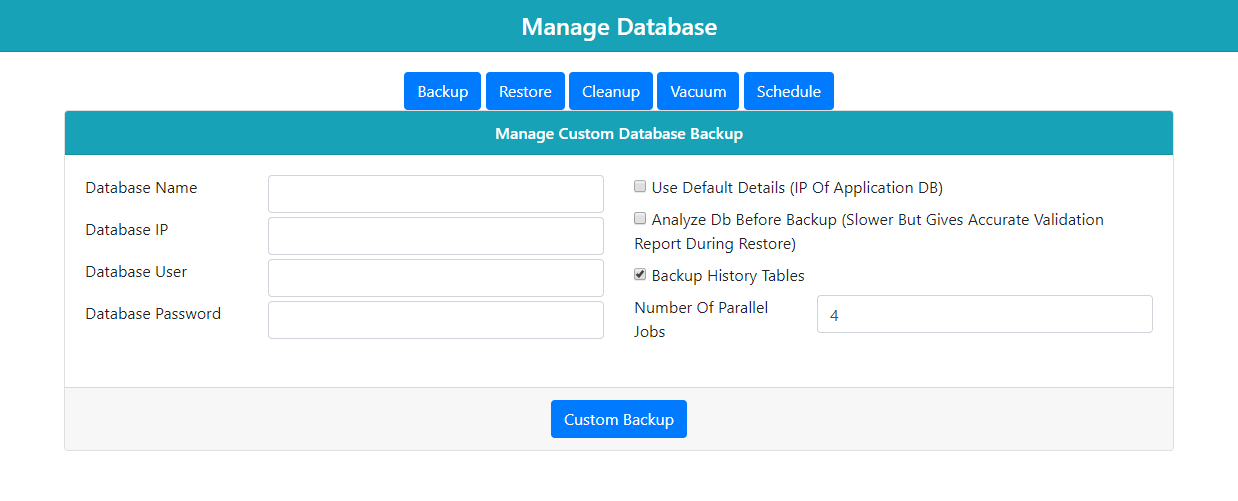
Click "Backup" tab in "Manage Database." It shows the following wizard in the Web browser.

Figure: Custom Database Backup
-
Keep "Take Backup of Custom Database" box checked.
-
Enter the name of the Database in the Database Name column.
-
(Optional) Use Default Details (IP of Application DB): If the target database (of which backup has to be taken) is on the same server that hosts the Ameyo application database, then enable this option. It lets the Ameyo authenticate the database automatically and saves the time by not asking the credentials to verify the server.
You can either select "Use Default Details)" option or enter the details of the target server where the target database is stored.
-
(Optional) Analyze Database Backup: Check the box titled "Analyze DB before Backup (Slower but gives accurate validation report during restore)" to analyze the database while taking the backup. At the time of backup, it runs the database error check resolver to check for the errors during the backup process.
There are possibilities of having the errors due to any reason at the time of backup. For example, during the backup process, one of two related tables get backup with the old data, but the second table stores the updated data. This is because the server is still working to update the data of both related tables and need more time to complete, but the backup process has already been started.
-
(Optional) Backup History Table: Check "Backup History Tables" to enable the option for taking the backup of the History tables. The History tables store the history of all contents like Call History, User Login History, and others. However, in some cases, these tables are not so important for the users, and thus, a user can also skip this step.
-
If the target database is not stored on the server that hosts the Ameyo application database, then you have to provide the following inputs.
-
Database IP: Provide the IP Address of the server that hosts the target database.
-
Database User: Provide the name of the user who has required access privileges to backup the target database.
-
Database Password: Provide the password of the selected user to authenticate the logon on the server.
-
-
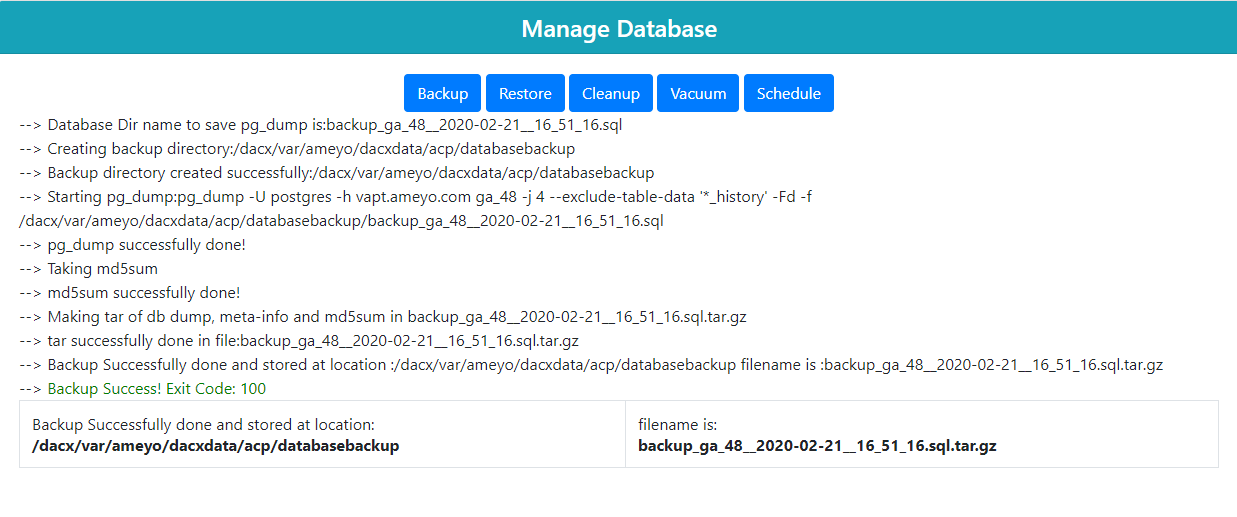
After entering all the details, the backup process starts and it may take some time depending upon the size of the database. After the completion of the backup process, the following screen comes up.

Figure: Backup Process
-
After completion of the backup procedure, you can download the database. Click "Download" to download the backup file.
-
Case 1: If "Ask where to save each file before downloading" option is not checked, the voicelog will be saved as ".wave" file with the default name at the default download location of the Web browser.
-
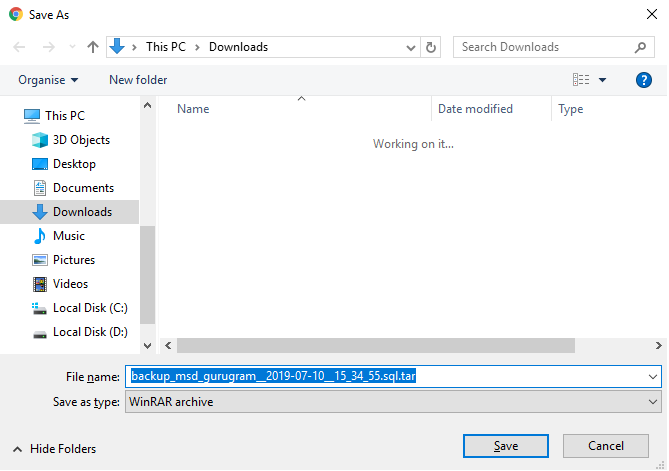
Case 2: If "Ask where to save each file before downloading" or other similar option is checked, then you have to perform the following steps to download the voicelog file.

Figure: Dialog Box to download the file
-
Select the location where you want to save the file.
-
The default name of the file is the name of the database (of which backup is taken) followed by the present time stamp(YYYY-MM-DD-hr-mm-ss).
-
You can change filename in "File Name" textbox.
-
Click "Save" button.
-
-