Ticket Creation
The working and feature of ticket creation page is similar for both Supervisor and Agent. However, the Group Manager does not have the privileges to access the ticket creation, as the group manager is not allowed to work in interaction and chat campaigns.
Tickets get created only in the Interaction Campaign. No ticket will be created if the agent is logged on to only a voice campaign. However, if the customer is logged on to both Voice and Interaction the tickets will be created for every customer communication.
It is the default configuration of Ameyo that agents can login to Chat Campaign only with an Interaction Campaign. So tickets will be created automatically in the Chat and Interaction Campaign.
To create Tickets for the first time, customer information has to be provided. After that, the tickets for the same customer information will be aligned with the same customer ID.
You will get an option to create a ticket only in Interaction Campaign, whereas the ticket will be automatically created while making or receiving a voice or chat communication with the customer.
Click "Create Ticket" button present on the top of the page and perform the following steps to create a new ticket.
Customer Information
Whenever a ticket is being created for the first time for a new customer, all customer information fields will remain blank. Click "Create Ticket" button present on the right top corner of the page.
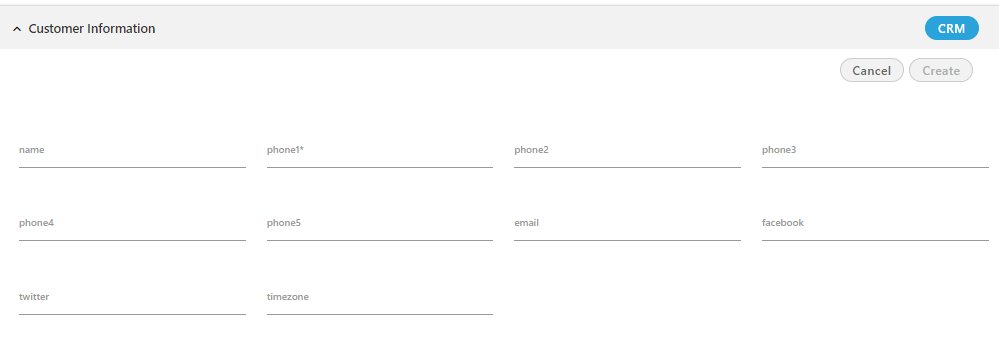
Figure: Customer Information
Provide the inputs for the following fields.
-
Name: Provide the name of the customer in the name field of the CRM.
-
Email: Provide the email-id of the customer.
-
Twitter: Enter the twitter handle name of the customer, if any.
-
Timezone: Enter the timezone of the customer in case if the customer is from a different time-zoned country.
-
Facebook: Enter the Facebook id of the customer, if any.
-
(Mandatory) Phone 1: Enter the phone number of the customer. It is mandatory to provide the phone number in the "phone 1" field of the customer.
-
Phone 2: Enter another phone number of the customer, if any.
-
Phone 3: Enter another phone number of the customer, if any.
-
Phone 4: Enter another phone number of the customer, if any.
-
Phone 5: Enter another phone number of the customer, if any.
You can provide multiple phone numbers of the customer using phone* fields. Only "Phone 1" field is mandatory, rest all the fields depend on the availability of the customer's phone numbers.
After providing the above information, click "Create" button to create the customer.
Customer's information on CRM
The agent can store the information of the customer on the CRM. Click "CRM" button present on the top of the customer's information bar to see the customer's information on the CRM(if integrated on Ameyo). The complete information of the customer is available on the CRM page. Agent can change view or change the information according to the usage.
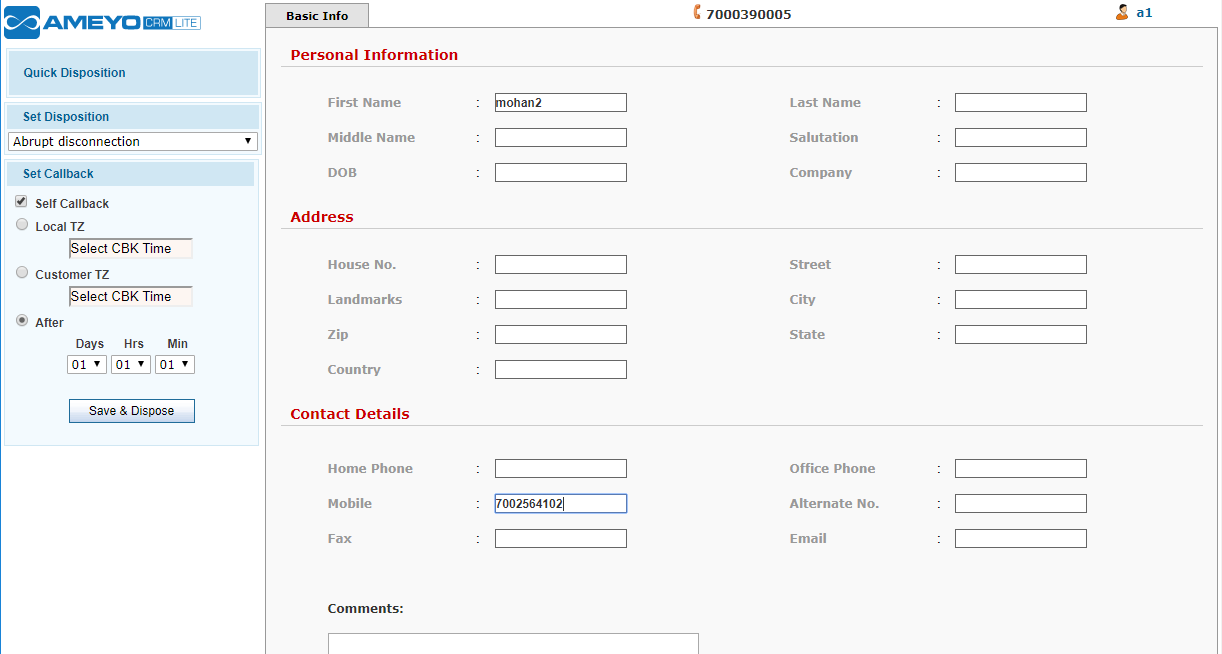
Figure: Customer Information on CRM
Click "Create" to create the customer with the provided information. After entering the information once, whenever a communication is received that matches any of the provided values, the ticket will be created for this customer.
If you are using CRM mode to store the customer's information then do not store the same information on the dashboard. The complete information will be fetched through the CRM only.
New Ticket for Interaction Campaign
Following is a screenshot for the new ticket of Interaction Campaign.
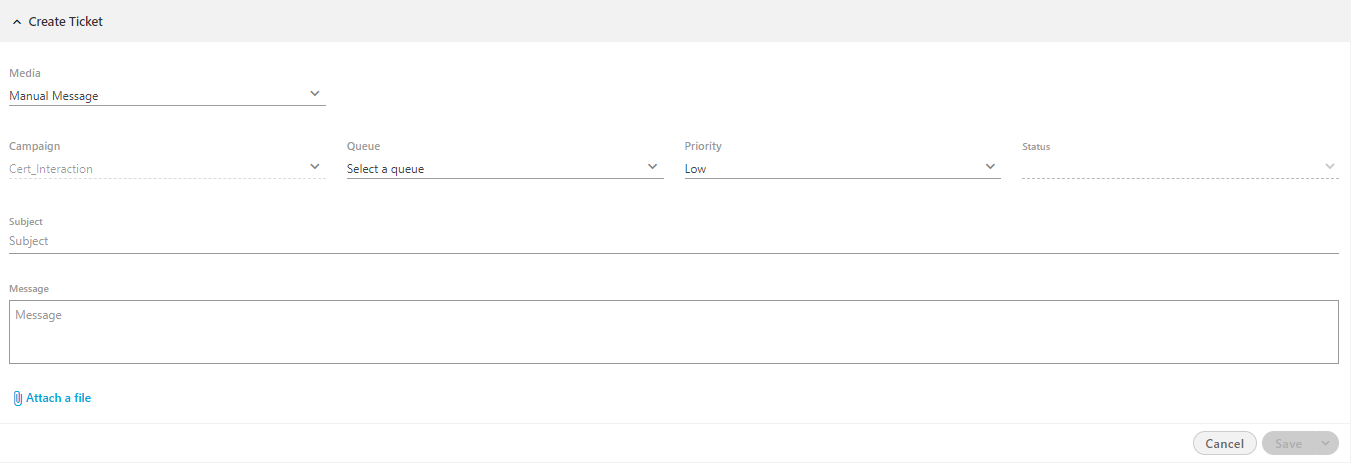
Figure: New Ticket Creation
Here, you can create both Manual Message and Email. Manual Messages are saved offline and are not delivered to the customer automatically until an agent communicates them manually through any medium. Email is sent to the customers with the creation of a new ticket.
Perform the following steps to create a ticket with a manual message.
-
Media: From the drop-down of the Media section, select the type of the media profile from which you want to send the message to the customer. There are by default three media profiles present in the drop-down list:
-
Campaign: The campaign field shows the name of the campaign in which the agent is assigned in. The campaign selection is non-editable, if the user is assigned in only one campaign.
-
Queue: Select the queue from the drop-down list of available queues.
-
Priority: Select the priority type of the ticket from the following priorities from the drop-down list.
-
Low: It means that the ticket is on the low priority and is not urgent.
-
Medium: It means that the ticket is on the medium priority and is less urgent.
-
High: It means that the ticket is on the high priority and is urgent to resolve.
-
-
Status: Select the status of the ticket from the drop-down list. The status in the drop-down list depends upon the statuses created by the administrator.
-
Custom Information: If any custom field is created in the campaign or queue, then it will show here. The agent has to provide the values of these information.
-
Subject: Provide the subject of the message.
-
Message: Enter the message which you want to convey to the customer in the textbox.
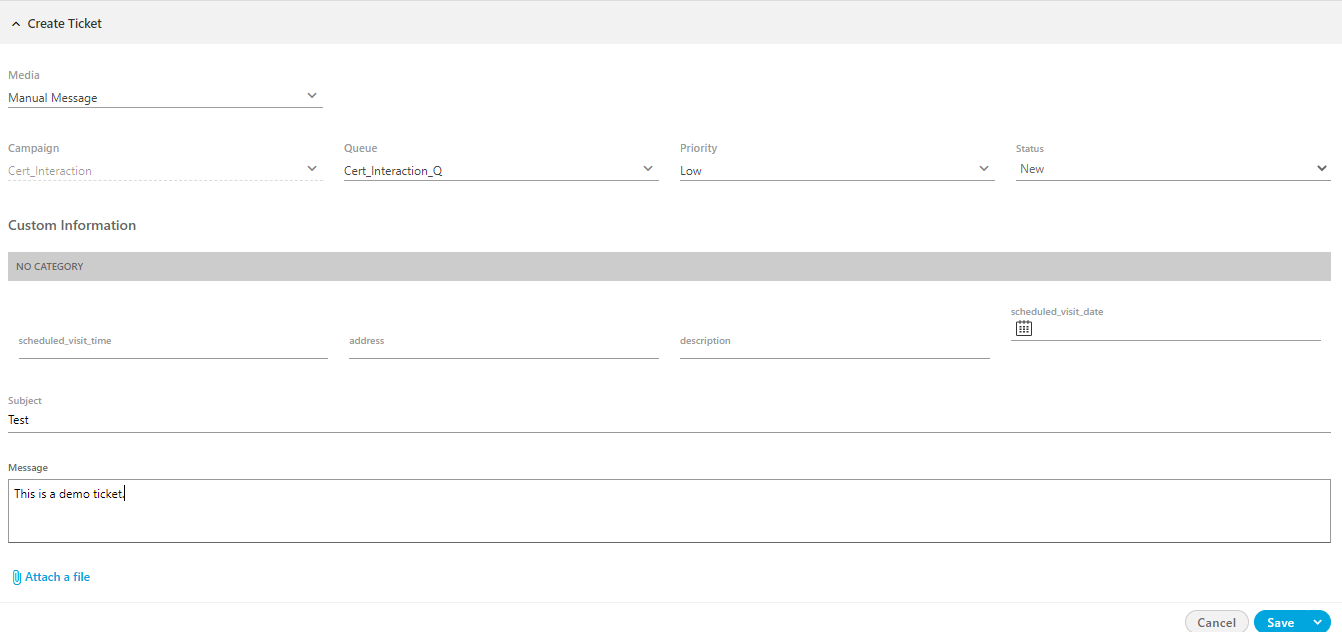
Figure: New Ticket with Manual Message as Media Profile
-
Attach a file: Click "Attach a file" button to attach a file with your email. A pop-up opens after clicking on the button.
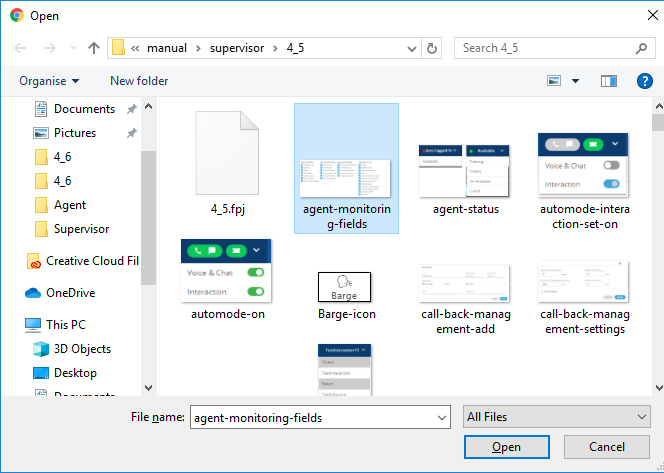
Figure: Attach File
Supported File Types
Following file types are supported for attachments with Manual Message.
.doc, .docx, .xls, .xlsx, .ppt, .pptx, .xps, .pdf, .dxf, .ai, .psd, .psd, .eps, .ps, .svg, .ttf, .zip, .rar, .tar, .gzip, .mp3, .mpeg, .wav, .ogg, .jpeg, .jpg, .png, .gif, .bmp, .tif, .webm, .mpeg4, .3gpp, .mov, .avi, .mpegps, .wmv, .flv, .txt
One file can be attached at once. The maximum file size for all attachments in one Manual Message is 25 MB.
Select the file which you want to attach, and click "Open" button. If the file successfully uploaded, then "Done" sign appears, else failure will occur if the file does not uploaded successfully. You can attach multiple files as well.
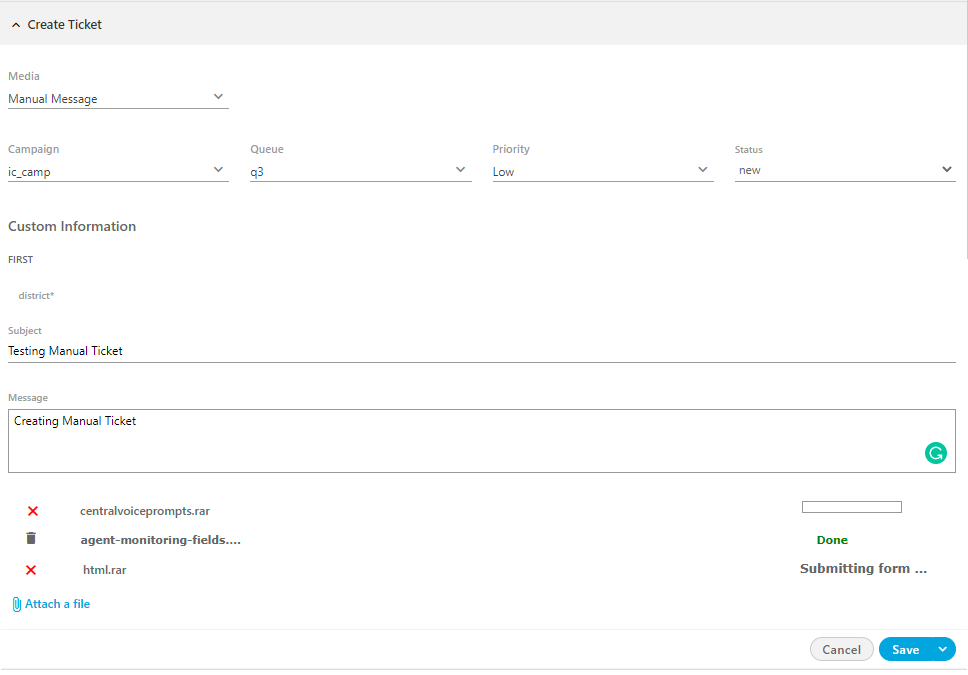
Figure: Sample Ticket with Attachment
-
Click "Save" button. A new ticket with the new customer is created and displayed in the customer information and the Ticket will display on the Agent's screen dashboard.
-
Save and Change Status: The agent can save and change the status of the tickets simultaneously with one click. Click
 icon to access the available ticket states. Select any state to save and change the ticket state.
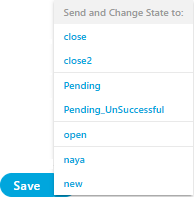
Figure: Save and Change Status of Ticket
After clicking save button, a new ticket with the new customer is created and displayed in the customer information and the Ticket will display on the Agent's screen dashboard.
Character Limit for various Tickets
The limit to the number of characters in the various forms of Messages has been implemented.
-
In Twitter messages, the Agent can type upto 280 characters.
-
In facebook Messages, the Agent can type upto 8,000 characters in faceboook post replies
The character limit will be displayed at the bottom of the textbox in the format: "<Available_limit>/<Total_limit>".
Custom Fields Selection
The custom fields are the fields that are created by the administrator. The agent can use the created custom fields in the customer tickets to save the information of the customer.
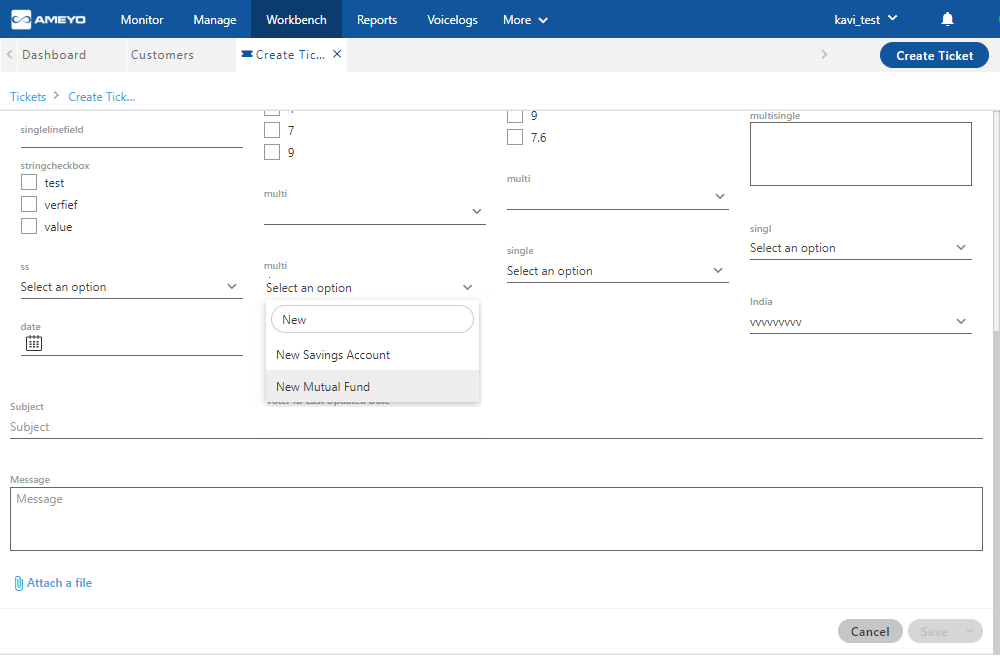
Figure: Search option for Custom Fields
The Ameyo User can type the value in the text area given on top, and it starts searching in the box. In the case of a single selection list box, the search icon with a search text field is displayed, whereas it will be hidden in case of multiple selection list box.
Regex Custom Field
Regex custom fields are the type of fields in which the agent has to provide the defined set of string. The Regex custom fields are generally used to provide a different set of strings. A Regex custom field helps the organization to provide a different unique numbers for different type of tickets. The agent has to provide the string that has configured by the administrator.
The following screenshot shows the Regex field at the ticket creation time.
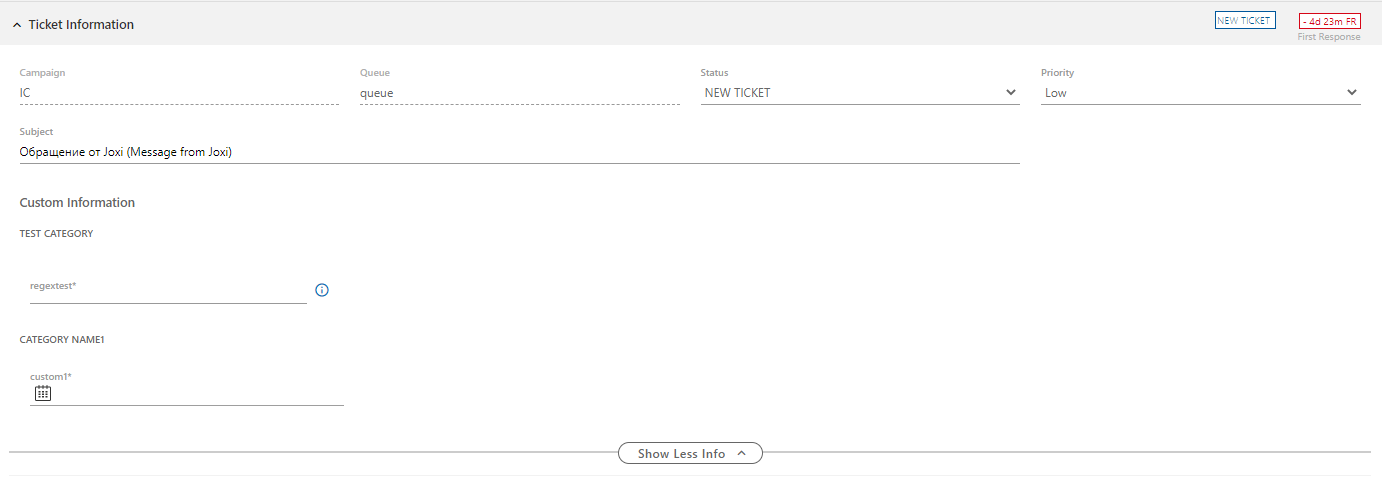
Figure: Regex Field in a Ticket
The agent has to provide the string here in the same format as defined by the administrator. The agent can hover its mouse at ![]() icon to view in the format in which the agent has to provide the Regex value.
icon to view in the format in which the agent has to provide the Regex value.

Figure: Regex Field Pattern
The following screenshot shows the sample Regex value filled in a ticket.
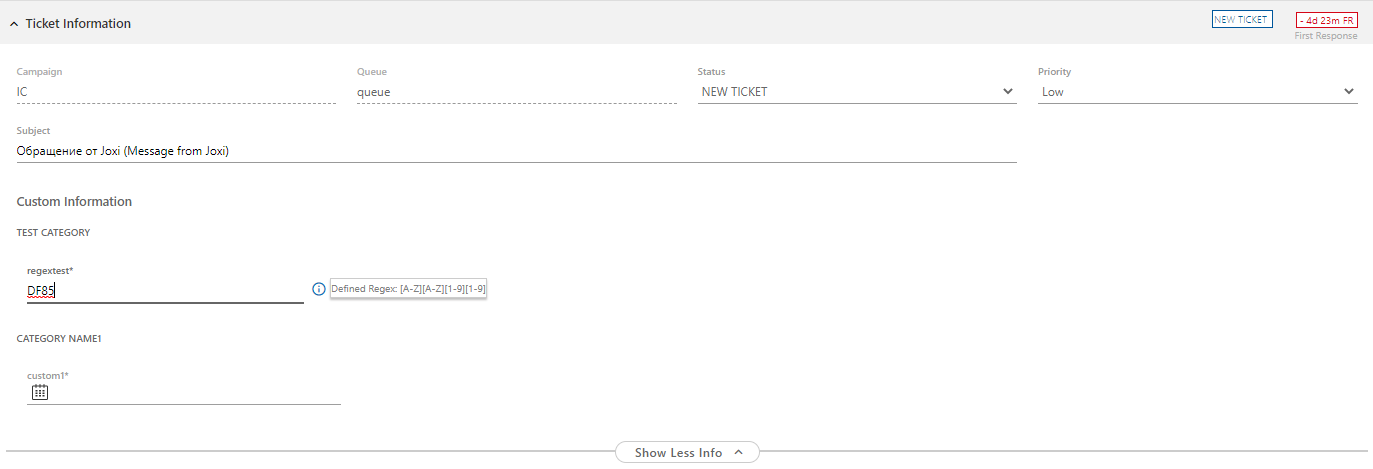
Figure: Sample Regex Pattern
If the agent does not provide a string in the defined format or the value is incorrect, then it shows an inline error when the agent tries to save the ticket information.
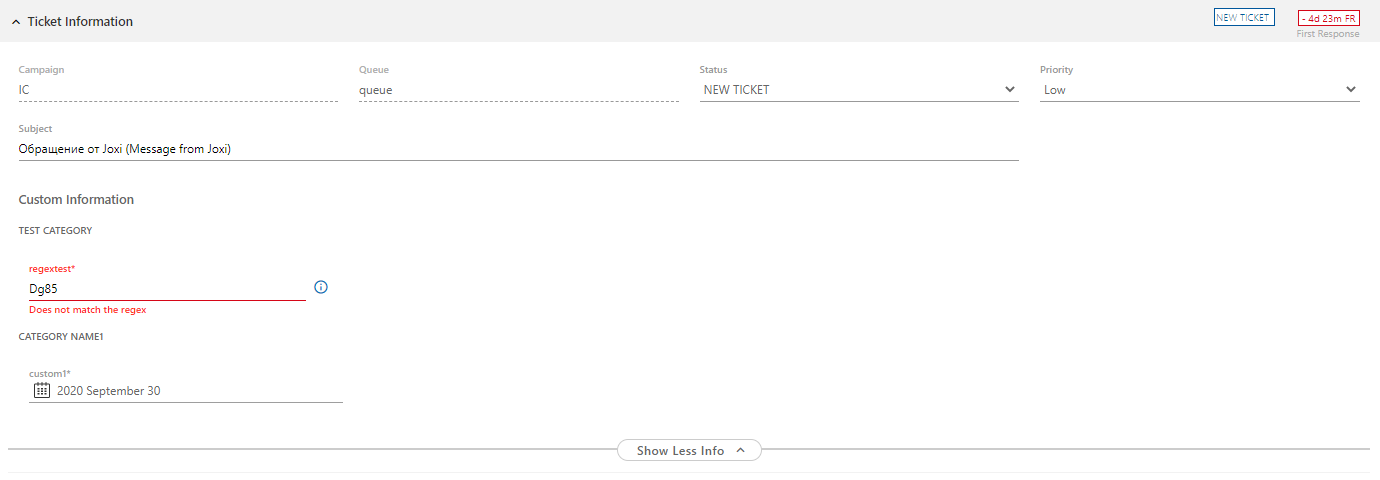
Figure: Error at Incorrect Regex Pattern