Routing in a Voice Campaign
Here, you can create and manage the routing for both Inbound and Outbound Calls in Interactive Voice Application Campaign, Outbound Campaign, and Parallel Predictive Campaign.
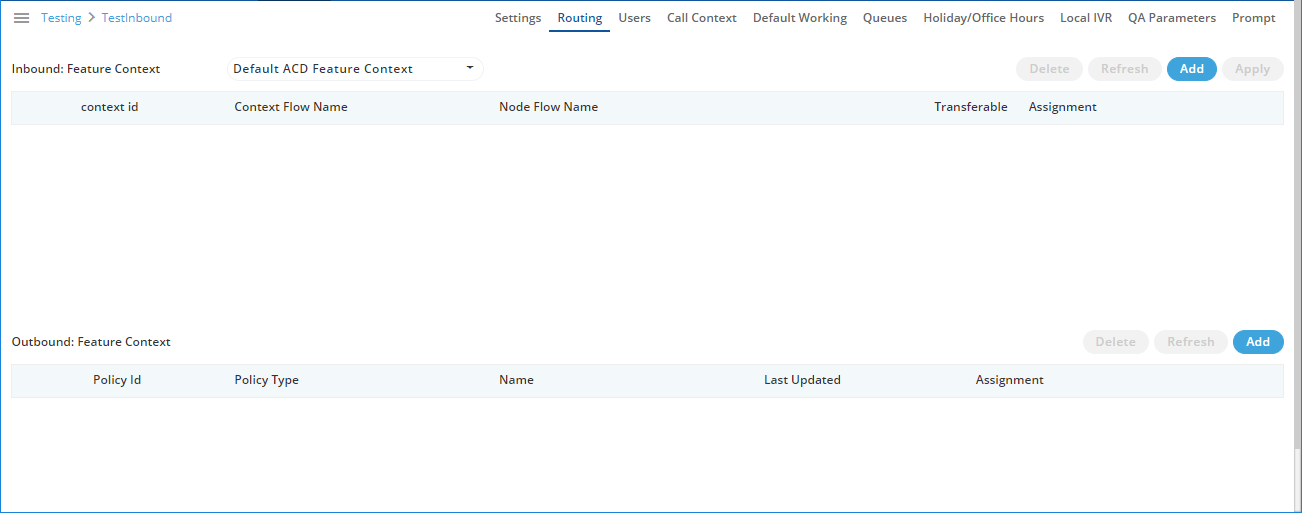
Figure: Routing
Routing for Inbound
Add a Nodeflow for Routing
Perform the following steps to create a nodeflow.
- Click "Add" button to create a nodeflow. It shows a new row in the white area just below the column header.

Figure: Add Context Flow
- Provide a name for the context flow.
- In "Node Flow Name" column, you have to upload either a .nodeflow or .anfx flow.
Service Engineer will provide you the required nodeflow files.
Click "Browse" to open a nodeflow file. Select the location where the file stored. Select the required file and click "Open". - Check "Transferable" if you want to transfer the call from this nodeflow to another nodeflow.
- Click "Apply" to add the nodeflow.
Assign Nodeflow to a Queue
Perform the following steps to assign a nodeflow to a queue in the campaign.
- Check the box to select a queue.
- Click "Assignment" to assign this nodeflow to a queue. It shows the following pop-up.
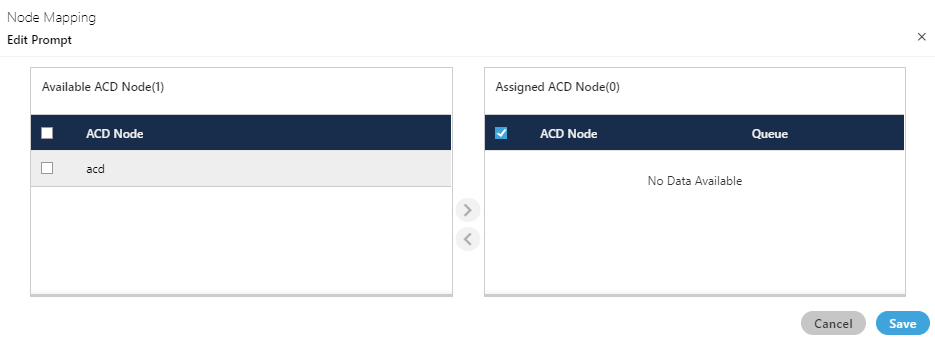
Figure: Assign Nodeflow to a Queue
- Select "ACD" node in "Available ACD Node" section, and click
 icon.
icon. - Select the nodeflow in "Assigned ACD Node" section.
- In "Queue" drop-down menu, select the queue to which you want to assign this ndoeflow.
- Click "Save" to assign the nodeflow to the selected queue. It takes you back to "Routing" Tab.
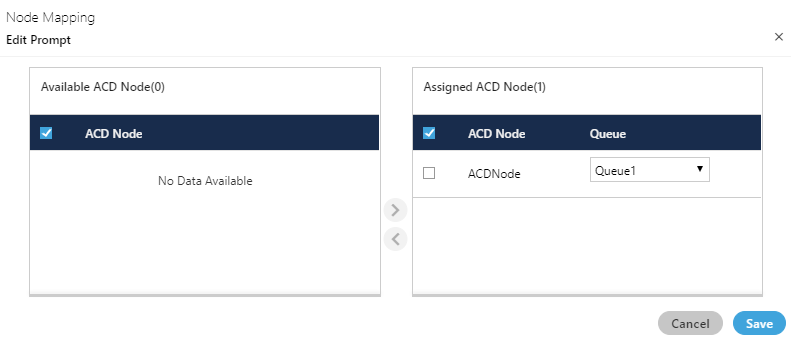
Figure: Assign Queue in ACDNode
You can perform the same steps to create the nodeflow and to assign it to a queue.

Figure: Added Nodeflows
You can fetch a nodeflow and download it as a file on the disk, assign or unassign it to a queue, and delete the nodeflow.
Delete Routing Policy
Select the Routing Policy for which you want to delete permanently. Click "Delete" button. A confirmation pop-up comes up.

Figure: Delete Routing Policies
Click "Yes" if you want to delete the routing policy, else click "No".
Routing for Outbound
In "Outbound: Feature Context" section, perform the following steps.
- Click "Add" to add a routing policy for the Outbound feature context.
- It creates a new row in the blank area.

Figure: Adding an Outbound Routing Policy
- Select any of the following Policy Types.
- Basic Single Call Context Type: It is the policy type in which outbound calls will be dialed out from the single call context.
- Phone Based Call Context Type: It is the policy type in which Voice-Admin can define the pattern on basis of which numbers will be dialed out from multiple call context. It will only reflect after procuring appropriate licenses.
- Basic Multiple Call Context Type (Licensable): It is the policy type in which outbound calls will be dialed out from multiple call context. It will only reflect after procuring appropriate licenses.
- Multiple Type Round Robin Call Context Type: It is the policy in which if a call tried by a call context fails to get connected, then it will be tried by the different call contexts that are selected for calling as per Round-Robin algorithm. As per Round-Robin Algorithm, each call context is used to call for a fixed amount of time and if the call does not get connected in that duration, another call context is used. The left over call context is reused when all other call contexts in the loop are used and the call is still not connected.
Make sure to not provide a name for the Routing for any "Outbound: Feature Context". The name will be assigned automatically after selecting the call contexts.
The Outbound Routing with manual names will not work.
- Click "Assign" link under "Assignment" header to select a call context that you have assigned in this campaign in "Call Context" Tab. Following pop-up is displayed for "Basic Single Call Context Type" on the page.
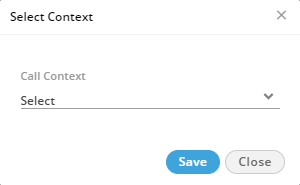
Figure: Select Call Context for Basic Policy
For "Phone Based Call Type", "Basic Multiple Call Context Type", and "Multiple Type Round Robin Call Context Type", the following pop-up appears to select the multiple call contexts.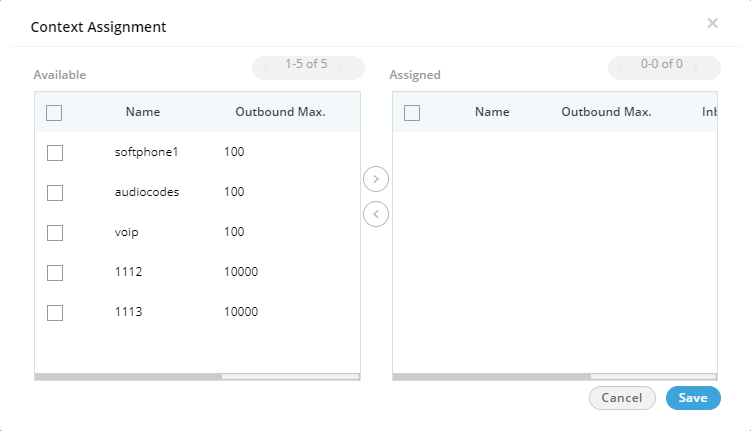
Figure: Select Call Contexts for Multiple Type Policy
Perform the following steps to assign call contexts to this new policy.
- Select the call contexts in "Available" section
- Click
 icon to proceed to assign the selected call contexts.
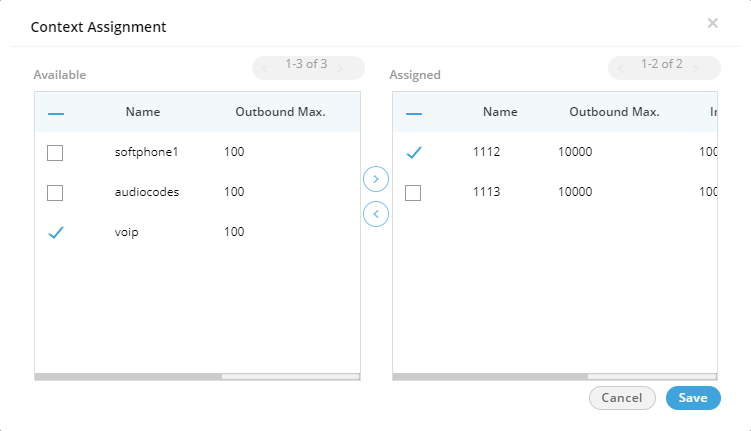
Figure: Assign or Unassign Call Contexts
- Click "Save" to assign the call contexts to this campaign.
Rather, you can click "Cancel" to not assign the Call Contexts.
To unassign a call context, click the link under "Assign" header for a new or existing Outbound Routing Policy, select a call context in "Assigned Call Contexts" section, click
 icon, and click "Save" to unassign the selected call context from the campaign.
 - Click "Save" to proceed to add the selected context to the routing policy.
- Click "Apply" to create the Routing Plan for Outbound.
You can create multiple routing policies for the Outbound Feature in the Interactive Voice Application (Inbound) Campaign.

Figure: Added Outbound Routing Policies
You can only change the selected Call Contexts while modifying an Outbound Routing Policy. In addition to that, you can also delete a routing policy.
Delete Routing Policy
Select the Routing Policy for which you want to delete permanently. Click "Delete" button. A confirmation pop-up comes up.

Figure: Delete Routing Policies
Click "Yes" if you want to delete the routing policy, else click "No".
Saving Routing Test Result
When a voice admin creates a routing test case, they may want to check that test case frequently so that any issues in the routing can be figured out easily. Allowing the voice admin to save these test results saves an enormous amount of time for them.
On the Routing Test screen, the voice admin can save the test cases. The saved test cases are listed on the same screen.

Figure: Saving Routing Test Result
Voice Admin can also perform the following actions
Delete a test case or select multiple test cases and delete them
Search for a test case
Select the test case(s) they want to run
Edit a test case.