Customer Distribution Rules
The Voice-Admin can upload the customer data at process level.
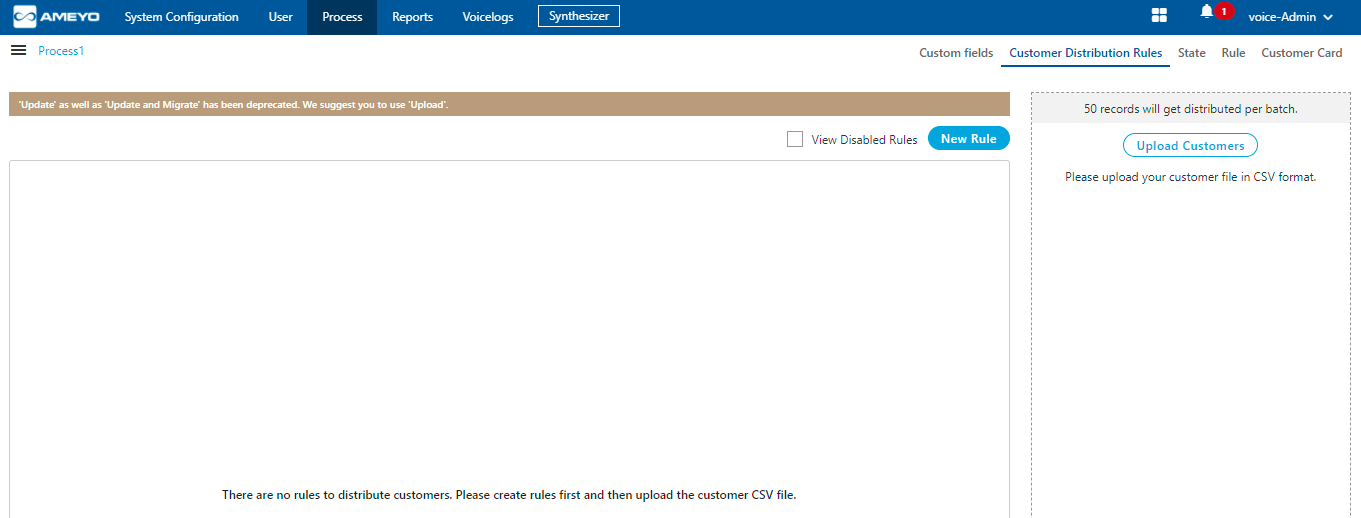
Figure: "Customer Distribution Rules" Tab in Process Settings
Following are the features of the customer data upload at process level.|
Step |
Process Flow |
|---|---|
|
Definition |
Now, the Customer Data will now be uploaded and distributed at the process-level itself, instead of the system-level. |
|
Ameyo Refresh Table and Customer Prospect Table |
Each Process will have its unique and separate Ameyo Refresh Table, which will be named as "ameyo_refresh_table_<process_id>" (Here, process_id is the ID of the Process.) Also, each Process will have its unique and separate Customer Prospect table, which will named as "customer_prosect_<process_id>" (Here, process_id is the ID of the process). After upgrading the build to Ameyo 4.7, the Default Ameyo Refresh Table and the Default Customer Prospect Tables for every process will be created. If there are 5 processes, then 5 Ameyo Refresh Tables and 5 Customer Prospect Tables will be created as per the above mentioned naming conventions. |
|
Customer Data Upload |
Customer Data sill will be captured from different sources such as Staging Database Architecture, API, files placed at FTP, or by uploading the data manually through CSV file. However, the backend configuration have to be done to instruct the Ameyo System that which data should be inserted in which "ameyo_refresh_table_<process_id>" table. Please refer to the following document to know more about the same. |
|
Transferring Data from Ameyo Refresh Table to Customer Prospect Table |
From "ameyo_refresh_table_<process_id>" table of a process, the data will be transferred to the Customer Prospect table, that is "customer_prospect_<process_id>", of that process. |
| Mapping the Columns |
The user still have to map the columns of "ameyo_refresh_table_<prospect>" table of a process with the columns of "customer_prospect_<process_id>" of the same process in "csutomer_prospect_column_mapping" table. However, now the user have to specify the ID of the Data Table of that Process of which Ameyo Refresh Table and Customer Prospect Table have to be matched. Please refer to the following document to know more about the same.Document on Ameyo Preprocessor: https://sites.google.com/a/ameyo.com/engineering/Home/certificationknowledgebase/forward-feed-and-data-allocation-testing |
|
Creating the Rules |
"Customer Segregation" Rule tab from "System" → "System Configuration" → "Rule Engine" has been removed. A new tab "Customer Distribution Rules" has been added in "Process Settings". A new "Customer Distribution Rules" tab will be created for all existing and new processes in the Ameyo System. Now, the Voice-Admin have to create the customer distribution rules at the Process-level to use the data available in "customer_prospect_<process_id> of a Process. |
|
Applicability of the Rules on Customer Data |
The created Rules will be applied in runtime, that is, as soon as the "customer_prospect_<process_id>" table has some Customer Data, the rules will be applied and moving the matched data from "customer_prospect_<process_id>" table to the Table Definition of that Process. After applying the rule, the data will be moved to the Data Table Definition of the process and will be deleted from "customer_prospect_<process_id>" table. |
|
Action if no data is matched for the applied rules |
If any Customer Data does not match any "Customer Distribution" Rule, then it will remain idle in the "customer_prospect_<process_id>" table and will not be used in any operation of the Ameyo System. The user can use the options on User Interface such as "Export" or "Export and Extract" to download the data from the Customer Prospect Table of a process. After downloading the data, the user can access it and analyze what new rules can be created in "Customer Distribution Rules" tab to use this data. |
| Summary |
In nutshell, the customer data is now uploaded and managed at the Process level. Each process has its unique "ameyo_refresh_table_<process_id>" table and "customer_prospect_<process_id>" table. In addition to transferring the data to these tables from the linked sources, the user can also upload the data to these tables. The rules will also be created and applied at the Process-level. The user can also download the data from Customer Prospect table of any process. |
The complete page is divided into two following sections.
-
Right Section: The right section allows the Voice-Admin to upload the customers through CSV, export the customer data to CSV, and do both export and remove the customer data from the system. It contains the following options.
-
Upload Customers: Click this button to upload the customers list from a CSV file to the Ameyo System. We recommend to follow this naming convention to name the name of CSV files to be uploaded: "<Process_Name>_<TimeStampofExport>.csv". The name of Column Headers in the CSV file should be same as that of Table Definition Fields of the selected process. If the name of Column Headers of CSV file are not different from the Table Definition Fields, then we recommend using "Provide Header Mapping" option while uploading the CSV.
Perform the following steps to upload the Customer Data through CSV file.
-
Click "Upload Customers" button. It shows the following pop-up.
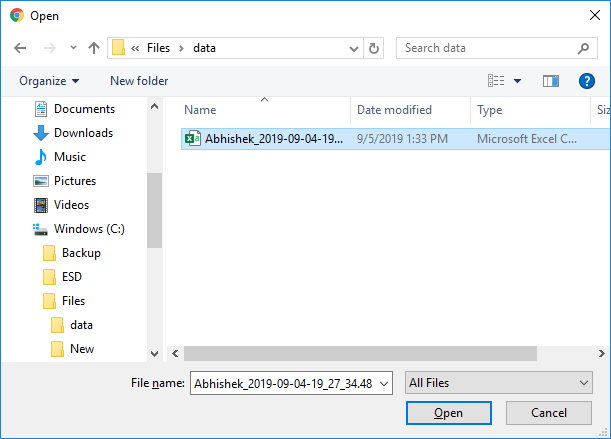
Figure: Open File dialog box
-
Select the location where the CSV file is stored.
-
Select the CSV file and click "Open". It opens the CSV file and displays the following pop-up.
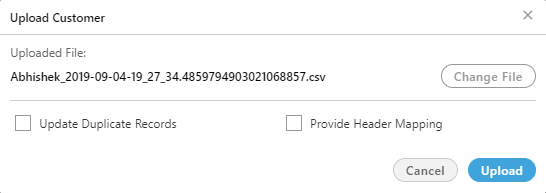
Figure: Pop-up to upload the CSV file
-
Here, you can select the following options.
-
Update Duplicate Records: By default, the Ameyo System will not upload those records of Customer Data which are already uploaded in the Ameyo System. You can check this option to update the already existing Customer Record with the latest data being uploaded.
Example: If a customer already exists at the Process-level with the following attributes.
twitter
timezone
facebook
phone2
name
phone3
phone4
phone5
email
phone1
additional_column
john
Asia/Kolkata
john@domain.com
123456789
John
john@domain.com
1234567891
NA
Now, the Voice-Admin is uploading the following data, in which the phone2 column contains the different value and phone3 contains the new value.
twitter
timezone
facebook
phone2
name
phone3
phone4
phone5
email
phone1
additional_column
john
Asia/Kolkata
john@domain.com
146797979
John
123479789
john@domain.com
1234567891
NA
Now, if the Voice-Admin have selected "Update Duplicate Records", then the Ameyo System will merge the changed values and add the new values in the existing customer record that would like the following data.
twitter
timezone
facebook
phone2
name
phone3
phone4
phone5
email
phone1
additional_column
john
Asia/Kolkata
john@domain.com
146797979
John
123479789
john@domain.com
1234567891
NA
-
Provide Header Mapping: Use this option if the name of any Column Header of the CSV file is different from the name of Table Definition Fields (of the process). With this checkbox, you can map the Column Headers of CSV file, having different name, to the Table Definition Fields. Select this checkbox to show the options to map the CSV Column Headers to the Table Definition fields.
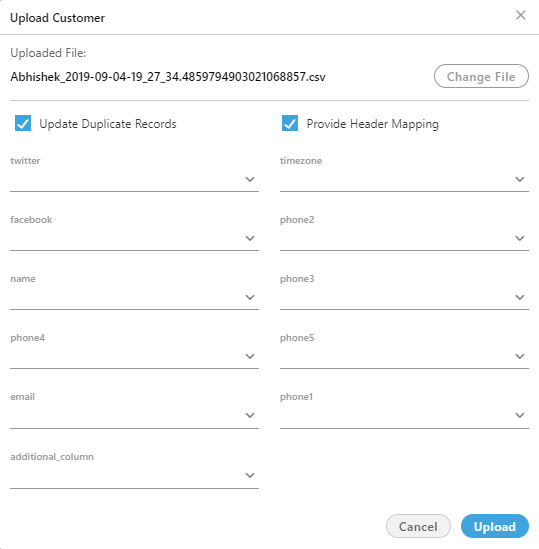
Figure: Map Headers of CSV with Table Definition Fields
The labels are Column Headers of CSV files whereas the Table Definition Fields are the values of drop-down menus.
If all Column Headers of the CSV file has the same name as that of Table Definition Fields, then the Voice-Admin can skip this option.
Ameyo Preprocessor will validate the data during the upload process. It can skip uploading some data and throw errors for any invalid data.
-
-
-
Export: Click this button to download the already uploaded Customer Data and save it in CSV file format on the disk.
-
Export and Extract: Click this button to download the already uploaded Customer Data, save it in CSV file format on the disk, and remove the downloaded Customer Data from the Ameyo System permanently.
-
-
Create a new Rule: It lets the Voice-Admin to create the new rules for the customer's data. Perform the following steps to create the new rule.
-
Click "New Rule" button. The following page is opened.
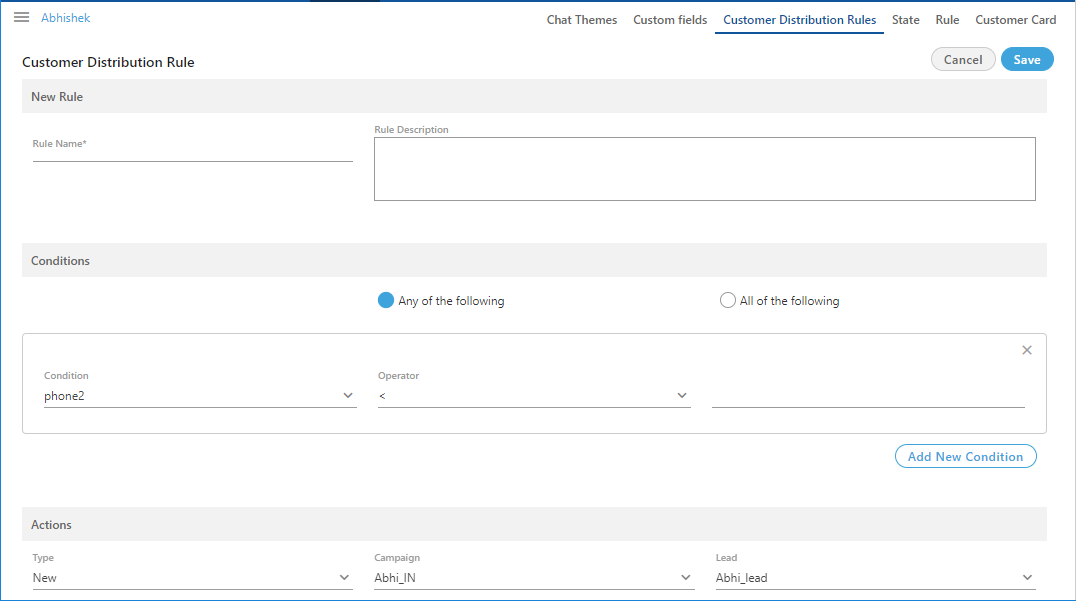
Figure: Create the new Rule
-
Provide the name of the rule in "Rule Name" column, through which you want to create the rule.
-
Enter the description of the rule in "Rule Description" textbox.
-
Click on the "Conditions" tab to provide the conditions. Select any of the following types of the condition from the drop-down list.
- timezone
- phone2
- name
- phone3
- phone4
- phone5
- phone1
After selecting the condition, you have to select any of the following operators in "Operator" drop-down menu.
- <
- =
- !=
- >
Provide the value in the RHS section which satisfies for the given condition.
The Voice-Admin can provide multiple conditions for the single rule. Click "Add New Condition" button to provide multiple conditions.
-
After providing the condition, now provide the action which will perform when the condition satisfies.
-
Select the type of the action from the drop-down list of "Types". The actions available to select are "New," "Update," and "Update and Migrate".
-
Select the campaign on which you want to upload the customer details, from the drop-down list of "Campaigns".
-
Select the lead on which you want to upload the data, from the "Lead" drop-down section.
-
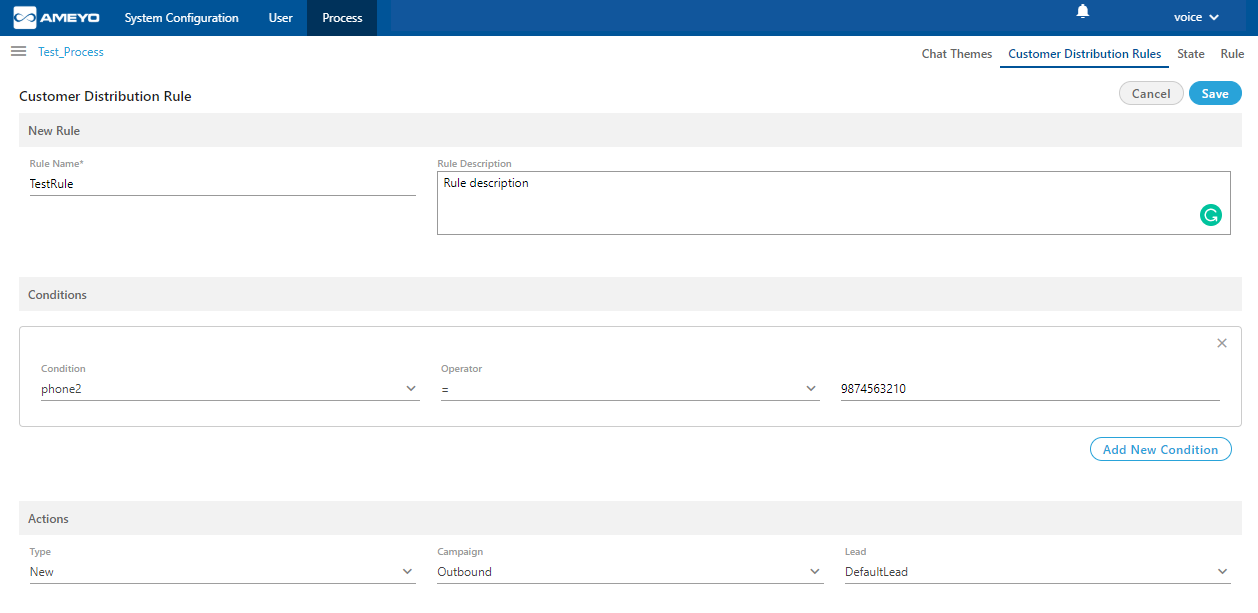
Figure: Sample Rule
-
-
After providing all the information, click "Save" button to create a new rule. Clicking save button redirects you to the main page of the customer rule.
-
-
Edit the Customer Distribution Rule: The Voice-Admin can edit the created rule as well. Click
 icon present in the actions column of the rule. The same page is opened as opened at the creation time of the rule.
Figure: Edit the Rule
The Voice-Admin can change all the information of the rule.
Click "Save" button after editing the rule.
-
Delete the Customer Distribution Rule: The Voice-Admin can also delete the customer distribution rules. Select the rule which you want to delete and click
 icon present in the actions column of the rule. A confirmation pop-up is arised.
Figure: Delete the Rule
Click "Yes" button to delete the rule, else click "No".
If you want to delete multiple rules, then select all the rules and click "Delete" button to delete all the rules at one click.
If the rule is deleted, then it can not be retrieved in any manner.
-
Disable the Customer Distribution Rule: The Voice-Admin can disable the enabled rule. Perform the following steps to disable the rule.
-
Select the rule, which you want to disable.
-
Toggle the
 switch present in the status column of the rule to disable the rule.
-
-
Enable the Customer Distribution Rule: The Voice-Admin can enable the disabled rule. Perform the following steps to enable the rule.
-
Click "View Disabled Rules" checkbox to see the list of the disabled rules.
-
Select the rule, which you want to enable.
-
Toggle the
 switch present in the status column of the rule to enable the rule.
-