System Settings Tab
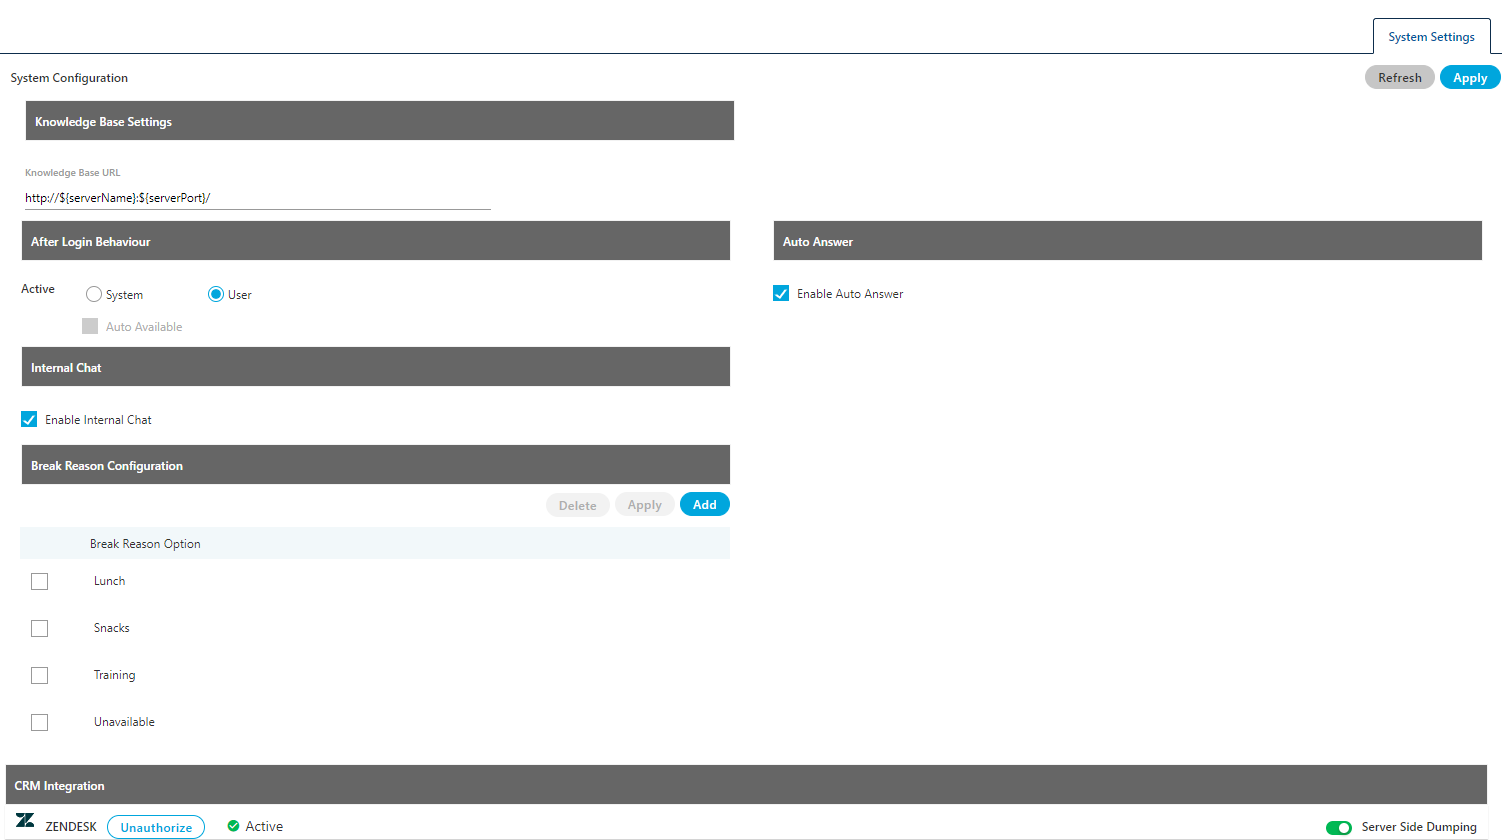
This tab contains the system settings, which are listed hereinbelow.

Figure: Settings Tab → System Settings
- Knowledge Base Settings: The Voice-Admin can define the knowledge base page URL here. Supervisor, agents, and other users will view this page on the Home screen of their workbenches.
Modify the value of "Knowledge Base URL" field. It's default value is given below.http://${serverName}:${serverPort}/
- After Login Behaviour : Using this feature, the Voice-Admin can define the after login behaviour. It contains the following two options. Any one of them can be selected only.
- System: The system should automatically make agent available. To make the agent automatically available, check "Auto Available" box.

Figure: System Auto-Available Option
- User: Select this option to let agent decide whether to make available or not.

Figure: User Available Option
- System: The system should automatically make agent available. To make the agent automatically available, check "Auto Available" box.
- Auto Answer: If "Enable Auto Answer" is checked then call will be auto-answered in all the campaigns of the contact center. Users with auto-call on status will automatically receive the auto-dialed and inbound calls and they do not have to answer each call manually.
Only first call offered to the user needs to be answered manually after that all calls thrown by dialer will be auto answered.

Figure: Auto-Answer and Internal Chat options
- (Licensable) Internal Chat : The Voice-Admin can enable or disable the internal chat. After enabling it, the Supervisor, Agents, and other users can use the internal chat to communicate with each other. A static chat icon will be displayed on the bottom right corner of the interface of every user.
CRM Integration: After implementing the OAuth for Single Sign-On with Zoho Apps (Zoho CRM and Zoho Desk), the Voice-Admin now have to authorize the access to the connecting Zoho App through the System Configuration in the Voice-Admin Console. Once done, the Call Start Time and Call Duration Time will recorded in the database and displayed on the User Interface.
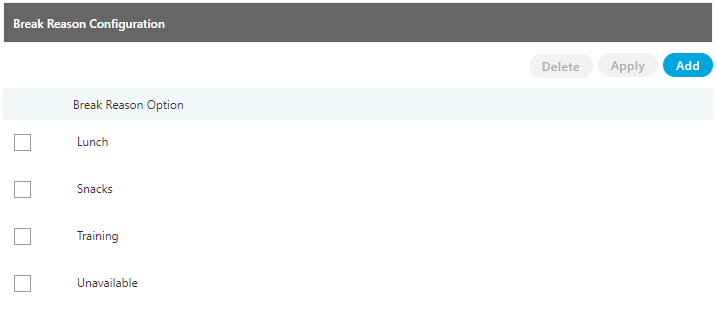
- (Licensable) Break Reasons: Voice-Admin can add the break reasons for the contact center. Created break reasons will be applied at system level and same will be visible to agents on Ameyo Web Access. While going on break, agents can select the respective break reason.
This feature is licensable, hence for further information on the same, contact Support team of Ameyo.

Figure: Break Reason Configuration
Perform following steps to add break reason.- To add a break reason, click on "Add" button.
- Enter the name of break reason.

Figure: Add a Break Reason
- Click "Apply" button to create the break reason.
- Select a break reason and click "Delete". A warning message is displayed on the screen.

Figure: Asking to delete a Break Reason
- Click "Yes" to delete the selected break reason.
Deleting a break reason will impact all users, queues, and campaigns where this break reason has been applied already. Make sure to modify their settings.
You cannot modify a break reason. Instead of it, delete a break and add a new one.
This feature is licensable, hence for further information on the same, contact Support team of Ameyo.