DNC Management
Supervisor can manage the DNC (Do Not Call) repository using this tab. The excluded numbers would not be dialed in Ameyo system. The DNC can be managed for an entire process, but not for a campaign specifically.
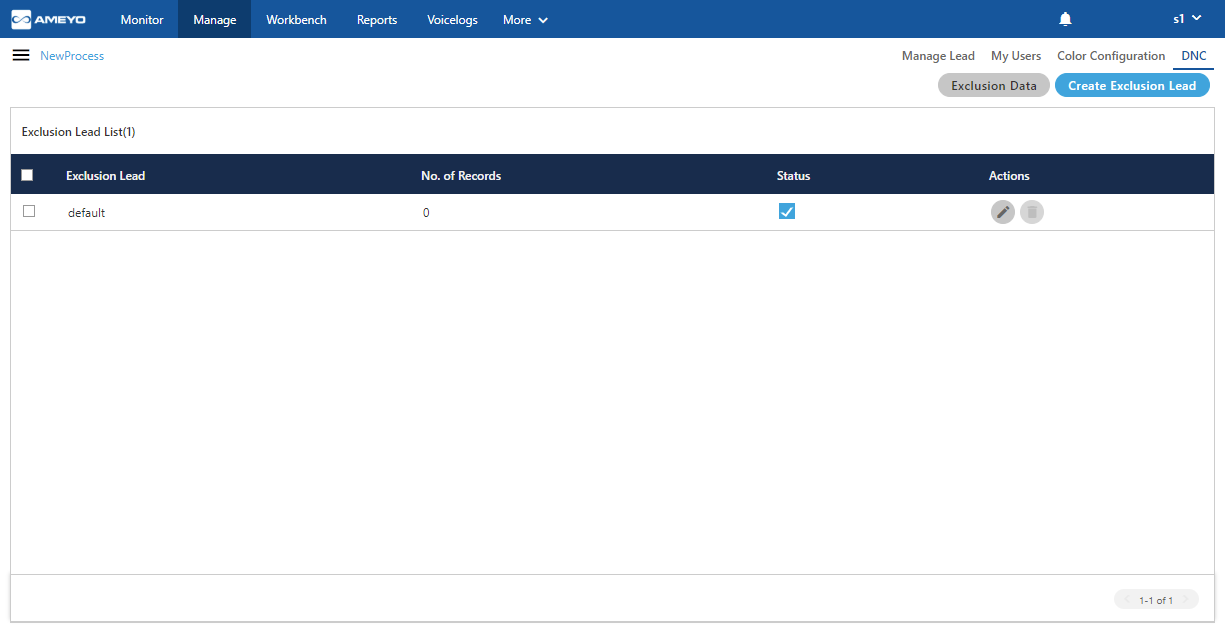
Figure: DNC Management
Only the administrator can create the Table Definition for a Process, mark anyone of its field as Primary, and map them to the Customer Attributes. While uploading the CSV for Customer Exclusion, the Supervisor has to map the column of CSV with that Table Definition Field, which is marked as Primary in the Table Definition.
Uploading exclusion through CSV based upon the Primary-marked Table Definition Field will work only with 9.4 and above versions of PostgreSQL. As we are supporting only PostgreSQL 10 in Ameyo Server 4.6 and 4.7, so we recommend to use PostgreSQL 10 for using this feature.
The front page of the DNC contains the following data.
Exclusion Lead: It shows the name of exclusion through which exclusion has been created.
No. of Records: It shows the total number of the records which has been uploaded while creating exclusion.
Status: It shows whether exclusion is enabled or not. Toggle the
 switch to enable or disable exclusion from here.
Actions: The supervisor can Edit or Delete exclusion from the Actions column.
There is a possibility that the supervisor has to upload the single phone number in DNC. In such cases, the supervisor has to create the CSV files. It means that you have to create and upload the CSV file even for a single number you want to add into the list of DNC.
Create an Exclusion
Perform the following steps to add the list of exclusion numbers, which will not be dialed in the Ameyo System.
-
Click "Create Exclusion Lead" button. It shows the following pop-up.
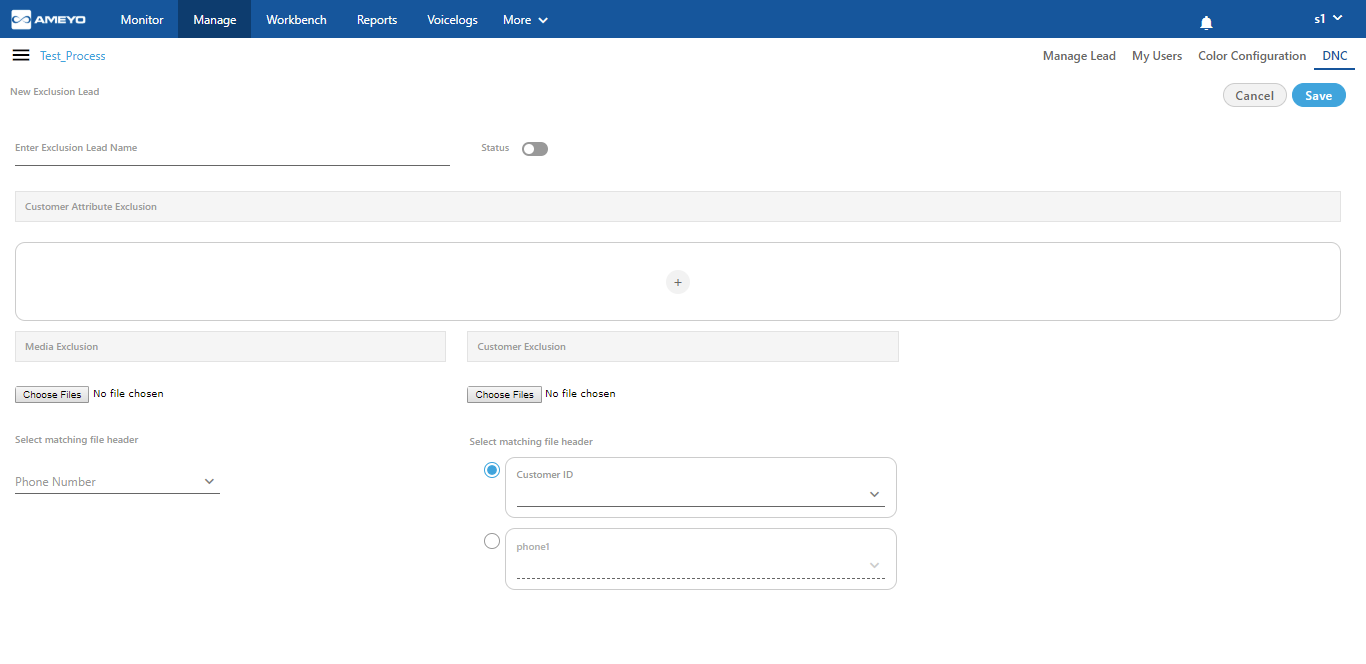
Figure: Adding an Exclusion
-
Enter Exclusion Lead Name: Enter the name of exclusion Lead.
-
Status: If the checkbox against "Enable" is checked then this exclusion lead status will be enabled else it will be disabled.
-
Types of Exclusions: Supervisor can add any of the following exclusions.
-
Attribute Exclusion: The Supervisor can add exclusion based on attribute name (phone number, time zone, name, and others). Perform the following steps.
-
Click "Add" to add the attributes for which exclusions will be setup.

Figure: Add Attribute
-
Here, the attribute will be the Table Definitions Columns, which are selected by the Administrator in its Console → "System" → "System Configuration" → "Table" → "Table".
-
Select any of the following attributes in the "Attribute" drop-down menu.
-
twitter
-
timezone
-
facebook
-
phone2
-
name
-
phone3
-
phone4
-
phone5
-
email
-
phone1
-
-
Select any of the following operators in the "Operator" drop-down menu.
-
equal to
-
less than
-
less than or equal to
-
greater than
-
greater than or equal to
-
not equal to
-
Like
-
Not Like
-
SQL Expression
-
-
Provide a value for the attribute. You can add multiple conditions, click "+" icon to add more attributes. To delete a condition, click on the "-" icon corresponding to that condition.
-
-
Media Exclusion: The Supervisor can upload the numbers in the respective lead which has to be added in DNC through "Media Exclusion". CSV file can have the Phone1 as a lead header.
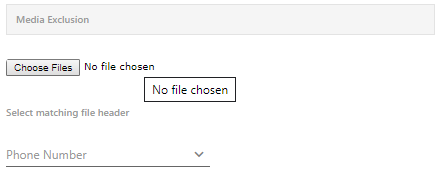
Figure: Media Exclusion
Perform the following steps.-
To upload the CSV file in the DNC lead, click on the "Choose Files" button.
-
Select the CSV file from the disk.
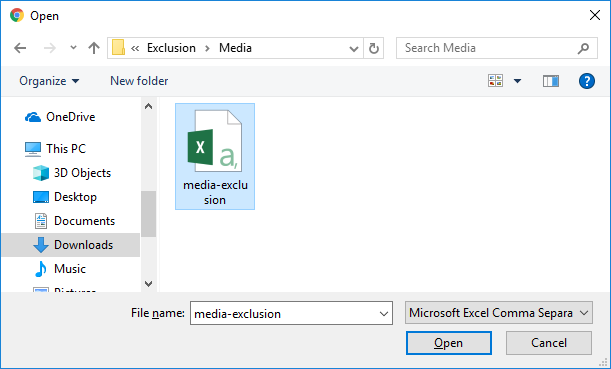
Figure: CSV File
-
It takes you back to the "DNC Tab".
Select the phone header primary field which has been provided at the time of data table creation by the administrator.
-
-
Customer Exclusion: The Supervisor can upload the customers in the respective lead which has to be added in DNC through "Customer Exclusion". CSV file can have the customer_id as a lead header.
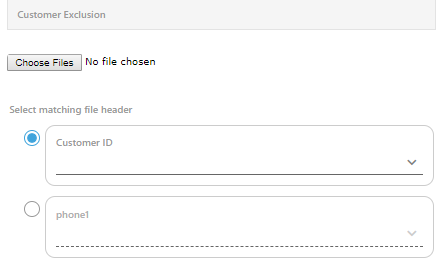
Figure: Customer Exclusion
Perform the following steps to add a Customer Exclusion.-
To upload the CSV file in the DNC lead, click on the "Choose Files" button.
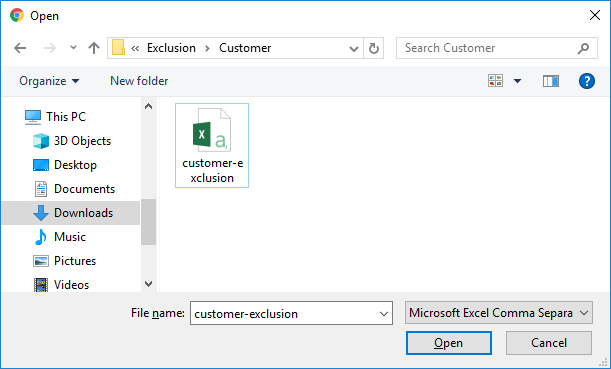
Figure: CSV File
-
Select the CSV file from the disk and click "Open".
-
It takes you back to the "DNC" Tab. Select the file matching header which is also the primary key for that data table provided by the administrator, by default the "Customer ID" is enabled.
-
-
Primary Key based Exclusion: You can notice the Table Definition Column, marked as Primary Key, in "Customer Exclusion" Section. You can enable it to upload the CSV file that contains the values of the Primary Table Definition Field. For example, if "phone1" is set as the Primary Table Definition Field, then you can upload the CSV containing the phone numbers to exclude the numbers from calling. Similarly, if "email1" is set as the Primary Definition Field, then you can upload the CSV containing the email addresses to exclude the email addresses from calling or communication.
Perform the following steps.
Click "Choose Files" button to upload the CSV.
Select the location where you have saved the CSV file.
Select the CSV file and click "Open."
Select the option that shows the Primary Table Definition field, such as "phone1" in our case.
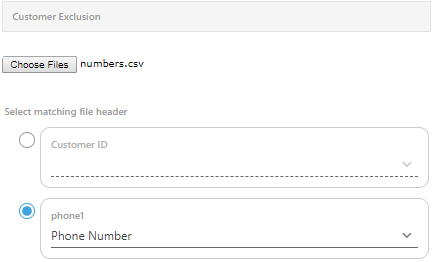
Figure: Upload CSV containing the values of Primary Table Definition field
After uploading the files, use the drop-down menu in the Primary Table Definition Field to select the matching header of CSV file.
Click "Save" to create the Customer Exclusion Lead.
Ameyo Preprocessor will validate the data during the upload process. It can skip uploading some data and throw errors for any invalid data.
Upload Failure Reasons
If the Supervisor is trying to upload another file except CSV, then an error is displayed on the screen that only CSV files are accepted. While uploading the CSV for excluding the Customer based upon the values of Primary Definition Field, Ameyo Preprocessor will validate the data and will skip uploading the invalid data.
After completing the upload process, the following pop-up is displayed that shows the number of successfully uploaded records, and the number failed to upload records.
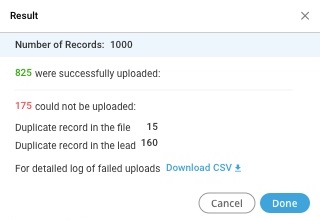
Figure: Summary of uploading the Customer Exclusion based on Primary Table Definition Field
The Administrator can click "Download CSV" link to download the CSV, which shows the errors encountered for every invalid record that was failed to be uploaded.
Notification of Uploading the Customer Exclusion based upon Primary Definition Field
Whenever a Supervisor uploads the Customer Data in any campaign, then a notification will be displayed to all Supervisors assigned to the same campaign.
-
Click "Save" to save exclusion lead.
Click "Cancel" to cancel the changes made.
Edit Exclusion
Click ![]() icon Actions column to edit any exclusion media.
icon Actions column to edit any exclusion media.
The same page has been opened which was opened at the time of the creation of exclusion.
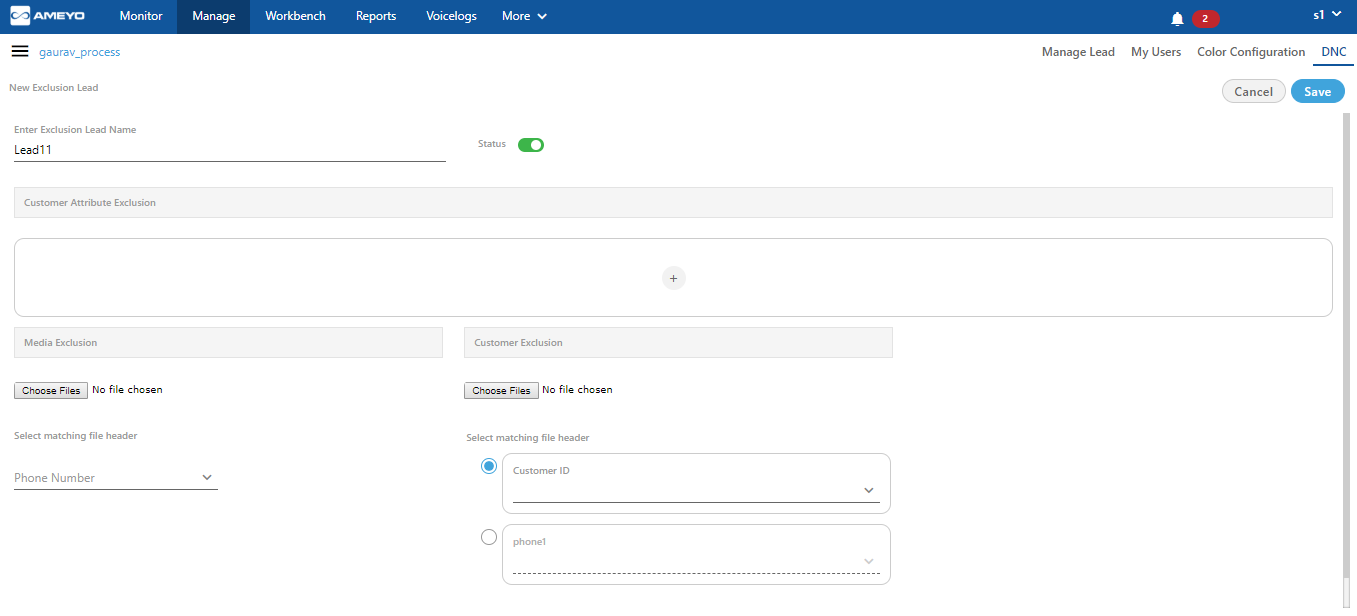
Figure: Editing an Exclusion
On the opened page, you can edit the name of the lead, change the status, customer attribute exclusion, media exclusion csv, and customer exclusion csv.
Delete exclusion
Click ![]() icon in Actions column to delete exclusion. A confirmation pop-up comes up.
icon in Actions column to delete exclusion. A confirmation pop-up comes up.

Figure: Deleting an Exclusion
Click "Yes" to confirm the deletion of exclusion, else click "No" button to undone the process.
Exclusion Data
This option lets the Supervisor to fetch exclusion Data for the selected lead. Perform the following steps.
-
Click on the "Exclusion Data" button. The following screen will start appearing.
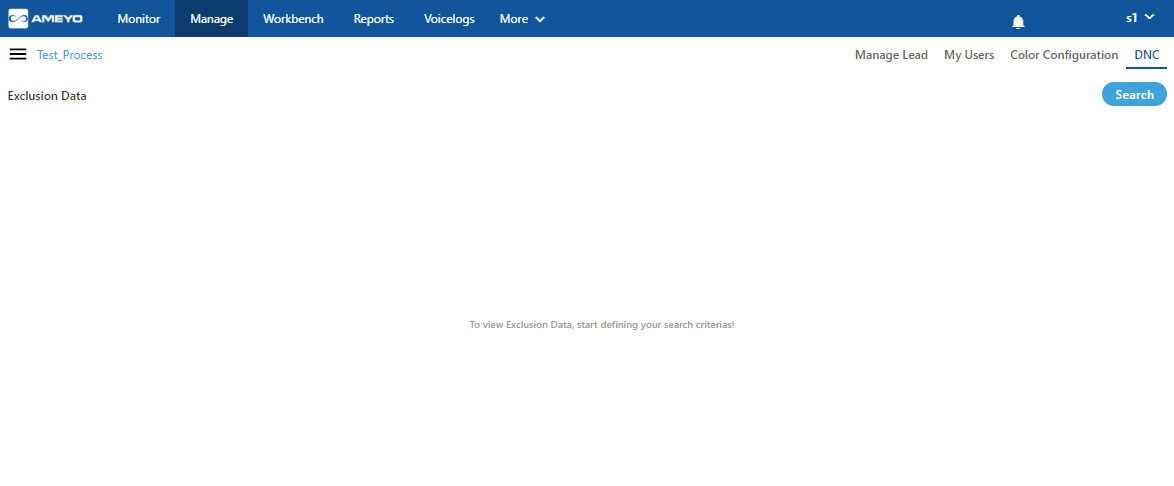
Figure: Exclusion Data
-
Click "Search" button present on the right top corner of the page. A pop-up is opened.
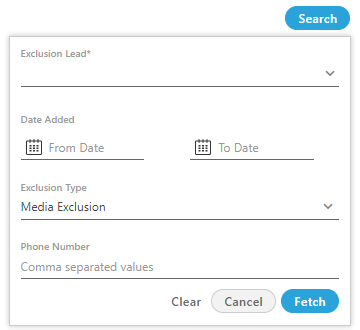
Figure: Search Exclusion Data
On the opened pop-up, provide the following information to search any exclusion data.
Select exclusion Lead name from the drop-down list.
Select the date range in which exclusion is being added.
Select the "Type of Exclusion" from the drop-down list. There are two types of exclusion available.
Media Exclusion: Select the "Media exclusion" type, if it is selected as the type of exclusion. After selecting it to provide the phone number which was created as the primary key during the creation time of exclusion.
Customer Exclusion: Select the "Customer exclusion" type, if it is selected as the type of exclusion. After selecting it, select the type of the primary key and provide the respective key in the textbox.
After providing all the information, click "Fetch" button to search exclusion list, "Cancel" button to cancel the searching operation, or "Clear" button to clear the provided searched data.
All the information of the customers according to the provided searched data is showing on the page.
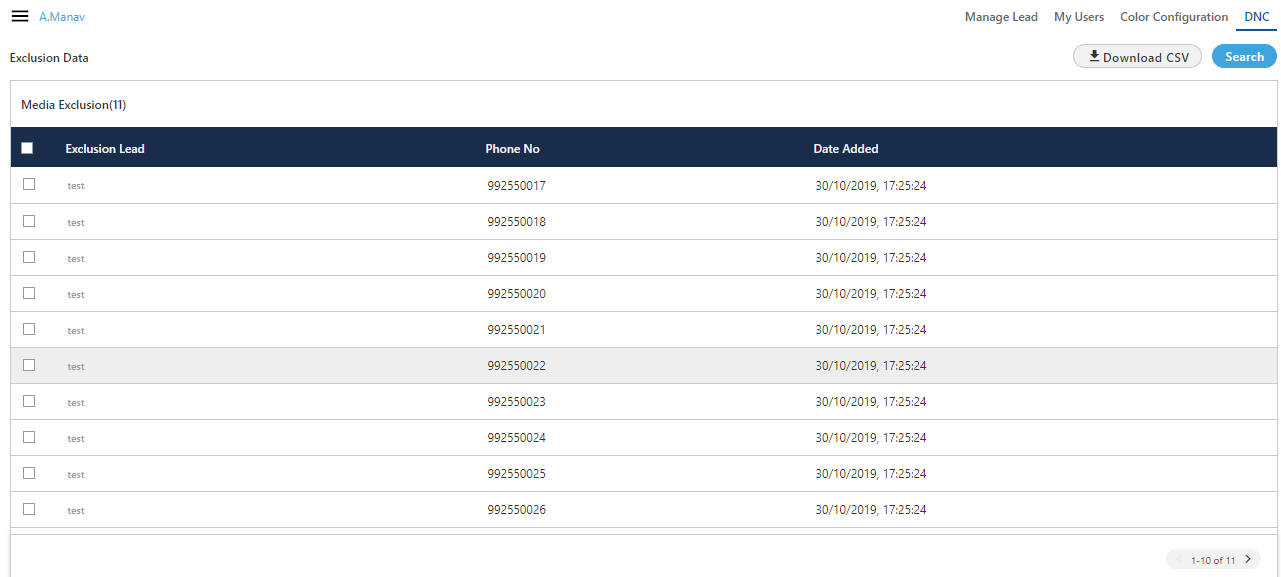
Figure: List of searched Exclusions Data
The total of 1000 records are fetched at a time. If the supervisor wants to see more records, then go to next page. If user tries to search more than 1000 records then, 10 records will be fetched at a time, and so after.
You can perform the following operations on the searched exclusion data.
Download Exclusion information as CSV: The supervisor can download the searched information of exclusion leads in CSV format. Select the numbers which you want to download and click "Download" button. A pop-up is opened.
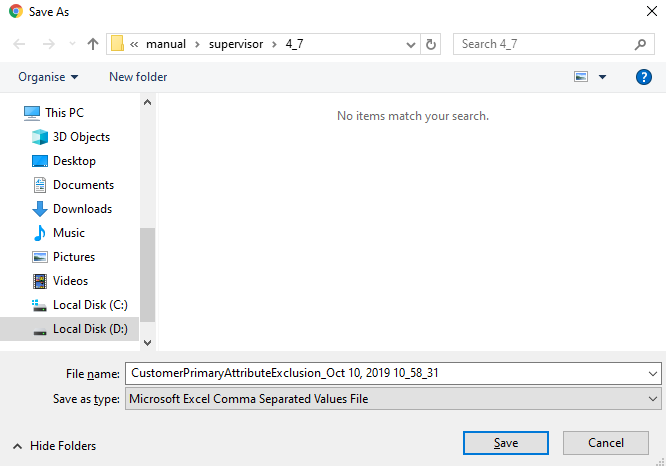
Figure: Download the List of searched Exclusions Data
You can change the name of the downloading file as well and then, click "Save" button to save the CSV file, else click "Cancel" button to cancel the downloading process.
The downloading pop-up depends upon the browser's settings.
Delete Exclusion Data: The supervisor can delete the searched exclusion data. Select exclusion data which you want to delete and then click
 icon to delete the data. A confirmation pop-up is opened.

Figure: Delete the searched Exclusion Data
Click "Yes" button to delete exclusion data permanently, else click "No" button.
Once the data is deleted form here, then it can not be retrieved anyhow.