Prompt Management
Supervisor can add, view, manage, and delete prompts here.

Figure: Prompt Management in a Campaign
It shows the prompts that are already added by the Administrator in its console at the Campaign-level.
Supervisor can perform the following operations here.
Add Prompt
The Supervisor can upload the voice prompts. Uploaded prompts will be used in the IVR.
Perform the following steps to create a Prompt.
-
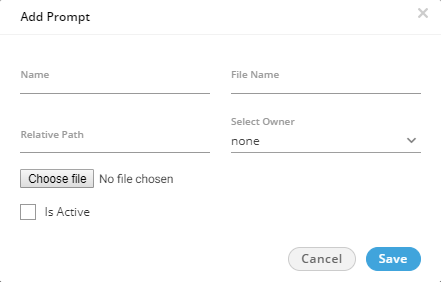
Click "Add Prompt" button in the top right corner. It shows the following pop-up.

Figure: Add a Prompt
-
Provide a name for the prompt.
-
Provide a name of the sound file, that you are going to upload. The name should contain the file's extension as well, like "welcome.wav".
-
Provide a name for a folder, in which the sound file will be stored. This folder will be created on the server and, if it exists already, the file will be saved into it.
-
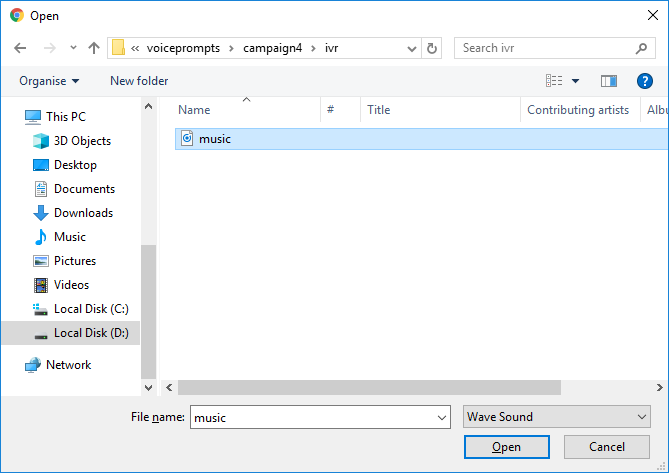
Click "Choose File" button to select the sound file from your disk. A pop-up comes up.

Figure: Upload Prompt
Select the file for the prompt and then click "Open" button to upload the file in "wave Sound" format.
-
Check "Is Active" to make this new prompt as Voice Prompt. Else uncheck it to disable it.
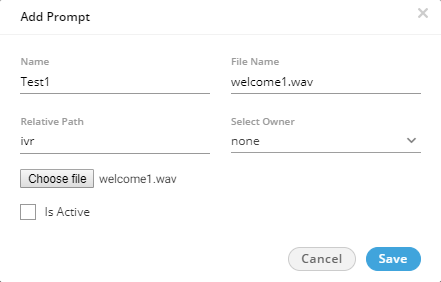
Following is a screenshot containing sample details.
Figure: Adding Prompt with Sample Details
-
Click "Save" to create the Prompt message.
Rather, you can click "Cancel" to not create a prompt.
You can create multiple prompts using these methods.
Compatibility List
The administrator can upload the prompts in MP3 and Wav format. The following are the supported compatibility list that the administrator can use.
MP3:
cbr mp3
vbr mp3
144kbps mp3
256kbps mp3
Wav:
PCM with any sampling rate (Hz) or bitrate (bits per sample * sampling rate)
Size: Up to 25 MB only
The call server will play only .wav files with 16-bit sample size, 8000 Hz, and mono-channel. Hence, as soon as you upload the prompt file, it gets converted to a call server compatible format. While adding a prompt, "File Name" field is used to store the prompt with the specified name on the call servers. Hence specify the name with extension .wav. Suppose the Administrator has provided the prompt name as "test", then the system will suffix ".wav" to that prompt name in "File Name" field automatically. If you specify any other extension, then an error message is displayed. This behavior keeps the user experience backward compatible, and the existing users shall not need to learn the usage again.
Edit Prompt
Supervisor can edit the added prompts as well. Perform the following steps.
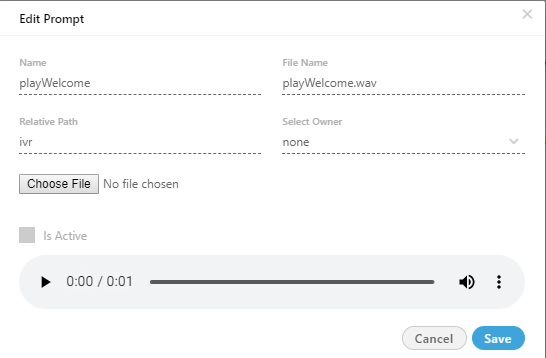
Select the prompt which you want to edit. A pop-up similar to adding a new prompt opens up.
Click "Choose file" button to upload the new prompt file in wave format. A pop-up comes up.
Select the prompt file in wave format and click open button.
After the prompt file selection, click "Save" button to save the changes made, else click cancel to cancel the changes.

Figure: Editing Prompt

Figure: Upload Prompt
Supervisor can not change any other information except the prompt file.
Delete Prompt
Perform the following steps to delete any prompt.
Select the prompt file which you want to delete.
Click "Delete" button present on the right top corner of the screen. A confirmation pop-up comes up.
Click "Yes" button to delete the prompt from the system permanently, else click "NO" button to revert back the deletion process.

Figure: Deletion Pop-up
Once you delete the prompt, it will delete from the system permanently and it can not be recovered in any manner.