Lead Management in Process
Here, the supervisor can create a lead, upload CSV containing phone numbers, modify it, and assign it to campaigns in the selected process.
Leads created and uploaded in a Process will not be available to another process.
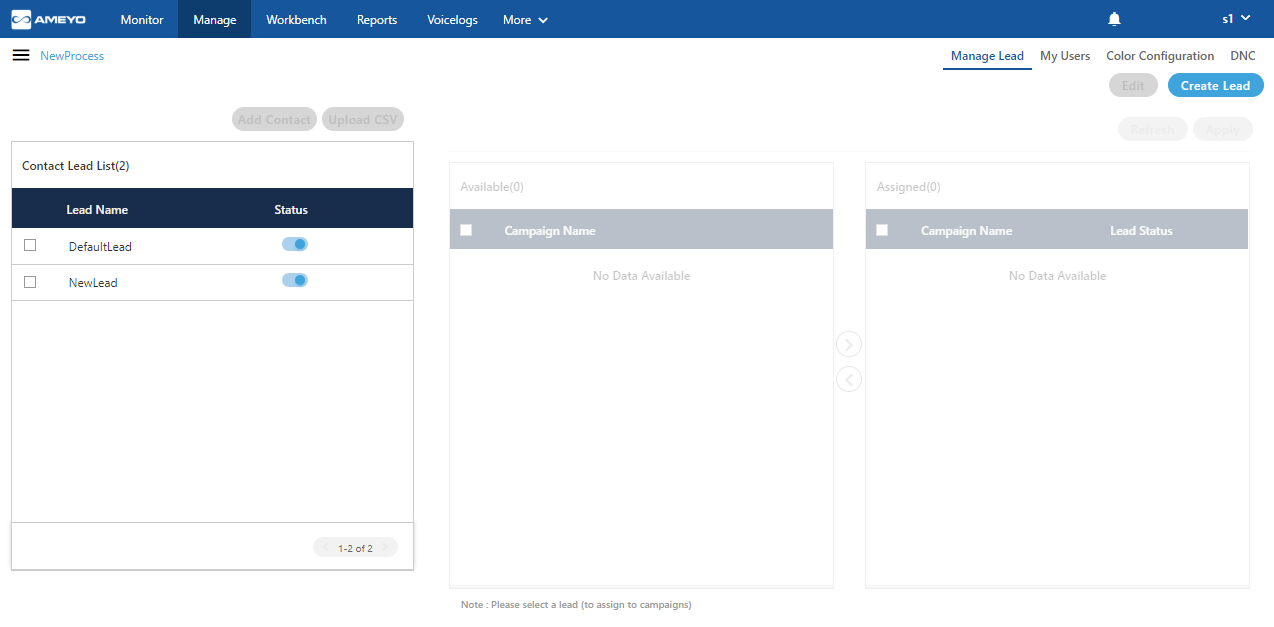
Figure: Manage Leads
Lead Creation
Lead can be created in a process, but not in the single campaign.
-
Click "Create Lead" button. It shows a pop-up, in which Supervisor has to fill the following details:
-
Lead Name
-
Time Zone
-
Lead Owner
-
Description
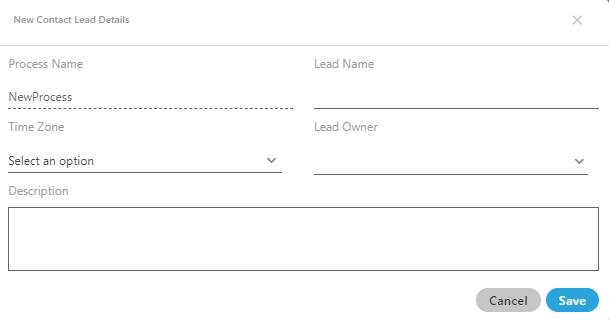
Figure: Create a Lead
-
-
Click "Save" to save the required changes.
Click "Cancel" to cancel the changes made.
The Supervisor can edit and delete the leads also. However, a deleted lead cannot be restored.
Multiple leads can be added here.
Edit Lead
Perform the following steps to edit any existing lead.
Select the lead which you want to edit and then click "Edit" button. The following modal is opened.
You can change all the fields like lead name, Timezone, Lead owner, and Description. But you can not change the Process name from here.
After changing the information, click "Save" button to save the changes; else click "Cancel" button.
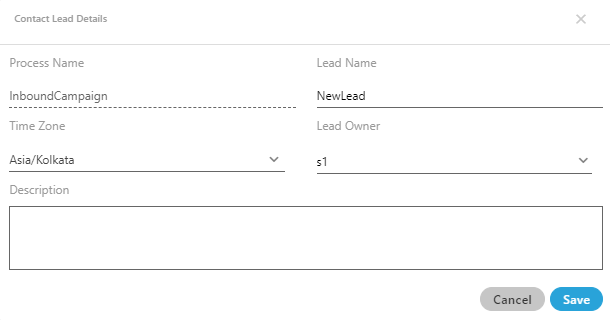
Figure: Edit the Lead
Delete a Lead
Perform the following steps to delete any lead.
Select the lead and click
 icon to delete the lead. A confirmation modal is opened.
Click "Yes" button to delete the lead; else click "No" button.

Figure: Delete Lead
Enable or Disable the Lead
The Supervisor can click  toggle switch to disable an enabled lead. To enable a disabled lead, click
  toggle switch.
Lead Upload
We recommend to upload a CSV file that contains the columns in the similar order as they are defined by the Administrator in its Console → "System Configuration" → "Table" → "Table" (Definition) and which has been used to create that process that you have selected here. Following is a screenshot of a sample CSV file.

Figure: Sample CSV File
Make sure to follow the rules of Character Type, Nullable, Unique Key, and Primary Key while entering the values in the CSV file as they are defined in the Table Definitions by the Administrator.To upload the CSV file in the lead, the supervisor has to perform the following steps.
-
Select the lead in which the file has to be uploaded.
-
Click "Upload CSV" to upload the CSV file using the following pop-up.
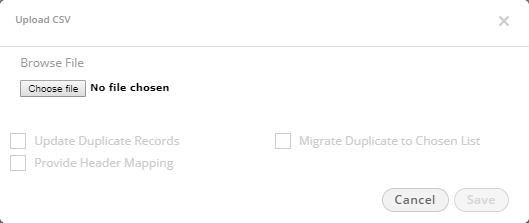
Figure: Upload Lead (Numbers) through a CSV file
-
To browse the file, click on "Choose File" button.
-
Select the CSV file from the disk using the following dialog box.
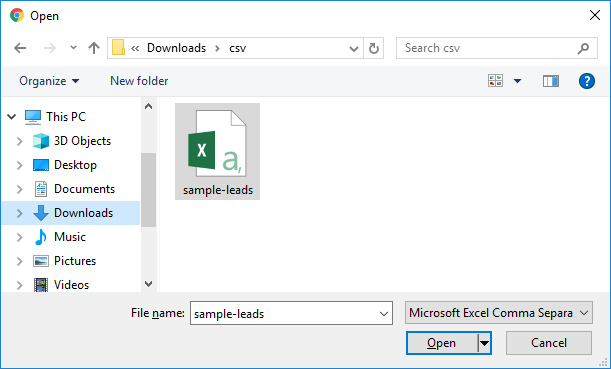
Figure: Select CSV file
-
Click "Open" to open the selected CSV file.
-
Now, the Supervisor can select these upload parameters.
-
Update Duplicate Records: This option can be used when there is a chance that the numbers of new lead may exist in the same lead or any other lead of the same campaign. By checking this option, if there is any record which is already uploaded in any of the lead of the same campaign, then that record will get updated with the new information (as uploaded in the new lead) within existing lead only.
-
If the record exists in the different lead, then the number will be updated in that lead only, and that number will not get uploaded in the new lead.
-
If the record exists in the same lead (in which the supervisor is trying to upload the new lead), then that number will get updated with the new information within the same lead.
-
-
Migrate Duplicate to Chosen List: This option can be used to migrate any of the existing records in a new lead. By checking this option, if there is any record which is already uploaded in any of the lead of same campaign, then that number will get migrated to new lead with the new information.
-
Provide header Mapping: The Supervisor can map the CSV file headers of lead with phone1, phone2, phone3, phone4, phone5, timezone and name headers.
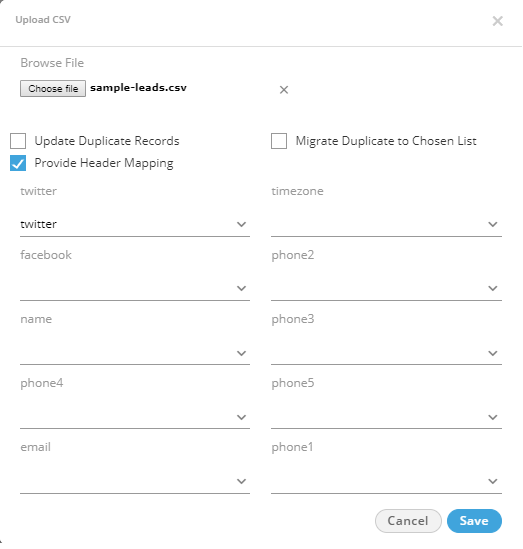
Figure: Mapping of Column Headers
You can select your column headers for the mapping.
-
-
Click "Save" to save the required changes.
Rather, click "Cancel" to not upload the leads from the CSV file.
Add a Contact
The Supervisor can also add a new contact in the lead by performing the below steps:
-
Select the required row.
-
Click on the "Add Contact" button.
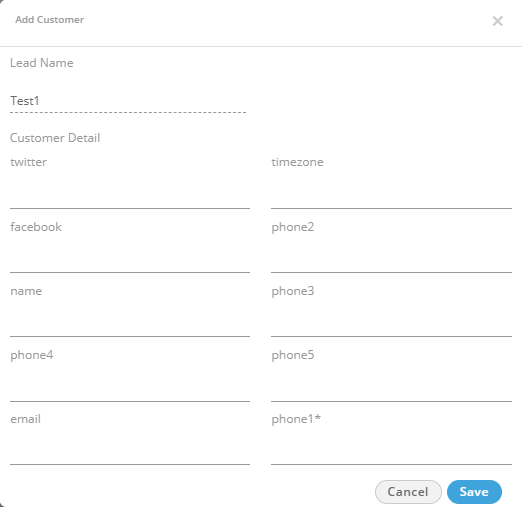
Figure: Add a Contact
-
Provide the values for the customer details in the fields such as name, email, phone1, twitter, and others.
-
Click "Save" to save the required changes.
Click "Cancel" to cancel the changes made.
Assign or Unassign Lead to Campaigns
Perform the following steps to assign or unassign the lead to the campaigns.
-
Select a lead, and it shows the campaigns on the right side.
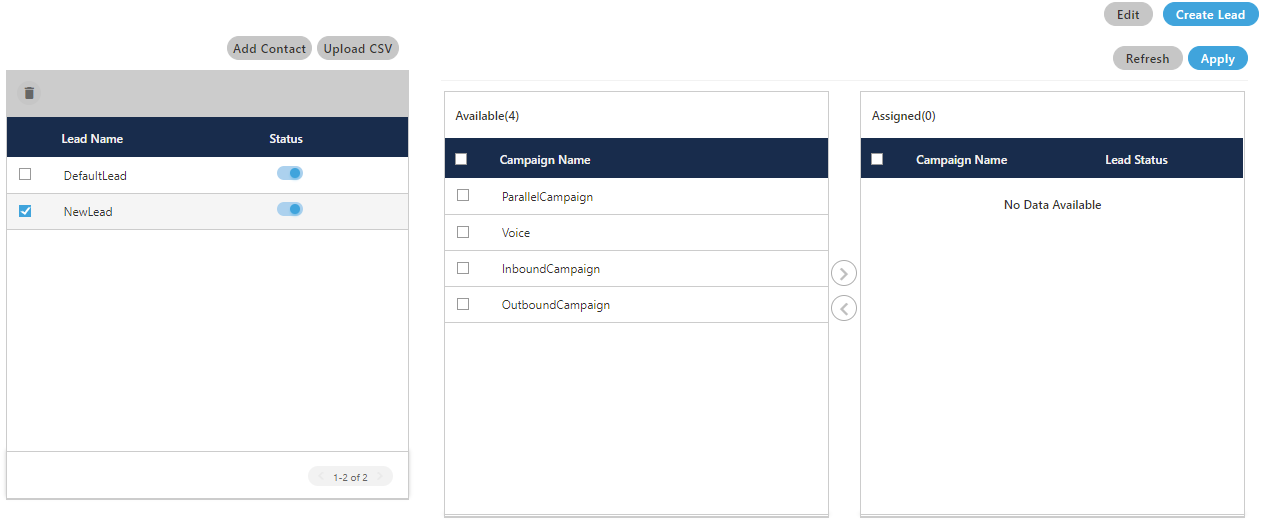
Figure: Assign or Un-assign Campaigns
-
Select the Campaigns in the "Available" section. You can click the checkbox given on top to select all campaigns.
You can also search for the usernames in the provided search box. -
Click
 icon to add the selected campaigns.
 -
Click "Apply" to apply the settings.
To unassign the lead from the campaigns, select the campaigns in "Assigned" section and click .![]() icon. Click "Apply" to apply the changes.
icon. Click "Apply" to apply the changes.
Suppose a scenario where "name" field in the Data Table Definition is optional and configured as a unique key. There is a lead list that contains multiple leads with blank customer names. When the lead was uploaded, then the first customer with the blank customer name was uploaded, but other customers with the blank names were not being uploaded.
This issue has been fixed now. Even if "name" field in the Data Table Definition is marked as optional and unique, still the lead list containing blank customer names will be uploaded.