Chat Campaign Routing
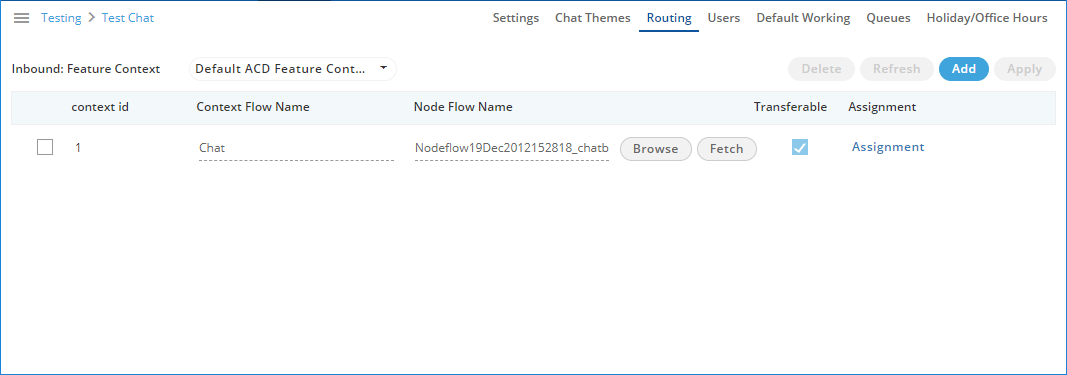
Routing Tab lets you create the nodeflows to manage the routing of communication (chat, call, or email) in a campaign.

Figure: Routing Management
Add a Nodeflow for Routing
Perform the following steps to create a nodeflow.
- Click "Add" button to create a nodeflow. It shows a new row in the white area just below the column header.

Figure: Add Context Flow
- Provide a name for the context flow.
- In the "Node Flow Name" column, you have to upload either a .nodeflow or .anfx flow.
Service Engineer will provide you the required nodeflow files.
Click "Browse" to open a nodeflow file. Select the location where the file stored. Select the required file and click "Open". - Check "Transferable" if you want to transfer the call from this nodeflow to another nodeflow.
- Click "Apply" to add the nodeflow.
Assign Nodeflow to a Queue
Perform the following steps to assign a nodeflow to a queue in the campaign.
- Check the box to select a queue.
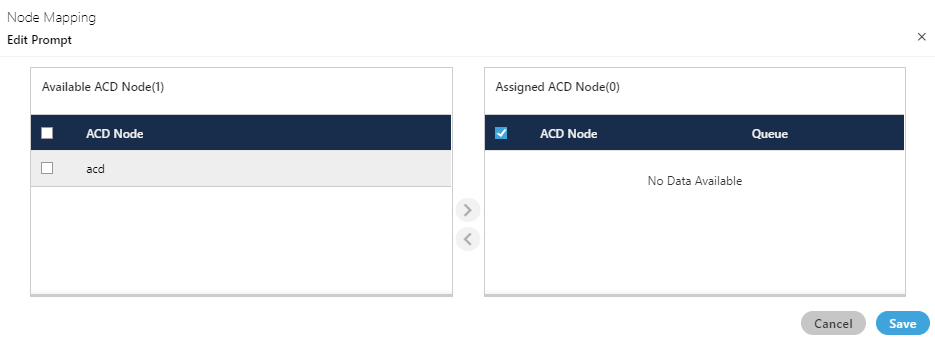
- Click "Assignment" to assign this nodeflow to a queue. It shows the following pop-up.

Figure: Assign Nodeflow to a Queue
- Select "ACD" node in "Available ACD Node" section, and click
 icon.
icon. - Select the nodeflow in "Assigned ACD Node" section.
- In "Queue" drop-down menu, select the queue to which you want to assign this ndoeflow.
- Click "Save" to assign the nodeflow to the selected queue. It takes you back to "Routing" Tab.
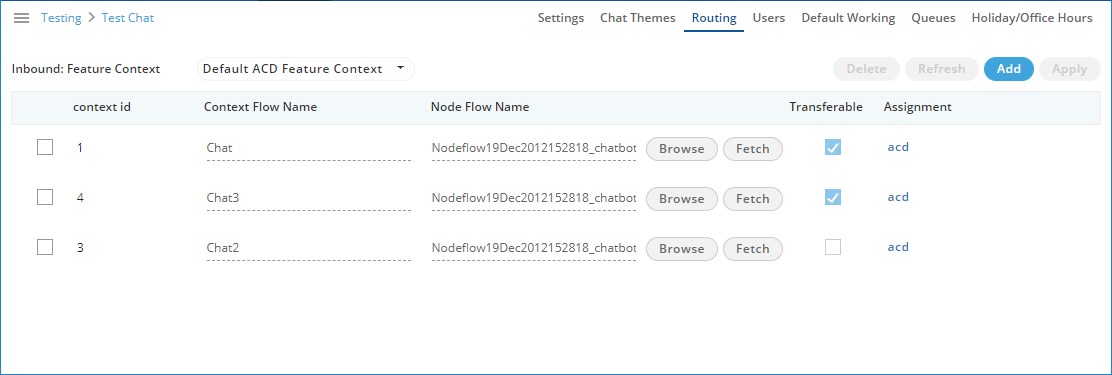
You can perform the same steps to create the nodeflow and to assign it to a queue.

Figure: Added Nodeflows
Edit Routing
Select the routing which you want to edit. After selecting it, the user can change the "Context Flow name," change the "Node Flow" and assignment of queues in it.
After editing the details, click "Apply" button to save the changes made.
Delete Routing
Select the Routing which you want to delete and click "Delete" button. A confirmation pop-up is arised.

Figure: Confirmation pop-up
Click "Yes" button to delete the routing, else click "No" button.