Configuration
Step1 - Install UTC Connector In Leadsquared
- Next, hover the cursor over the settings
 icon and click Configure.
 - Click the Add New Connector button.
- Enter the name Ameyo for the new connector , then click Add.

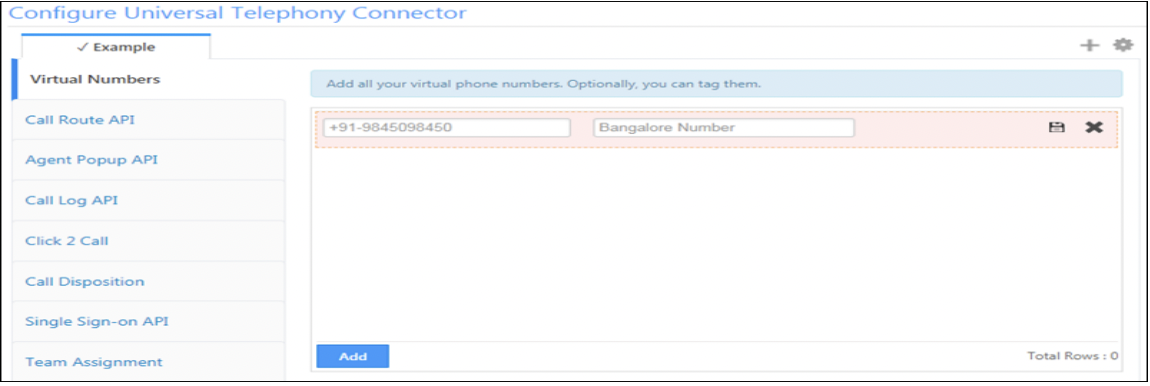
Virtual Numbers
Use this section to add one or more virtual numbers for the connector you’re configuring. You can also tag them if you like. Click the Save  icon to save a virtual number andclick Add to add another number.
Step2 : Install Ameyo Leadsquared App
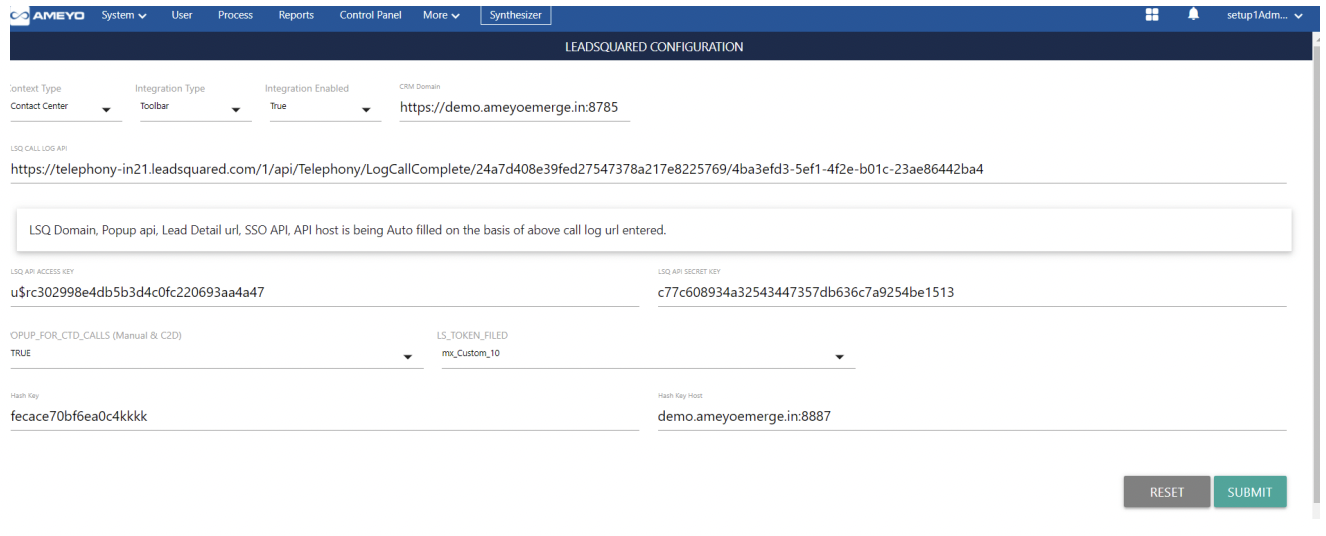
- Login through Admin Account in Ameyo and Go to More -> LeadsquaredConfigApp (Thisapp needs to enable by Ameyo team)
- Now configure the Leadsquared App with the details.
- Context Type - It should be Contact Centre
- Integration Type - It should be Toolbar
- Integration Enabled - It should be True
- CRM Domain - It should be Ameyo CRM domain Where LSQ Backend Module is deployed in Ameyo.
- Call log API - Put Call Log API URL (Login into LS Account -> Go to UTC Connector -> Call Log API -> Copy the Call Log API URL)
- Configure Access Key & Secret Key - (Login into LS Account -> My Account > Settings > API and Webhooks),
- Hash Key - Ameyo API Hash key (Need generate Hash key and put into it and same hash key should be configured in Ameyo database for CC)
- Hash Key Host - Ameyo API hash Key Host (Need to put hash key host and same hash key host should be configure in ameyo database for the CC)
- Click on submit to save the configuration
https://help.leadsquared.com/how-do-i-obtain-api-access-keys-in-leadsquared
Step3 : Configure Click To Dial API in UTC Connector
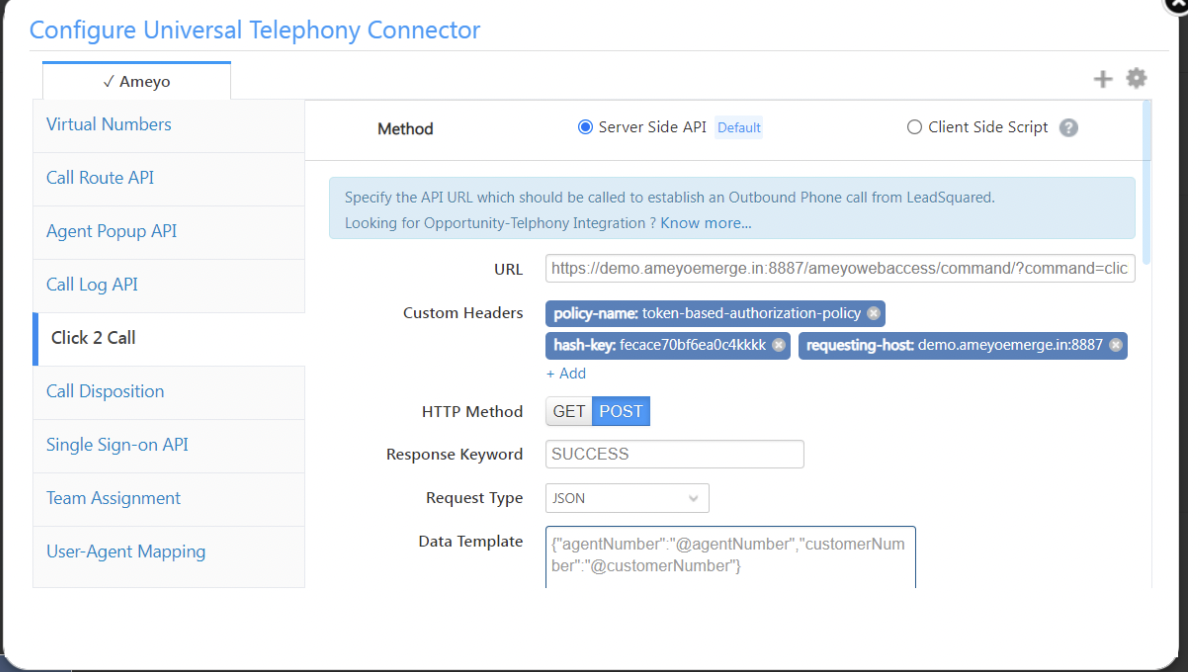
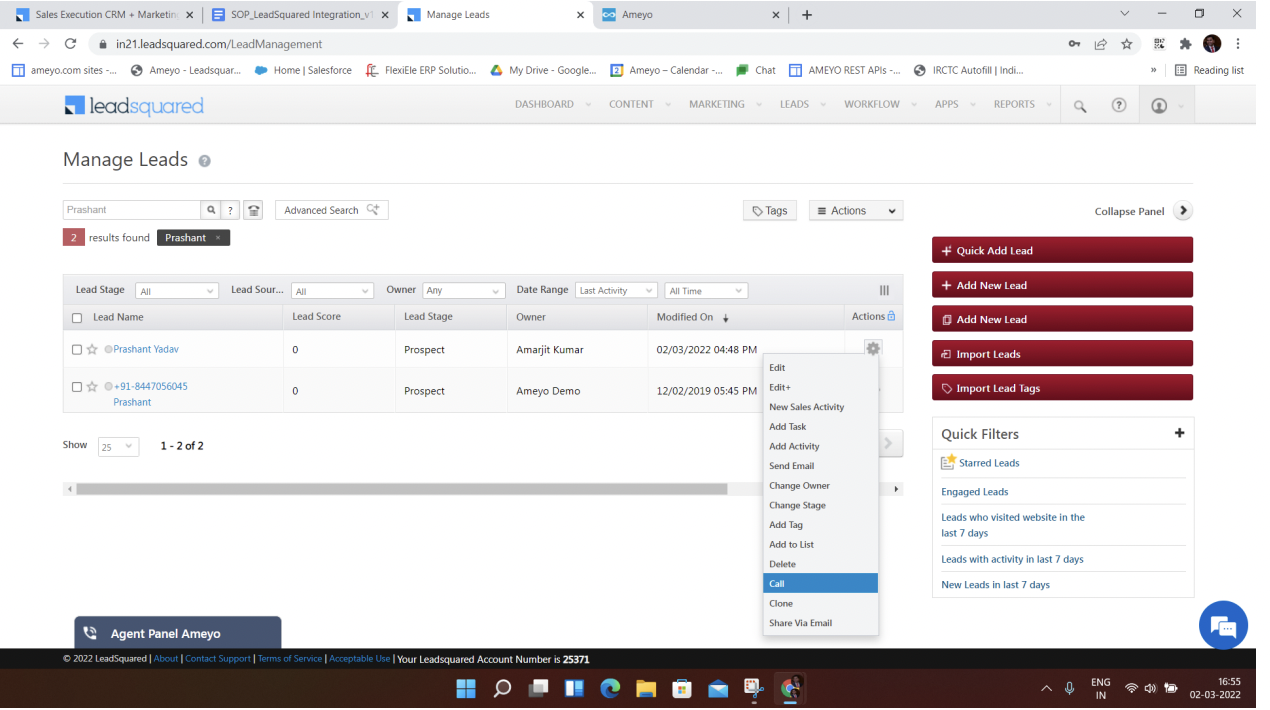
- Go TO UTC Connector -> Click 2 Call
- Put Below URL :
- Add below headers
- Select the HTTP method : POST
- Enter the response keyword: SUCCESS.
- Enable click to call feature for users by selecting the checkbox.
Protocol://IP/Domain Port/ameyowebaccess/command/?command=clickToD
ialWithToken&data={"phone":"@customerNumber","userId":"@agentEmail","sh
ouldAddCustomer":false,"additionalParams":{"LS":true,"shouldAutoSelectC
ampaign":true}}
policy-name: token-based-authorization-policy
hash-key: hash Key configured in Ameyo LSQ App
requesting-host: requesting-host configured in LSQ App
Step4 : Configure Agent Popup API
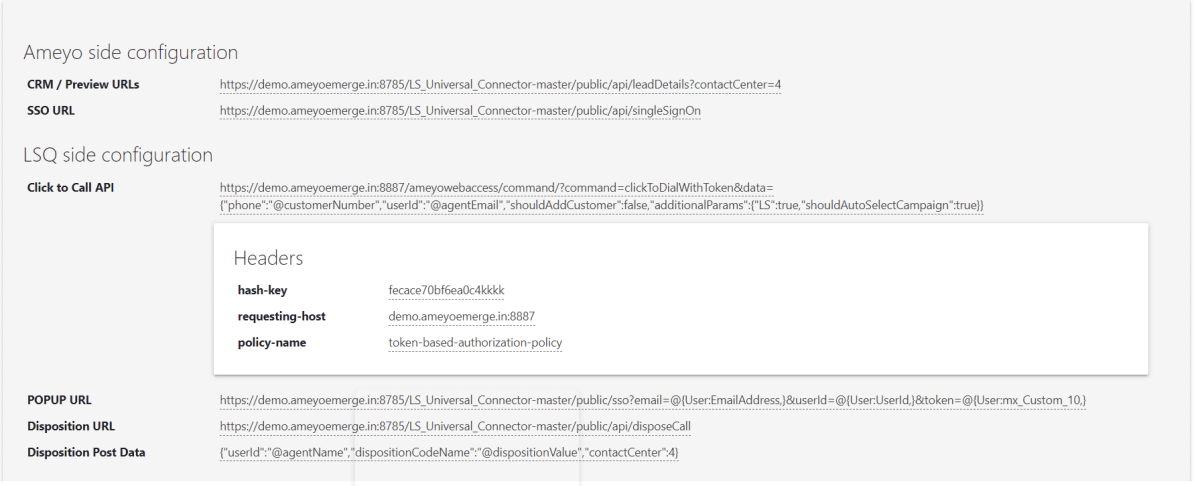
- Click on Configuration Data in Ameyo Leadquared App
- Copy the POPUP URL
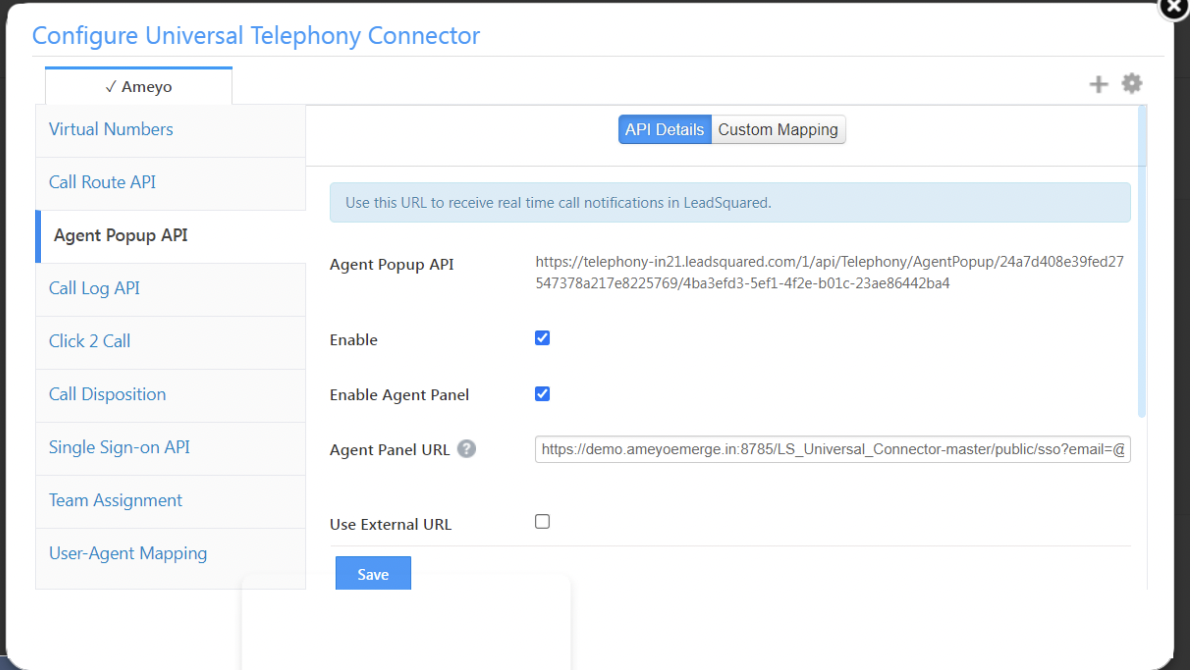
- Go to Leadsquared Account -> UTC Connector -> Agent Popup API
- Paste URL under Agent Panel URL
Step5 : Configure Call Disposition
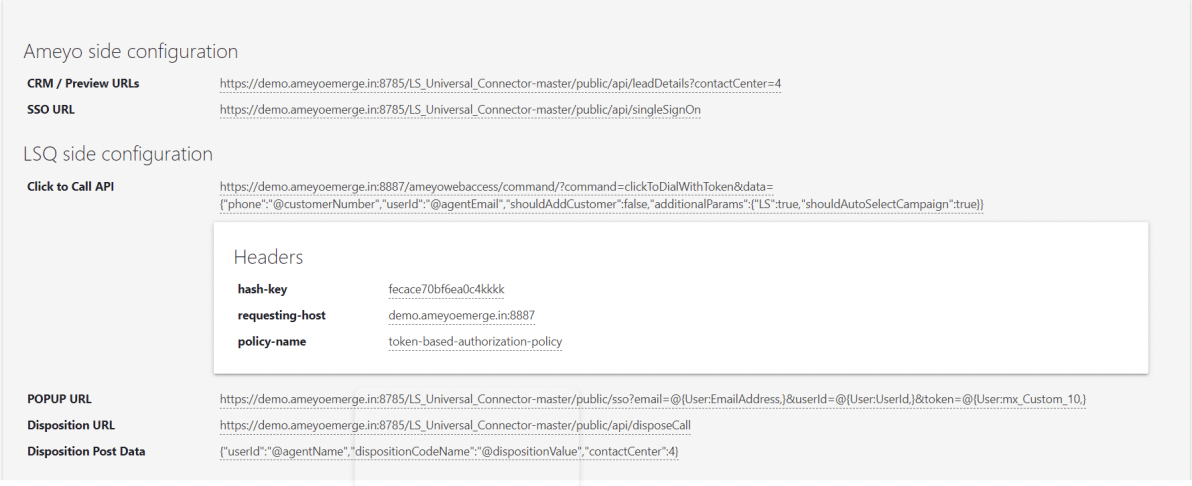
- Click on Configuration Data in Ameyo Leadquared App
- Copy the Disposition URL and Disposition Post Data
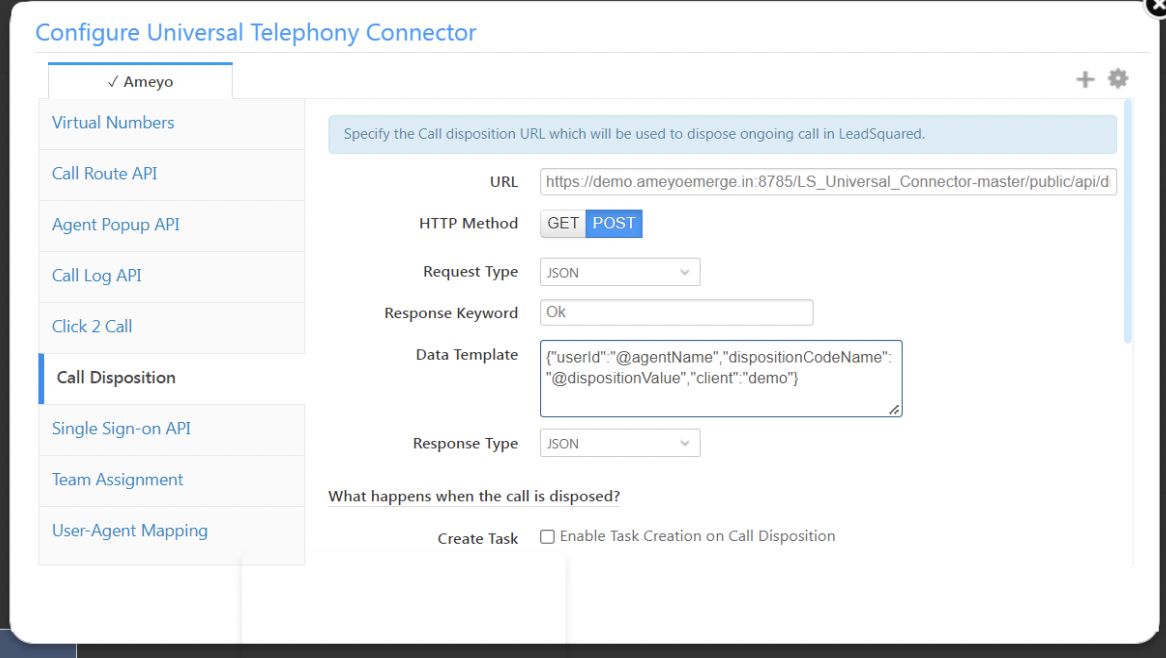
- Go to Call Disposition under UTC Connector (in LS)
- Paste Disposition URL in URL
- Select HTTP Method - POST
- Select Request Type - JSON
- Put Response Keyword - Ok
- Paste Disposition Post Data in Data Template
- Select Response Type - JSON
- Select Default Lead Field - Disposition (Need to create disposition field with all disposition values, If already created with different name then you can select that also)
Step6 : Call Log Configuration
- Download the postprocessing node-flow from Leadsquared App
- Change the CRM Domain and upload the node-flow in Advance setting
Step7 : Additional Configuration
- Update the agent number in profile for each agent.
- Enable agent popup in profile for each agent.
- Set the token in “custom field 10” under the agent profile for each agent.
- Create a custom dropdown field in lead and configured the disposition list as per Ameyo, and assign the same in the disposition panel in UTC connector.
(Refer Link to create customlead field)
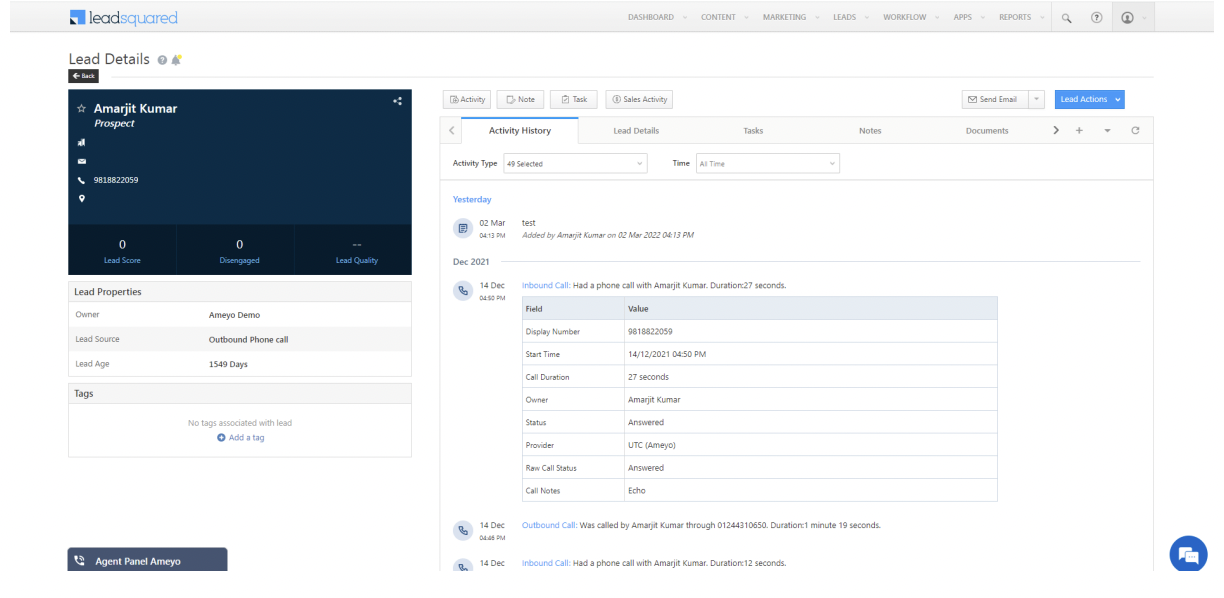
Reference Screenshots :
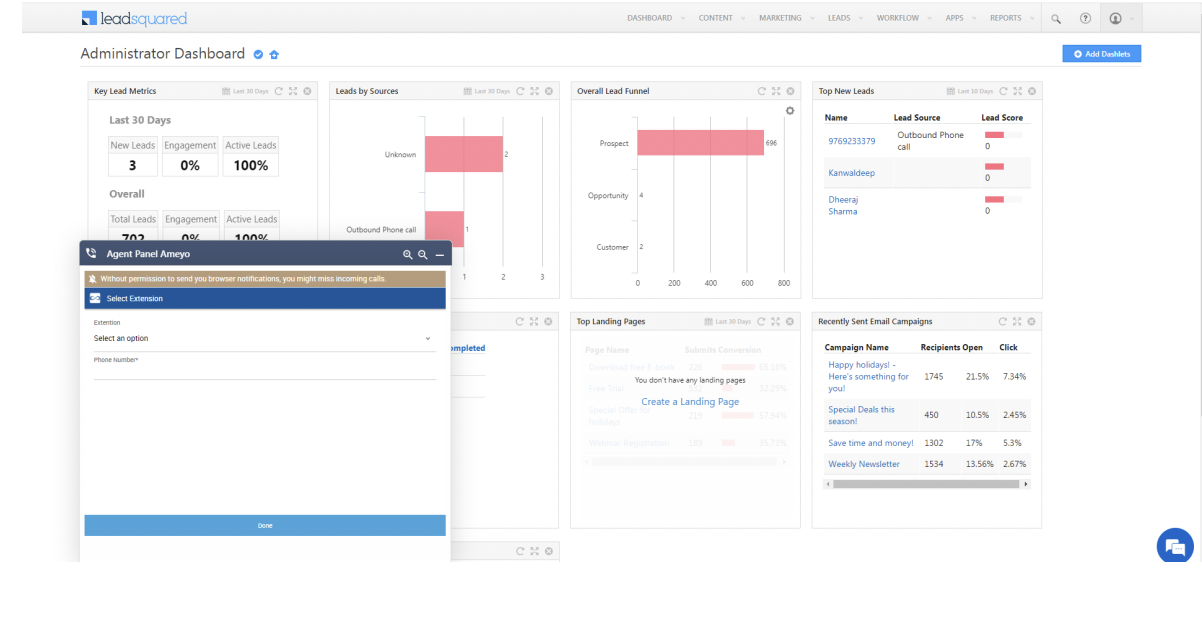
Single Sign On
Click To Call
Agent Popup
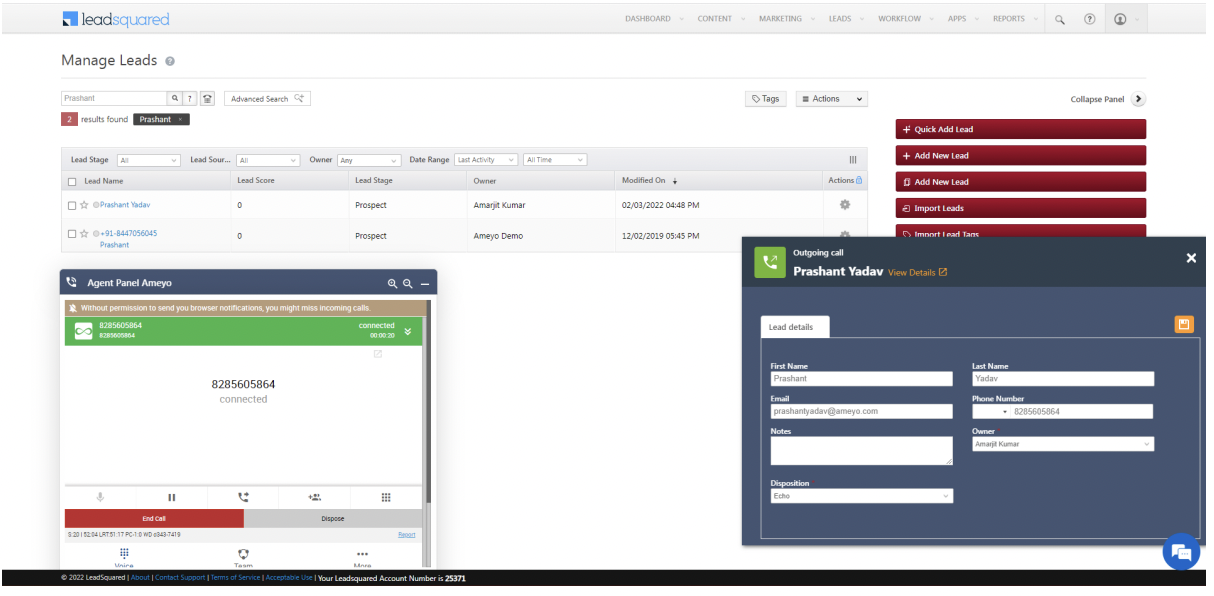
Call Disposition

Call Log
