Interaction Campaign Settings
In the left navigation bar of Process Tab, you can select an Interaction Campaign to view its settings.
The changes made in settings of one Interaction Campaign will be applicable to that campaign itself. They will not be applicable on other similar (interaction) and different (non-interaction) campaigns.
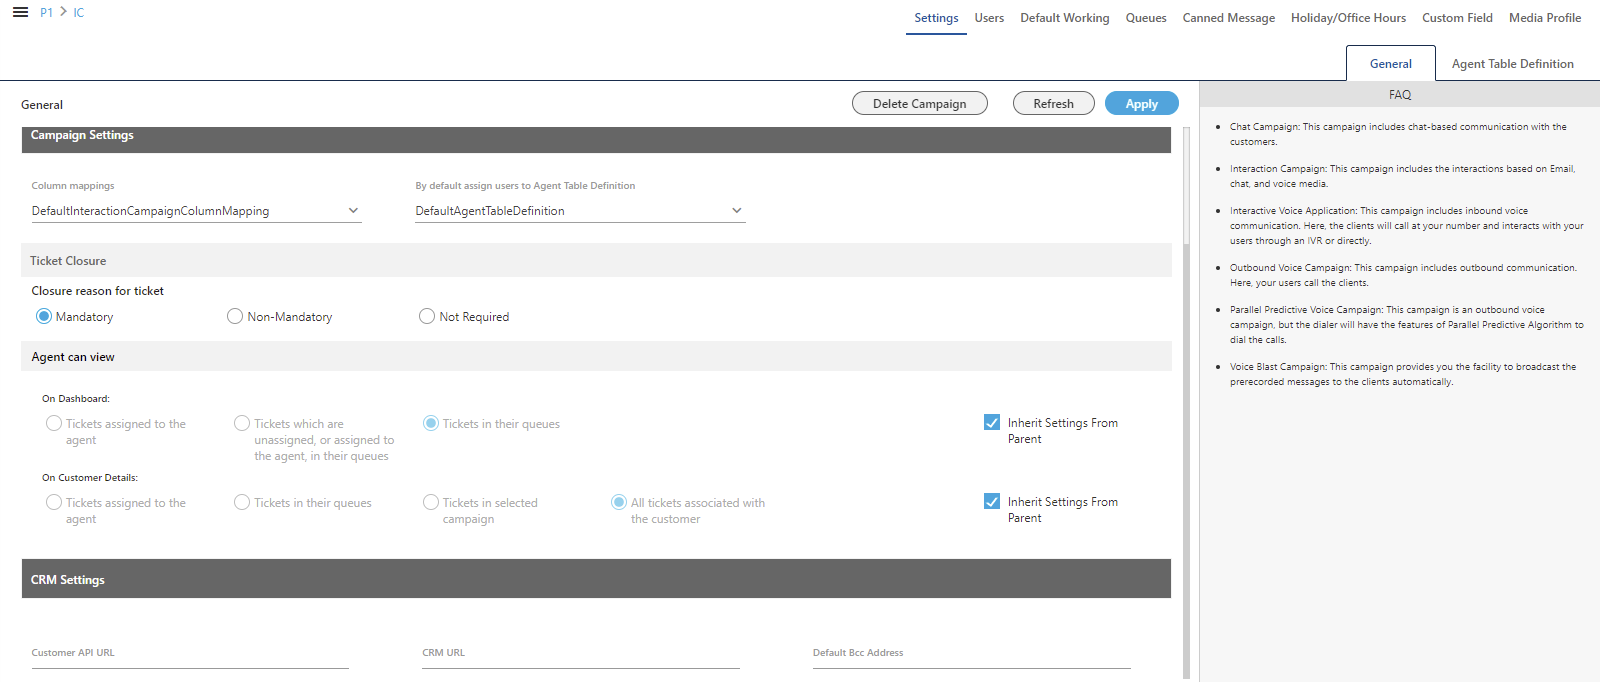
Figure: Settings of Interaction Campaign
At the right side of the campaign settings page, some of the commonly asked definitions of settings are defined. You can refer to those definitions.
The proxy server with the Email based services can be used. The administrator has to configure the proxy server, named as nginx-based Proxy Support . For further information contact Ameyo Support team.
It contains the following tabs.
- Settings → General
- Settings → Agent Table Definition
- Queues
- Users
- Default Working
- Holiday/Office Hours
- Canned Messages
- Custom Field
- Media Profile
General Settings of Interaction Campaign
This tab contains only "General Settings", which are divided into the following sections.
Campaign Details
These are the same details, which you have provided while creating this campaign. You can only change the campaign name here.
Campaign Settings
It contains the following settings.
Agent can view
This setting lets you allow the agents to view the tickets of others or not.
- On Dashboard: It lets you allow or disallow the agents to view the tickets of other agents on the dashboard. You can check "Inherit from Parent" to inherit this setting from the parent. If you uncheck it, then you can select any of the following values for this campaign.
- Tickets assigned to the agent: Select it to let the agent view only those tickets that are assigned to the agent.
- Tickets assigned to the agent and all unassigned tickets: Select it to let the agent view all unassigned tickets and those tickets that are assigned to the agent.
- All Tickets: Select it to let the agent view all tickets such as assigned tickets to the agent itself, unassigned tickets, and tickets assigned to other agents.
- On Customer Details: It lets you allow or disallow the agents to view the tickets of other agents on the customer details. You can check "Inherit from Parent" to inherit this setting from the parent. If you uncheck it, then you can select any of the following values for this campaign.
- Tickets assigned to the agent: Select it to let the agent view only those tickets that are assigned to the agent.
- Tickets assigned to the agent and all unassigned tickets: Select it to let the agent view all unassigned tickets and those tickets that are assigned to the agent.
- All Tickets: Select it to let the agent view all tickets such as assigned tickets to the agent itself, unassigned tickets, and tickets assigned to other agents.
Closure Reason of Tickets
It is a new setting named "Closure Reason for ticket", which allows the Voice-Admin to specify whether the users have to provide the closure reason while closing the ticket or not. It contains the following values.
- Mandatory: Select it to make it mandatory for the users to provide a closure reason while closing the ticket.
- Non-Mandatory: Select it to make it optional for the users to provide a closure reason while closing the ticket. The agent can skip the step to provide the closure reason and close the ticket directly.
- Not Required: Select it to make it unnecessary (not required at all) for the users to provide a closure reason while closing the ticket. The option to ask for a closure reason will not appear at all while closing any ticket.
Column Mappings
Select a different column mapping here.
By default assign users to Agent Table Definition
Here, you can select the default Agent Table Definition for this campaign.
CRM Settings
These are the same settings, which you have provided while creating this campaign. You can modify all of its fields here.
Click here to know more about the Campaign Details and CRM Settings for this campaign.
Default BCC Address
You can provide an email address to which all emails will be sent through BCC field.
After modifying the settings, click "Apply" on top to apply these settings. Else, you can click "Refresh" to discard the changes.
Users
Here, you can assign and unassign the users to this campaign. This tab has already been explained in the Chat Campaign Settings. Know more...
We recommend that Ameyo Users such as Professional Agent, Execute, and Supervisor should select only one Interaction Campaign during and after their logon. Selecting Multiple Interaction Campaigns can create some issues. The option to select Multiple Interaction Campagins have been removed already in the later versions of Ameyo AppServer.
Therefore, we recommend the Voice-Admin to assign the unique users to an Interaction Campaign so that one user is assigned to only one Interaction Campaign.
Agent Table Definition
This tab allows you to select the default Agent Table Definition for the campaign and assign the users to the selected Agent Table Definition. Know more...
Default Working
Here, you can select the users who will be logged in to this campaign, by default, and will not receive the prompt to select the campaign. This tab has already been explained in the Chat Campaign Settings. Know more...
Holiday/Office Hours
Here, you can define the holidays, office hours, and non-working hours for this campaign. This tab has already been explained in "System Configuration". Know more...
Canned Messages
This Tab lets you assign and unassign the canned messages to this campaign. You have created the canned messages at the System Level and the same will be shown here. Refer to "Canned Messages" in System Configuration to know the steps to create the canned messages.
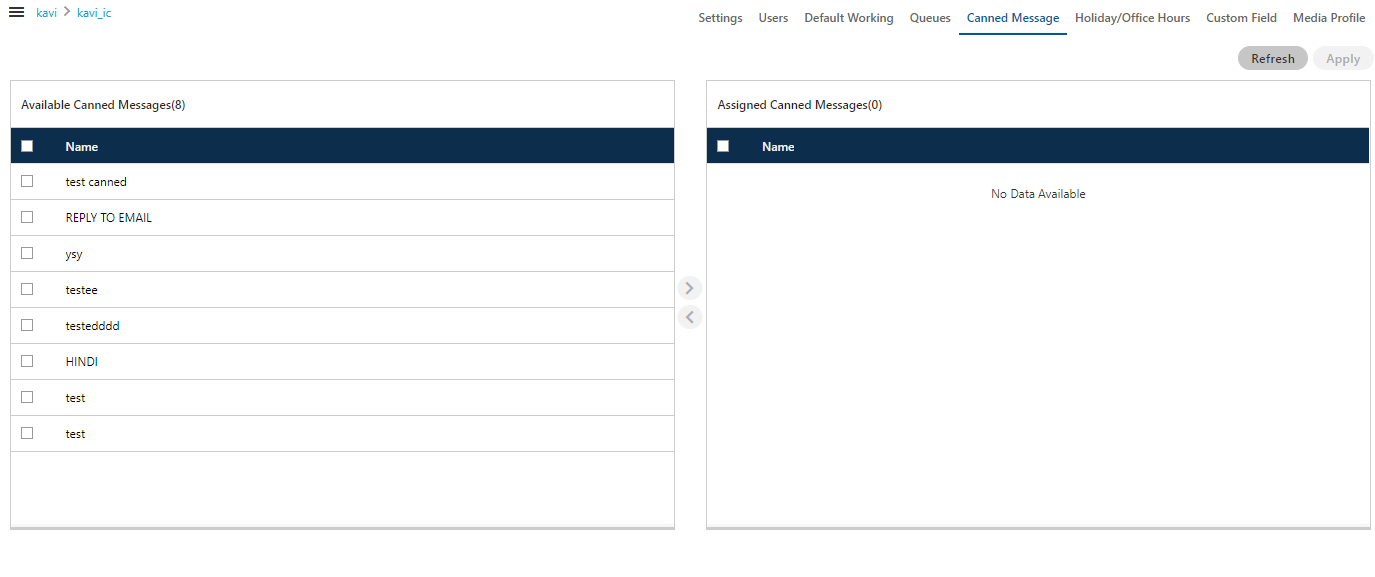
Figure: Canned Messages
Perform the following steps to assign canned messages to this campaign.
- Select the canned messages in "Available Canned Messages" section
- Click
 icon to proceed to assign the selected canned messages.
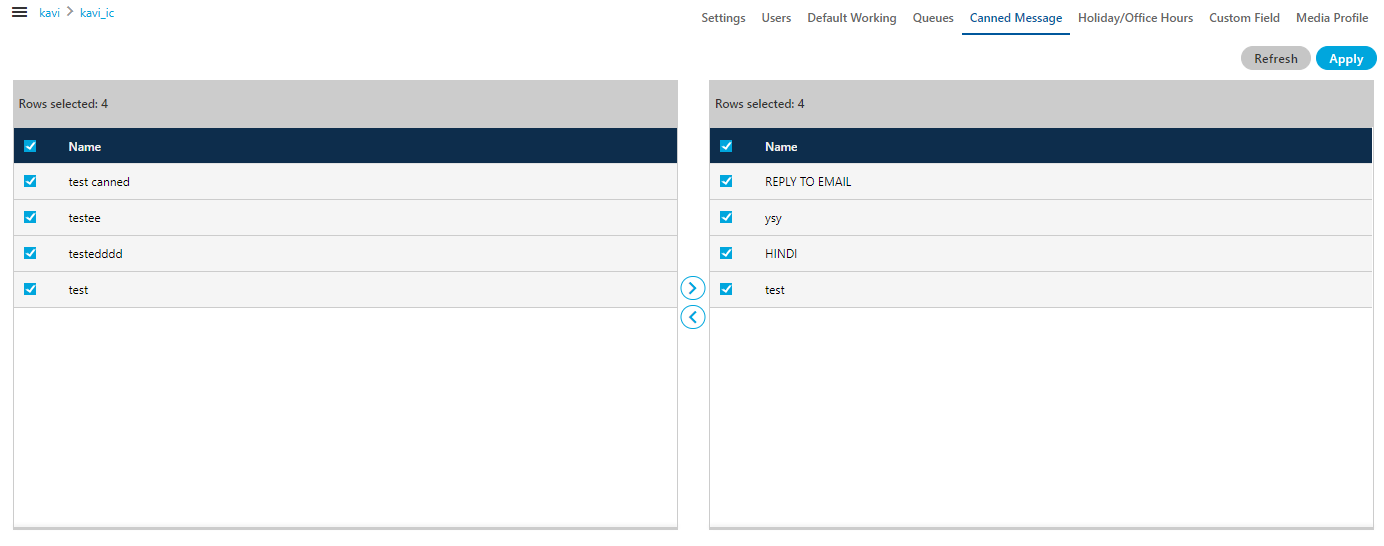
Figure: Assign or Unassign Canned Messages
- Click "Apply" to assign the canned messages to this campaign.
Rather, you can click "Refresh" to not assign the canned messages.
To unassign a canned message, select it in "Assigned Canned Messages" section, click ![]() icon, and click "Apply" to unassign the selected canned message from the campaign.
icon, and click "Apply" to unassign the selected canned message from the campaign.
Media Profile
This Tab lets you assign and unassign the media profiles to this campaign, which the administrator has created the Media Profiles at the System Level and the same will be shown here. Refer to "Media Profiles" in System Configuration to know the steps to create the media profiles.
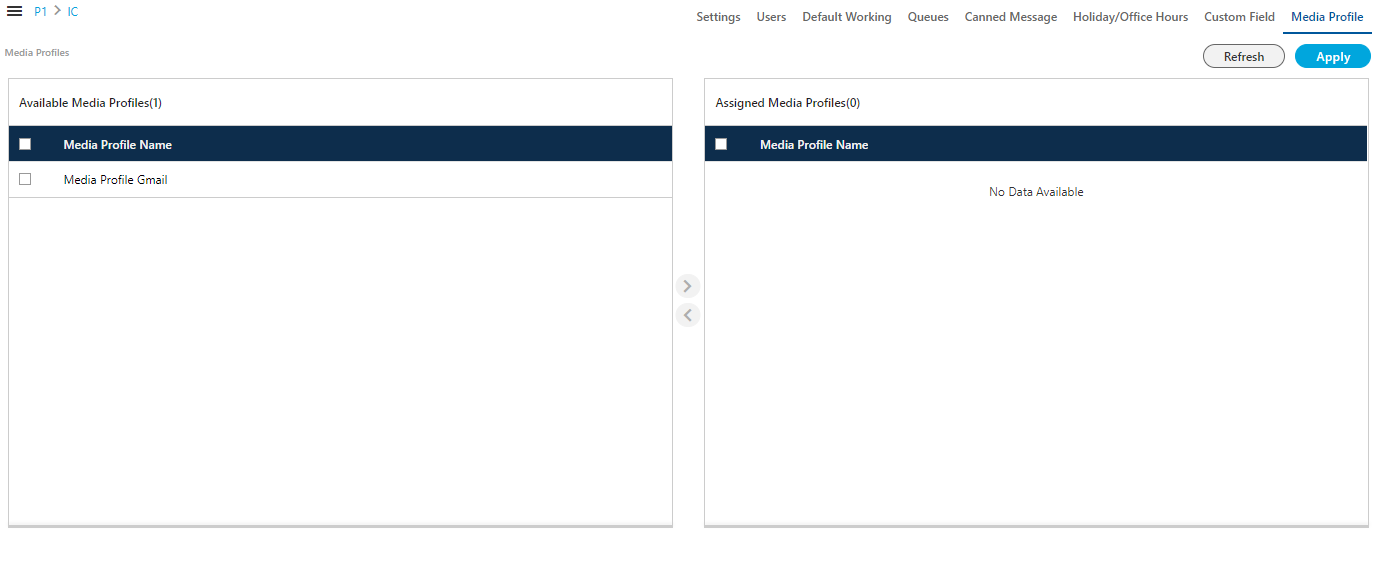
Figure: Media Profile
Perform the following steps to assign media profiles to this campaign.
- Select the canned messages in "Available Media Profiles" section
- Click
 icon to proceed to assign the selected media profiles.
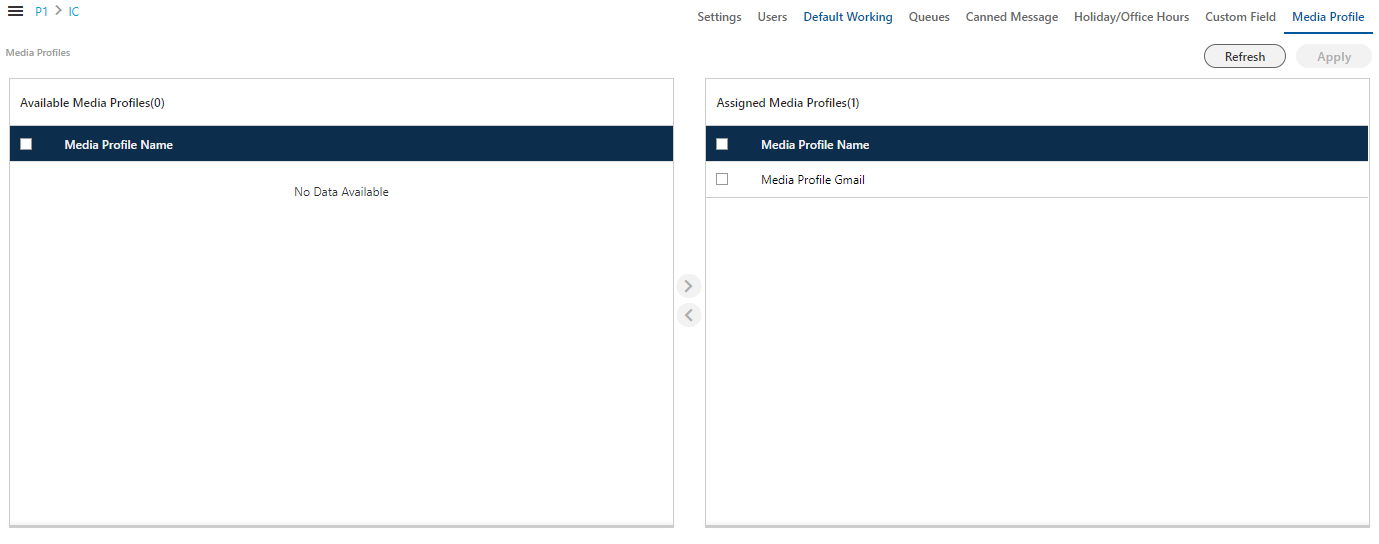
Figure: Assign or Unassign Media Profiles
- Click "Apply" to assign the Media Profiles to this campaign.
Rather, you can click "Refresh" to not assign the media profiles.
To unassign a media profile, select it in "Assigned Media Profiles" section, click ![]() icon, and click "Apply" to unassign the selected media profile from the campaign.
icon, and click "Apply" to unassign the selected media profile from the campaign.