(Licensable) Google SSO Configuration with MFA
Single Sign-On helps businesses to deliver a secure and compliant working environment. Ameyo has the support of the Single Sign-On for its Application Server with Microsoft, Google, and LDAP-based services. Ameyo supports Single Sign-On based on OAuth2 for Management Framework Architecture with Google.
Perform the following steps.
Login to the Google Developer Account with your Google ID. It shows the following page.

Figure: Google Developer Account
Click "Select a Project" option. A modal is opened.
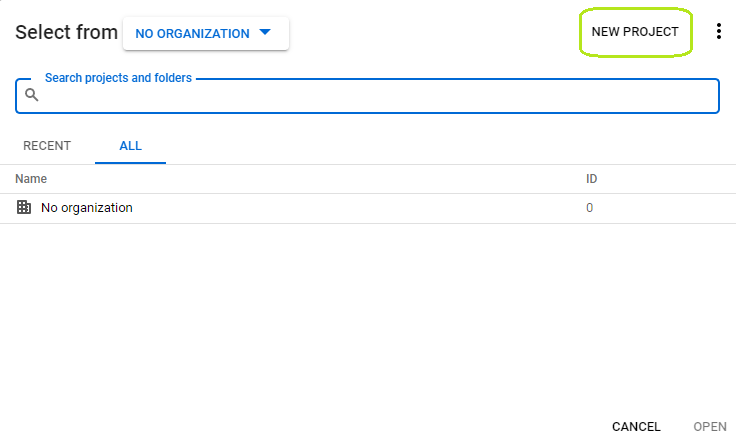
Figure: Project Selection Modal
Select the project (if already existed) or click "New Project" option (displayed with a green box in the above screenshot). The following modal is displayed.
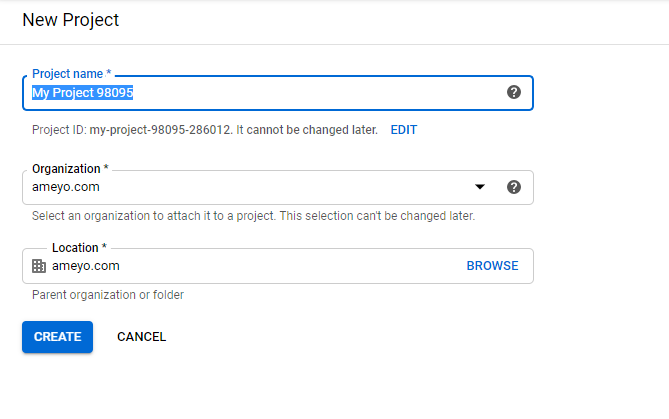
Figure: Project Creation Modal
Provide the following information in the opened modal.
Project Name: Enter the name of the project in the project name data field.
Organization: Select the name of the organization from the drop-down list.
Location: Select the location where the project will be saved.
:
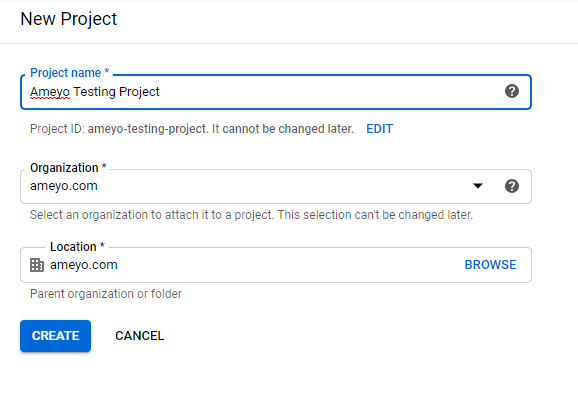
Figure: Sample Project
Click "Create" button. After creating the project, the page redirects to the previous page.
Now, click "Enable APIs and Services" button present at the top of the page to enable the APIs.
Search for the "Google+" API and enable it.

Figure: Enable Google+ API
After enabling the API, the following page is displayed.
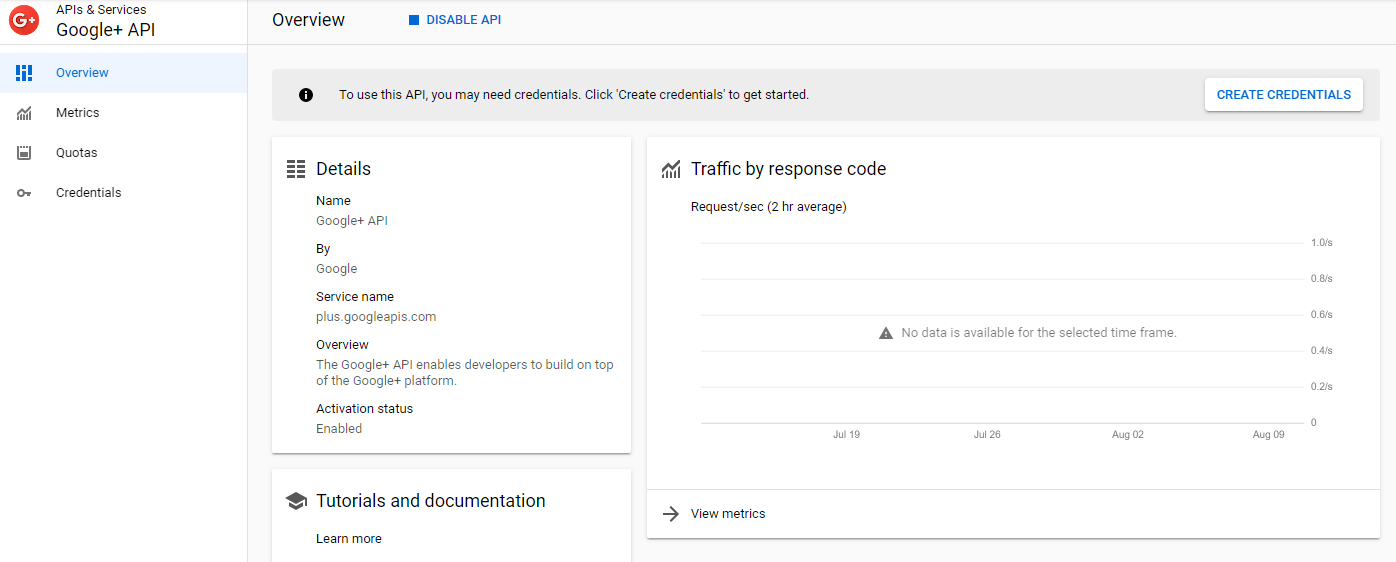
Figure: Overview Page of Google+ API
Now, go to the credentials tab present at the left sidebar. The following page is displayed.

Figure: Credentials Tab of Google+ API
Click "Configure Consent Screen" button to configure the Email address. The following page is displayed.
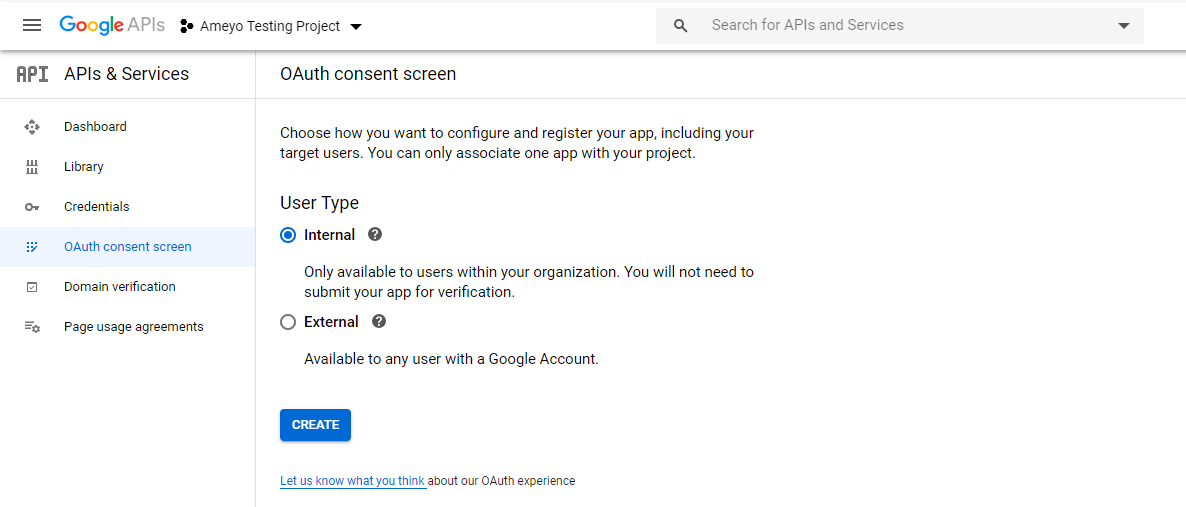
Figure: Consent Screen Configuration
Select the type of the user, which is allowed to use this app. The following two options are present here.
Internal: Select it to allow users within the organization only.
External: Select it to allow all the users with a Google Account.
Click "Create" button. The following OAuth form is displayed.
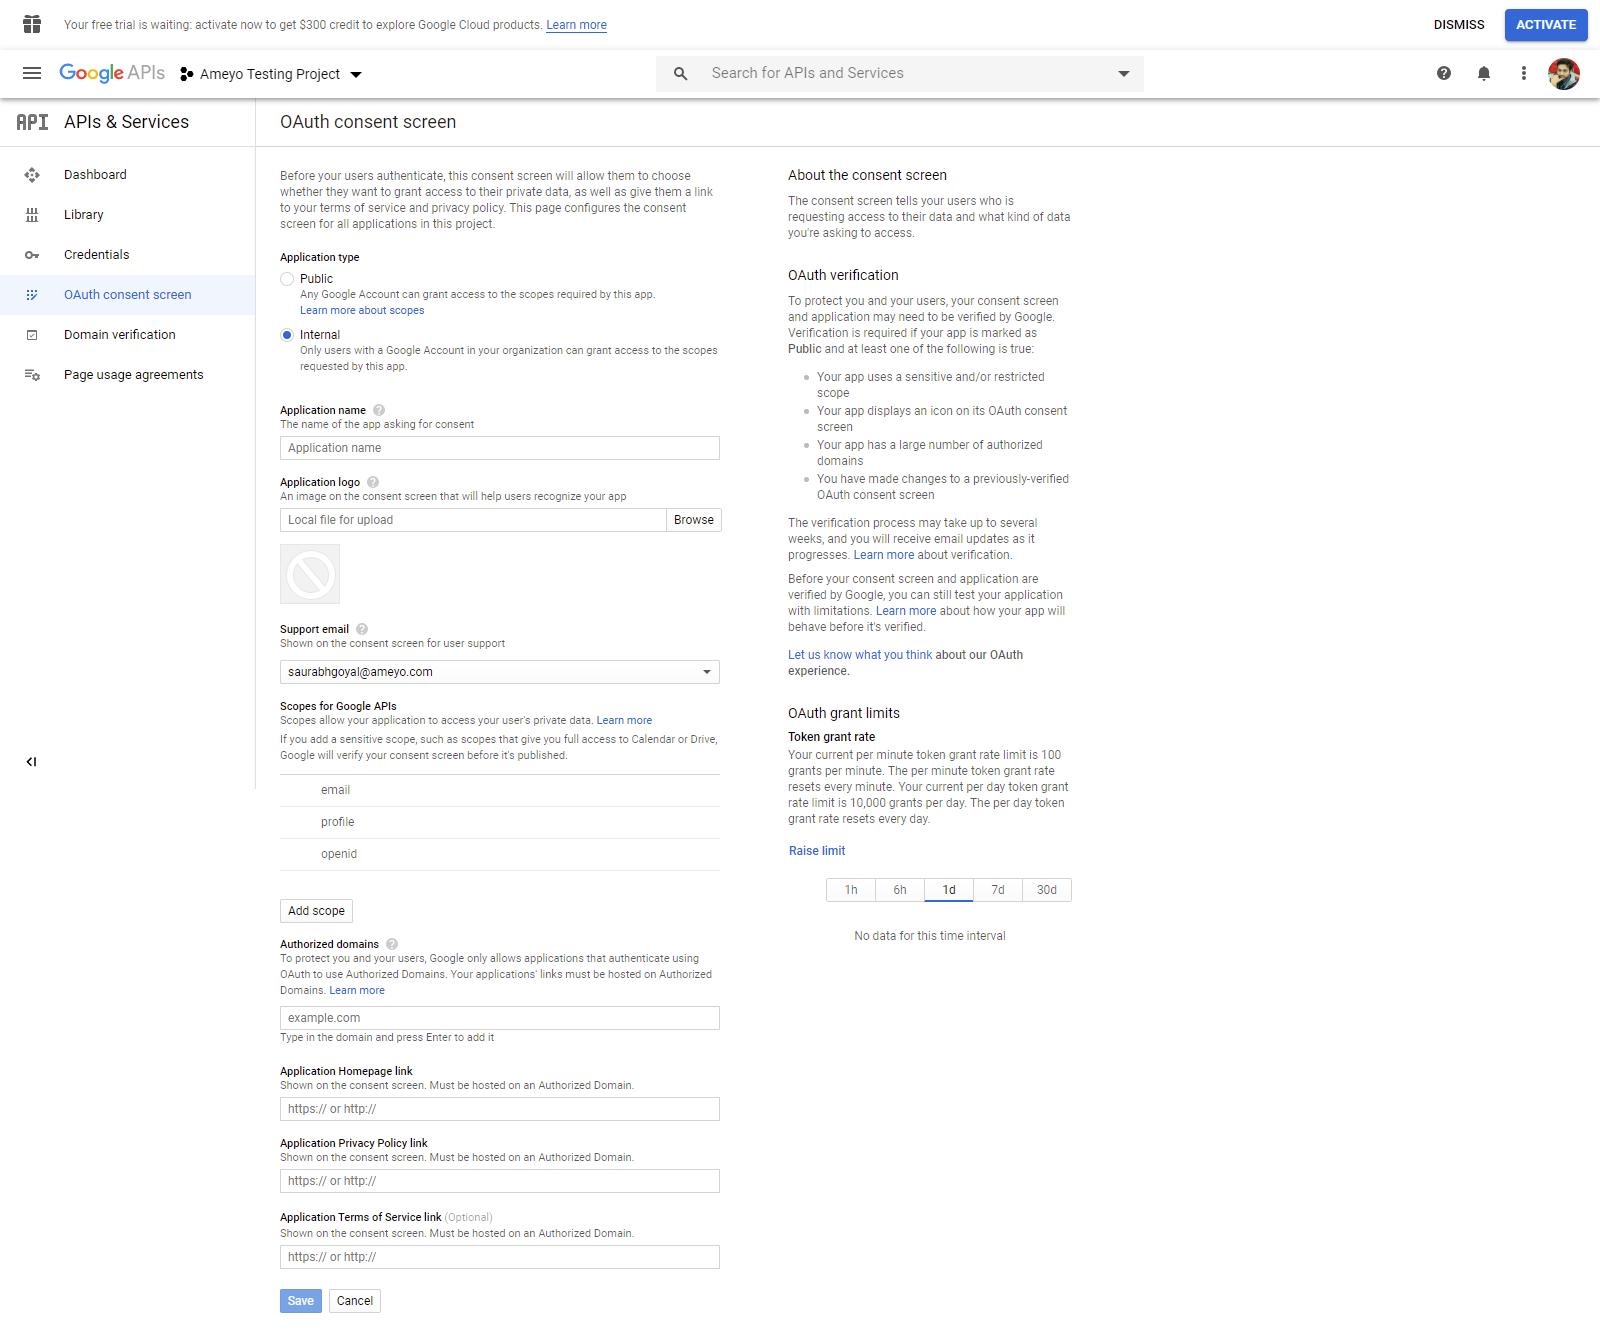
Figure: Consent Form after App creation
Fill the consent form that has been displayed, and click "Save" button.
Now, click "Create Credentials" button in the "Credentials" tab to create the credentials. Click "Create OAuth Client ID".
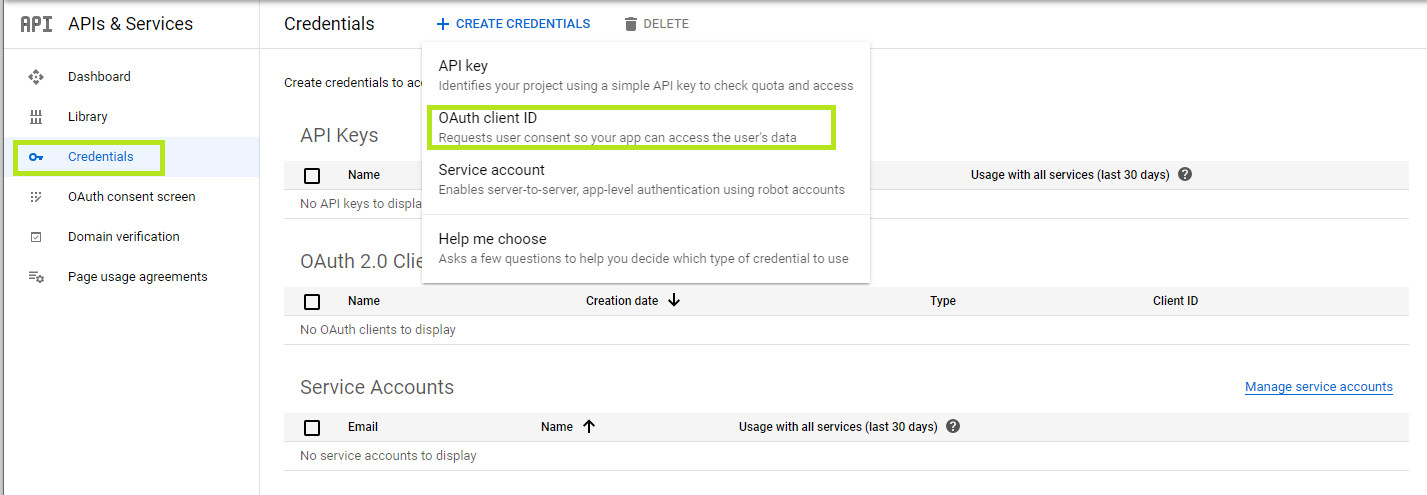
Figure: Creating Credentials
From the displayed page, select "Web Application" from the drop-down list of Application type.
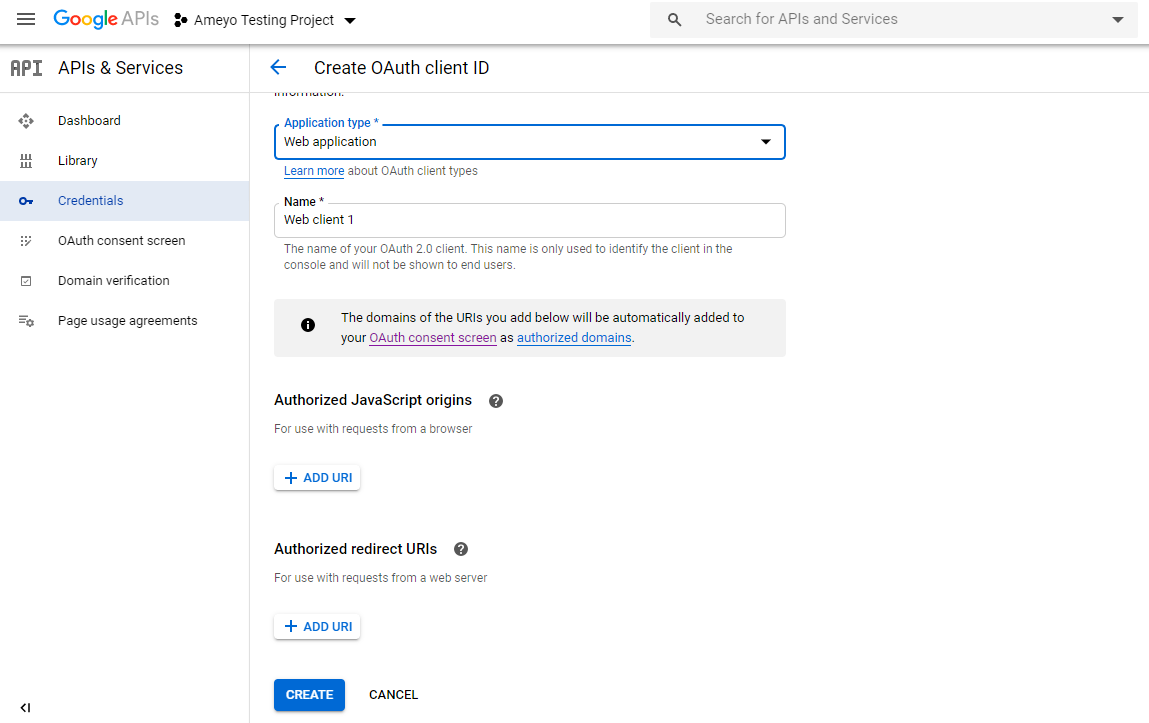
Figure: Creating OAuth Client ID
Enter the following URI in the Authorized JavaScript Origins.
https://ameyo.com:<PORT_Number_of_Application>
Enter the Authorized Redirect URI in the following format:
<Protocol>://<Domain_Name>:<PORT_Number>/ameyowebaccess/_callback?consumerId=<Consumer_ID>
Click "Create" button. A modal is displayed.
The displayed modal consists of the OAuth Client Id and Client Secret Keys generated after validation of all the above steps. Copy these keys and keep the pen down, as they have to be used later.
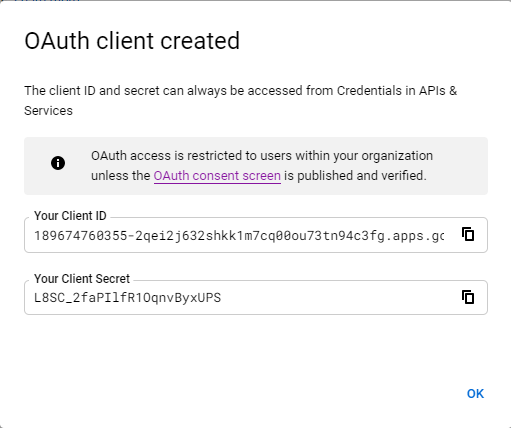
Figure: Generated Client Key and Client Secret Keys