Ticket Status in Interaction Campaign
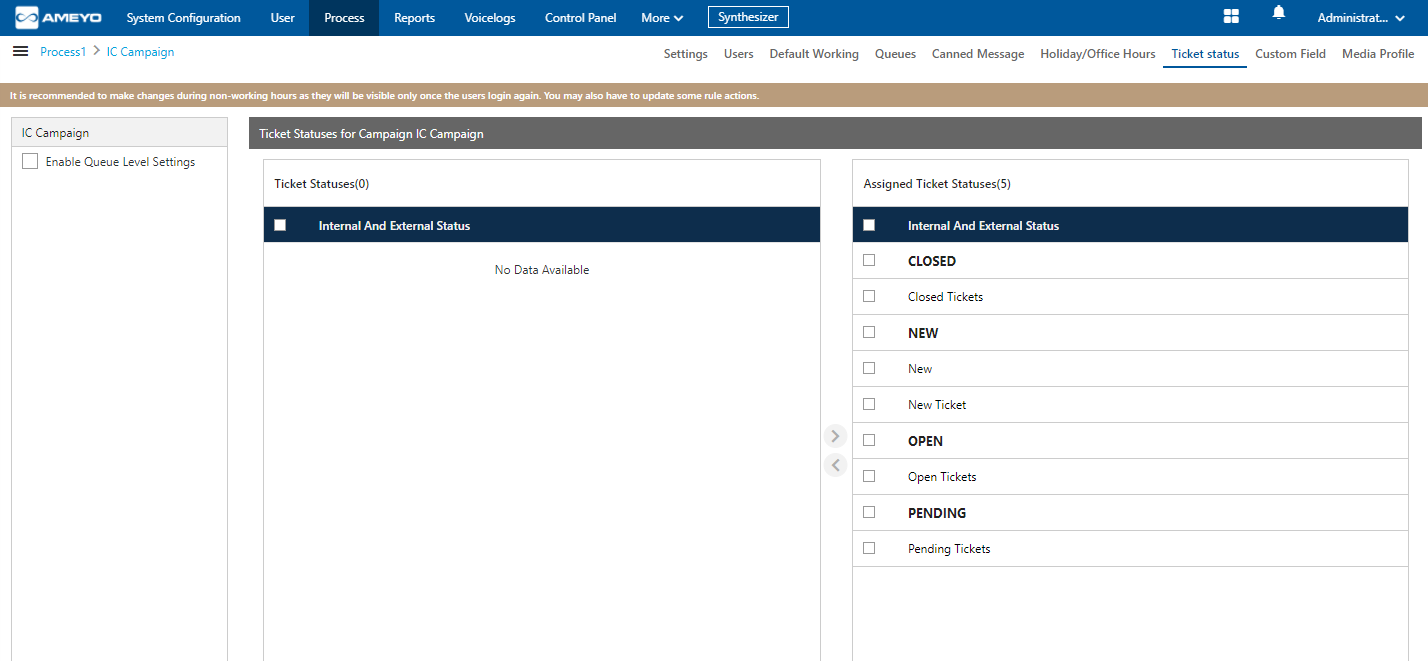
This Tab lets you assign and unassign the external ticket status to this campaign. All created Ticket Status in the System Configuration tab and the same will be shown here. Refer to "Ticket Status" at System Configuration to know the steps to create the external ticket status.

Figure: Ticket Status
Campaign Level Ticket Status
Perform the following steps to assign ticket status to the campaign.
-
Create the Queue in the Interaction Campaign first. Know more...
-
Switch the tab to Ticket Status of IC Campaign.
-
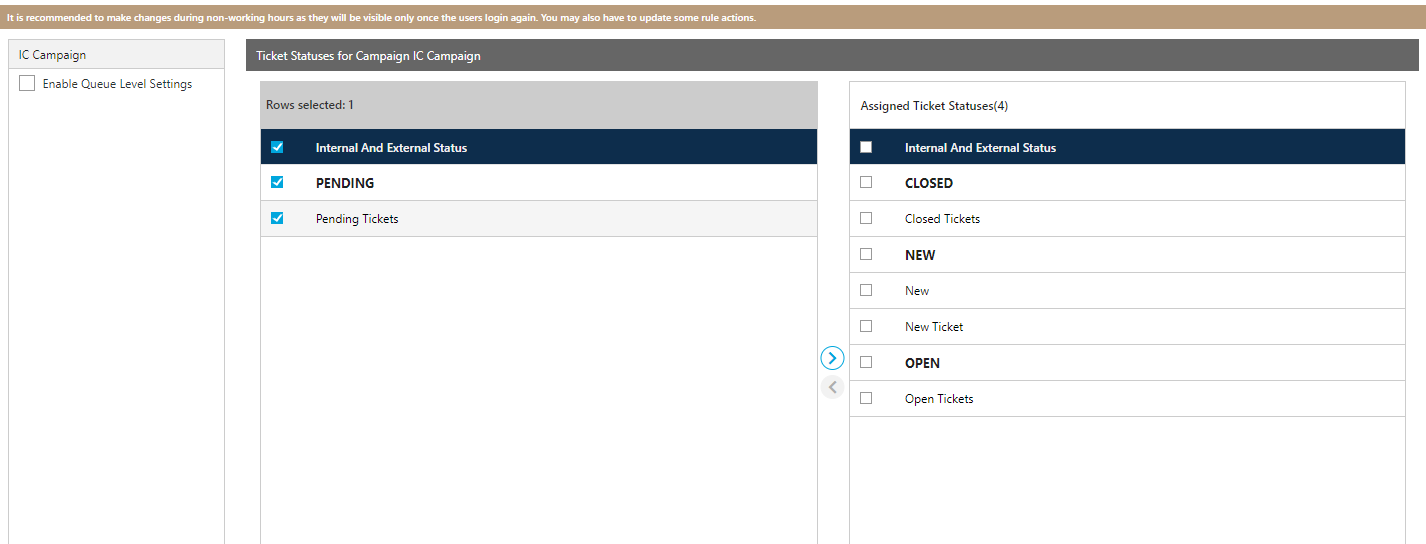
All Ticket Statuses created at the system level are shown in the "Available Ticket Statuses Section.
-
Select the Ticket Status which you want to assign in the campaign.
-
Click
 icon to assign the selected ticket status.
Figure: Assign or Unassign Ticket Status in campaign
-
Click "Apply" to assign the ticket status to this campaign.
Rather, you can click "Refresh" to not assign the ticket statues.
To unassign a ticket status, select it in "Assigned ticket statuses" section, click ![]() icon, and click "Apply" to unassign the selected ticket status from the campaign.
icon, and click "Apply" to unassign the selected ticket status from the campaign.
Queue Level Ticket Status
Perform the following steps to assign the ticket status to the particular queue.
-
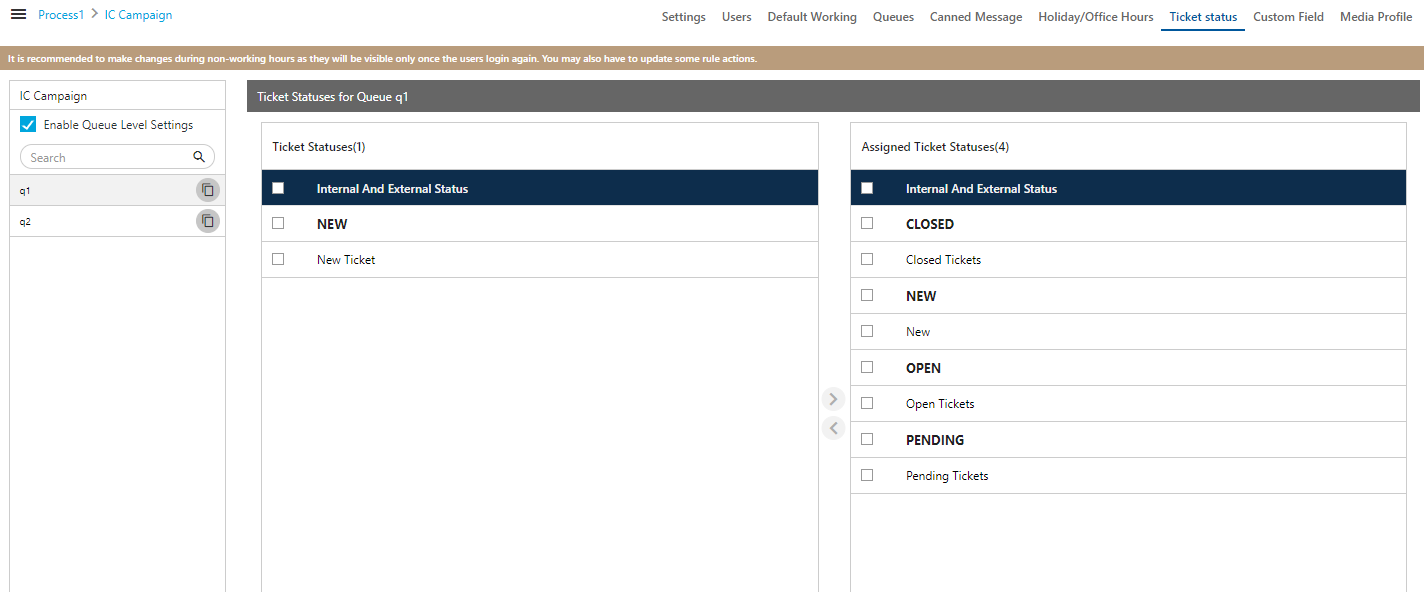
Enable the "Queue Level Settings" check-box present in the left bar of the page.
-
After enabling the settings, all the queues which are created in the Campaign start showing in the list.
-
Click on the queue on which you want to assign the ticket status. The same page to assign the ticket status comes up. By default, all ticket statues are assigned to that queue, or it follows the assignment done at the campaign level.
-
All the Ticket Status created at the process level are shown in the "Available Ticket Statuses Section.
-
Select the Ticket Status which you want to assign in the queue.
-
Click
 icon to assign the selected ticket status.
Figure: Assign or Unassign Ticket Status on queue
Perform the same steps to assign the ticket status to other queues.
If any ticket status is assinged or unassigned to a campaign or queue, then the agents staffed to that queue or campaign are not required to logout and relogin to see the impact.
Copy settings to other Queues
If all the ticket status assigned to one queue is same for the other queue, then you can copy all the settings to other queue with one-click. It allows the administrator to copy all the settings to one to another.
Perform the following steps.
-
Click
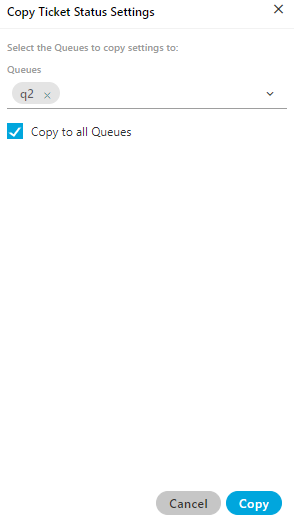
 icon present adjacent to the queue name. A new pop-up arises.
Figure: Copy settings
-
Select the queue in which you want to change the settings.
-
Enable the "Copy to all Queues" check-box if you want to copy the settings to all the existing queues of the campaign.
-
Click "Copy" button to proceed with the coping action. A notification will be shown on the screen notifying about the success of the copy process.

Figure: Notification shown